• Beer Braised Collards

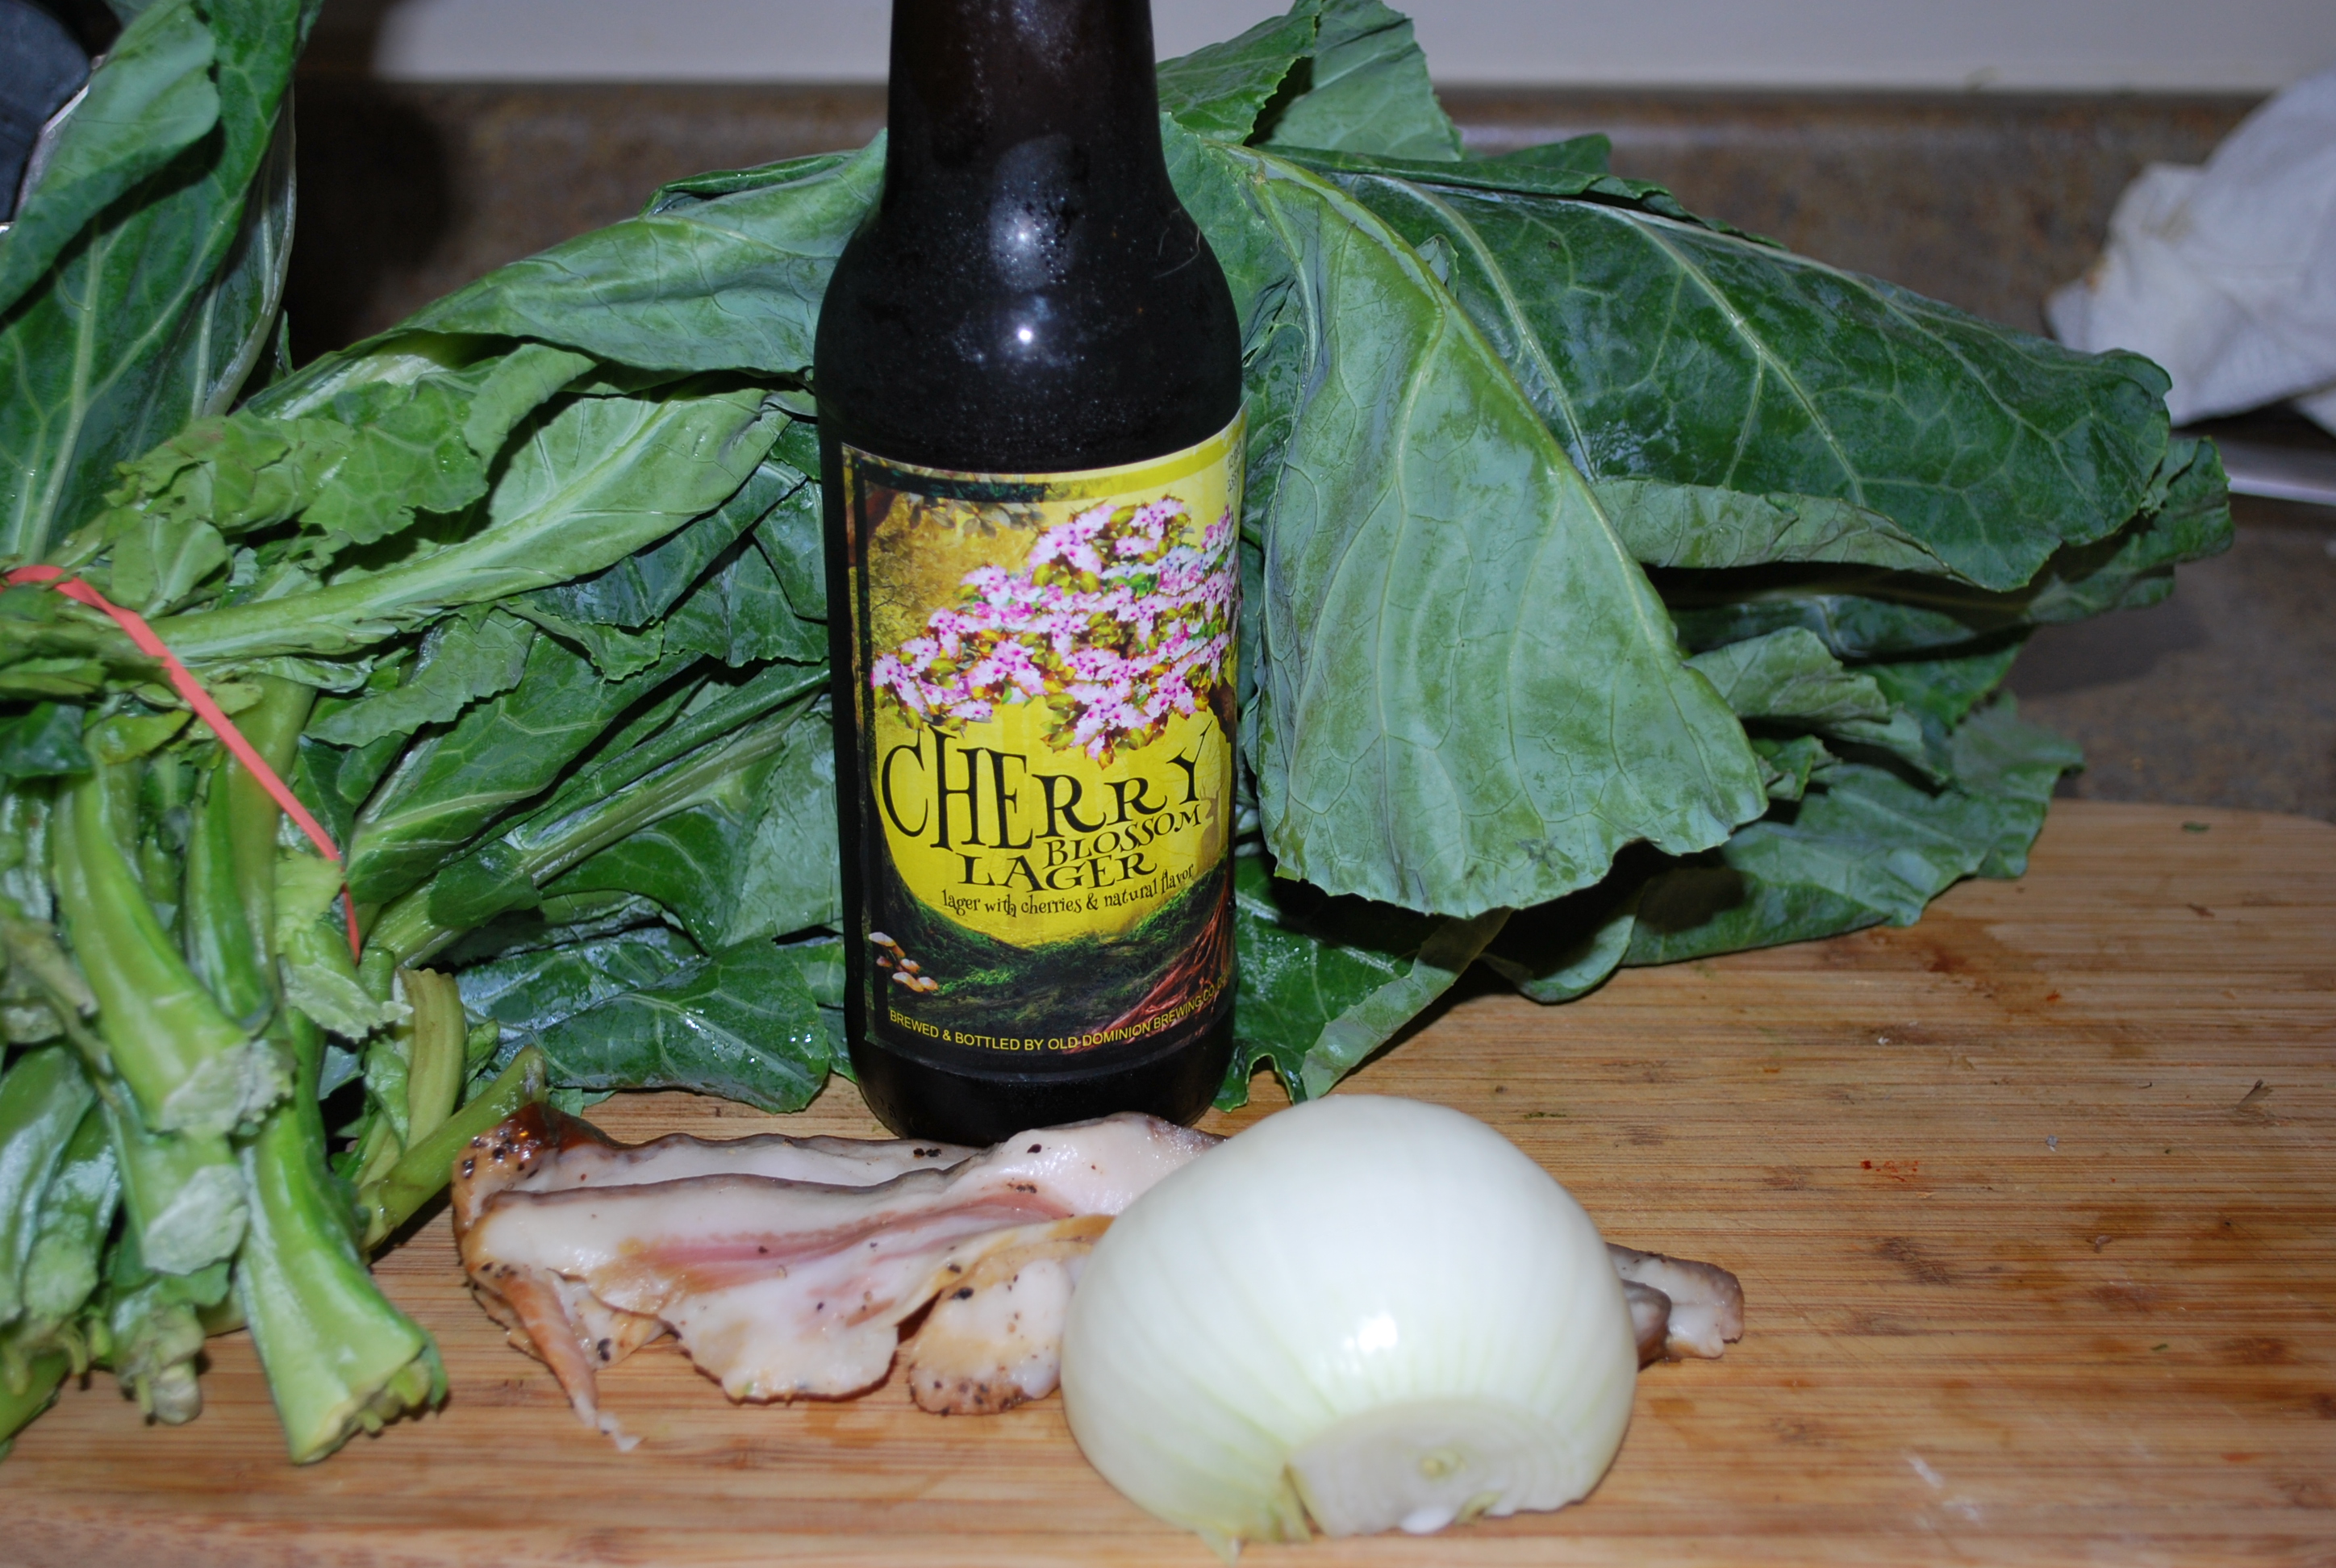
    If there’s any vegetable that says comfort food, it’s the Collard Green.  Anywhere below the Mason Dixon line, this inexpensive and nutrient packed green is all over the place.  During my time in Atlanta, I was hard pressed to find a restaurant that didn’t serve them, so when took over a busy hotel restaurant.  I had to figure something out with them that make them different, but just similar enough to not scare off the natives.  The recipe was so simple, pork fat onions, greens and chicken stock.  How do you mess with it and make it different?  The answer was in my glass at the bar. I’d braise them beer,,but shoot, I just don’t want to use any pork product.  I want to use something out here and unheard of.  The next day in the butcher shop, I was looking through some of the cured meats we had and there it was….Gunaciale.  That Beautiful Italian cured pig cheek.  Congratulations Altanta, you now have my secret you’ve been asking for.  This recipe makes about four portions.   2 bunches Collard Greens, chopped (yes, pick the leaves from the ribs, and wash them) 1 onion, julienne 4 oz. Guanciale 2 bottles NICE Lager Beer (sorry , but the cheap stuff ain’t cuttin’ it here)

    DSC_0468
    Summer Green Awesomeness
    1. Start up a nice heavy pot on low heat.  Add the Gunaciale and let it cooke slowly to render the fat out.  You dont’ want it to crisp up, but you want to cook as much fat out as possible. It shoudl take abotu 10-15 minutes
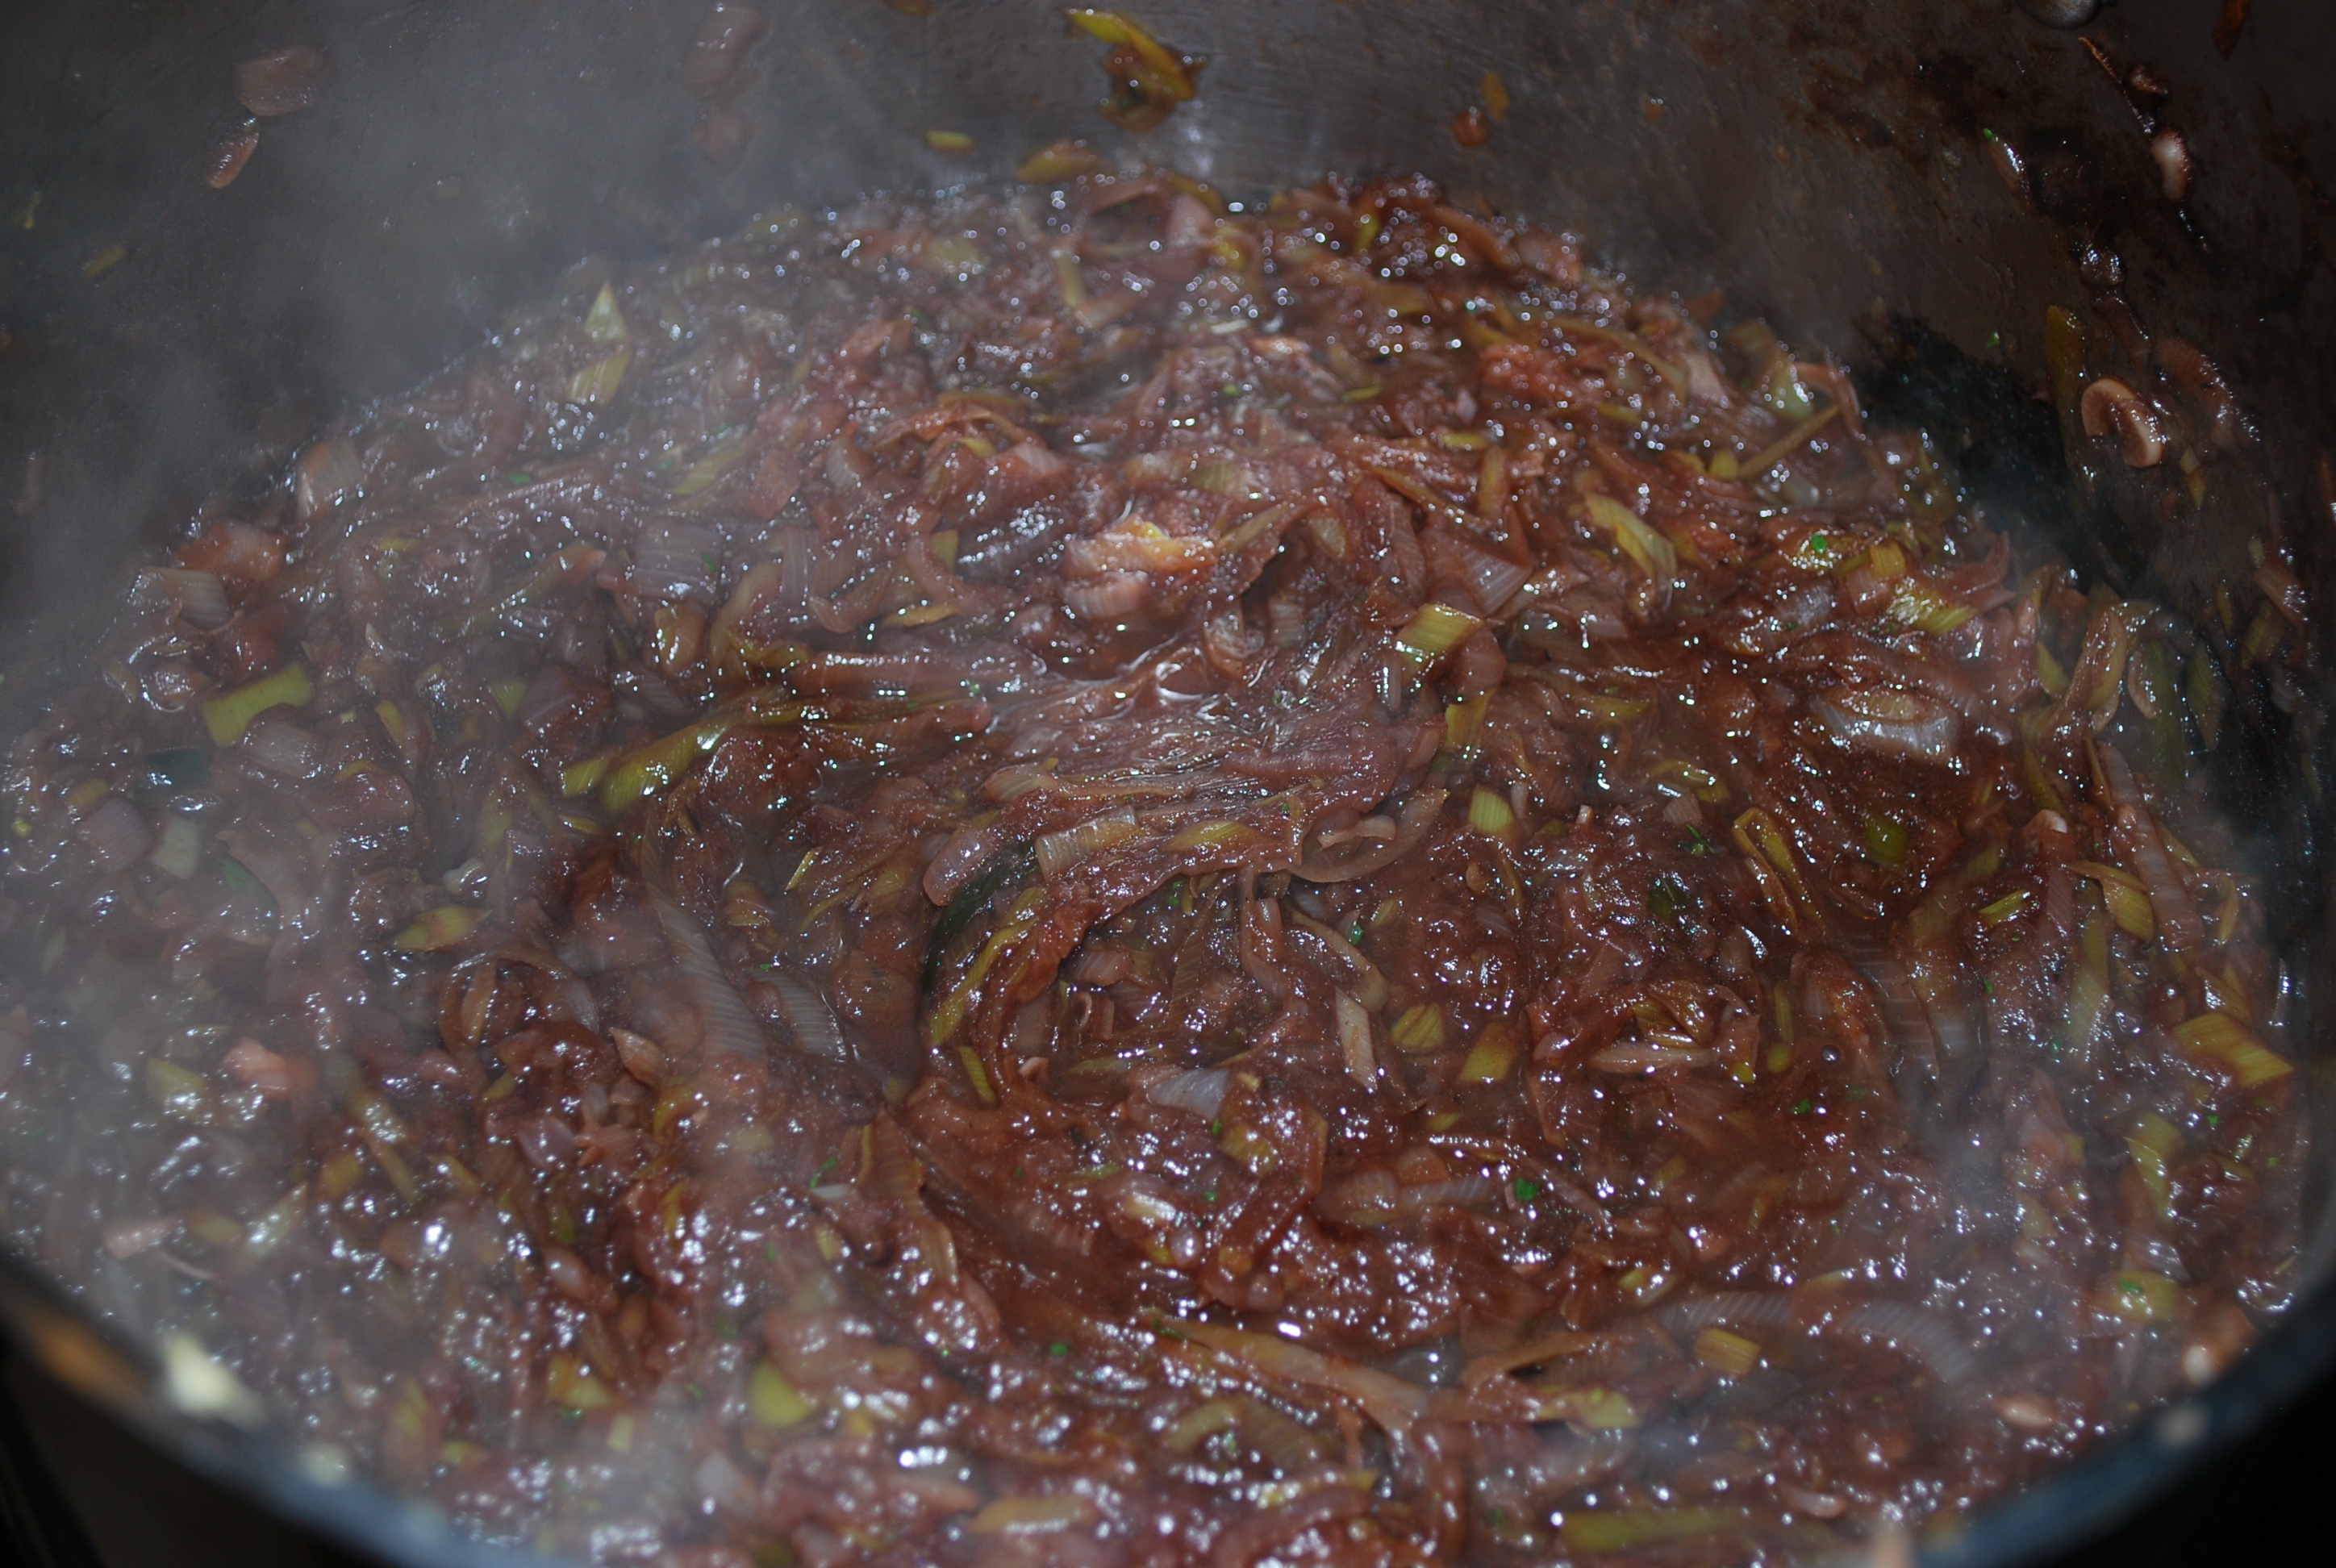
    2. Add your onions and cook them until there is just a bit of color, like this: DSC_0467
    3. Now add your chopped greens.  Sweat these out and let the wilt for just couple of minutes.  Then add your beer
    4. Cover your greens and let them simmer for about 45 minutes to an hour, or until they’re tender.
    DSC_0465
    All the players

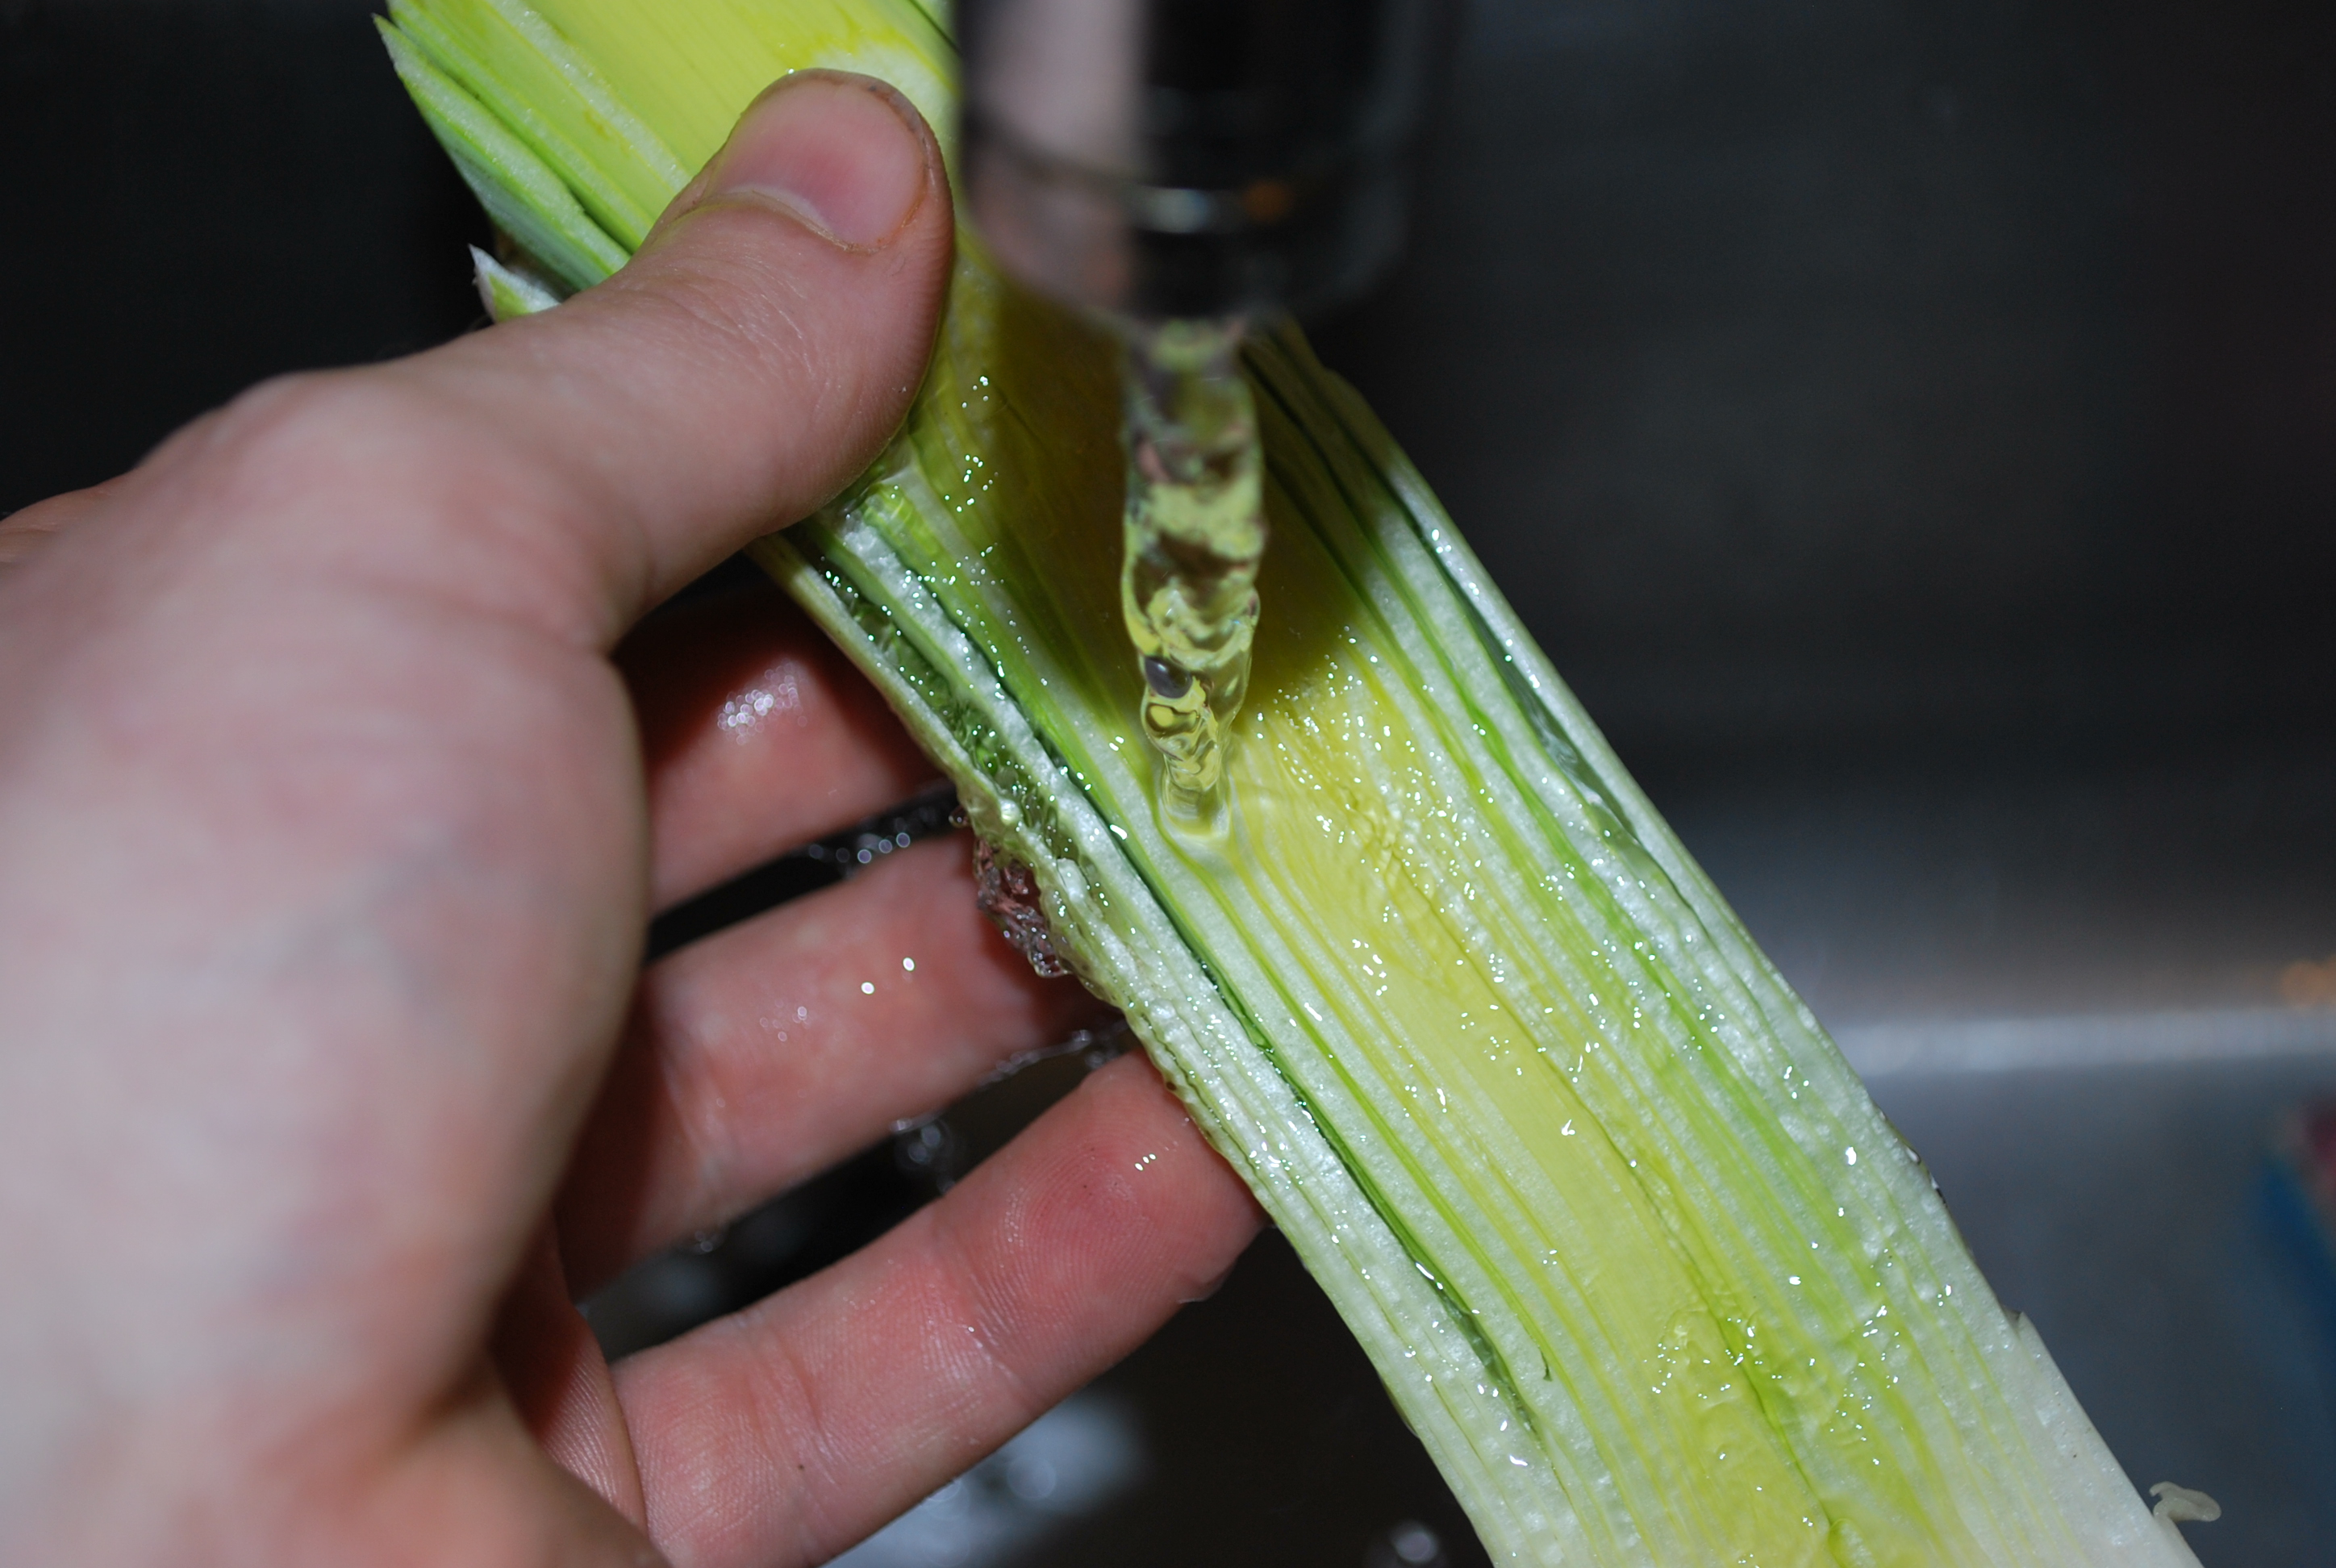
    I can’t stress enough how important it is to wash your greens before you get started, even if they came in a bag.  There’s a lot of dirt and grit that can make the eating experience unpleasant, and who wants unpleasant greens?  that begin said, if you can’t find Gunciale where you are, you can always use pork jowl, or plain old salt pork.  Nothing wrong with that.  Feel free to play with the beers you use too.  For example, if you want something with a nuttier flavor that complements the bitterness for the greens,  heavy IPA will do you just fine.  If you want something heartier, a good strong strout does the job.  let me know what you used in the comments below.   Happy Eating   -The Doctor


  • Catfish Tacos

    Well, any kind of fish really, but where I live, the catfish is plentiful, delicious and incredibly popular.  This recipe is a fan favorite at cookouts, and it’s so simple, and very healthy.  (Don’t worry you can fry the fish too after it’s been in the marinade, I’m not backin’ out of you).  I love to use good old fashioned soft corn tortillas with these, there’s just something about the authenticity  Of course instead of plain old lettuce and tomato, I used pico de gallo  and baby greens.  Did someone say avocado?  DUH!!!!!!   Here’s what I use to make four portions:

    DSC_0469

    4 4 oz. Catfish Filets
    1 tbsp. chili powder
    1 tsbp. Cumin
    1 tbsp. cajun seasoning
    1 tsp garlic powder
    1 tbsp chopped cilantro
    Juice of 1 lime
    2 tbsp olive oil
    Salt and pepper

    DSC_0466

    1. The night before mix together all of your spices, lime juice, olive oil and cilantro.  Toss your catfish in the mix and allow it to sit overnight.

      Cutting the catfish
      Cutting the catfish
    2. When you’re ready to cook, heat up a heavy bottom skillet, or even better, a nice old school cast iron skillet.
    3. Throw just a bit of oil into the pan an let it smoke just a bit.  Lay the pieces of catfish in 1 or 2 at a time, making sure not ot overlap.  We really good color and we don’t want moisture to build up in the pan.
    4. Turn the catfish as needed, when it’s ready, put it right on a plate or right into one of your tortillas.  Top it with whatever you want.

    I gave you a couple of ideas already about what to serve with these, but rice and black beans is always a winner for a nice side.  (Be sure to use PLENTY of pork in your beans, for no reason other than it’s DELICIOUS!!!!)  I have an article on how to cook beans here in case you need it.  I also like to grill some corn and pull it off the cob, then toss is with some mixed greens as well.  You can also use you favorite taco toppings too.  Don’t worry about that stupid no cheese with fish rule here…IT’S A TACO!!!


    You got questions?  Leave ’em in the comments


    Happy Eating

    -The Doctor


  • More Basics…Pizza Dough

    There is nothing like a good homemade pizza dough.  You will never, ever catch me buying the frozen albino poop they call dough in the grocery stores.  Why?  IT’S SO EASY!!!!!!  This recipe is about as basic as you get.  And, you all better appreciate this, because I’m actually risking my life giving it to you guys too.  Why?  Because it’s the very same recipe I learned at the first pizzeria I ever worked at.  If Vin Falzo (rest his soul) ever found out about this he’d make sure I get a great discount on some cement shoes.  This makes enough for two 12 inch pizza pies.  (Of course depending on how thick or thin you like them)

    DSC_0476


    1 cup warm water (110F)
    1 (1/4 ounce) envelope active dry yeast
    1 tablespoon honey
    3 cups all-purpose flour, divided
    1 tablespoon extra virgin olive oil
    1 teaspoon salt

    1. In the same measuring cup you have your water, mix your yeast and honey.  Let this sit until you have a nice foam on top of the mixture.  This means your yeast is active.  Why not the mixing bowl first?  Simple.  It may cool down the water and prevent the yeast form activating.  (KNOWLEDGE DROP!!!!)
    2. Add the rest of your ingredients into the bowl of a mixer and let it go for about 3-4 minutes.  You want some glutens to form here.
    3. Brush the top with some Olive oil  and let the dough rise for an hour.  Are we done yet??? Nope.  we have to let this proof, twice.
    4. After an hour pull the dough out of the mixer bowl and onto a floured surface.  Cut the ball in hale  roll each half into a ball and place them into a zip lock bag.
    Fully risen dough
    Fully risen dough

    At this point if you’re not going to use it right away, freeze it.  If you are, let it site over night and proof again.  But really, how hard was that?  I don’t want to hear anyone whining about bad frozen dough again.  If you want to spice this up, feel free to add some garlic powder and some fresh herbs to the dough.  You can use this recipe for Zeppoli’s too, just fry it up like a donut and throw some powered sugar on it.  CAN’T GO WRONG!!!!  My personal favorite thing to do is cook up some bacon, grab some nice Italian meats and make a stromboli, which is like  stuffed bread.  FABULOUS!!!

    Tucking the dough
    Tucking the dough
    Rolling the dough
    Rolling the dough


    Got questions?  let me know in the comments

    Happy Eating

    -The Doctor


  • Back to the Basics…Pico de Gallo

    Let’s face it, with summer coming around, everyone needs a quick and easy pico de gallo recipe on hand.  Don’t get me wrong,  love my funky salsas, and we’ll be doing some her soon, but there’s nothing like the classic.  This recipe itself is straight from Mexico, and from none other than my favorite little old lunch lady, Maritza.  What made this so special is the beautiful mountain produce that was available in Valle de Bravo.  We used gorgeous heirloom tomatoes, onions so strong they made you cry as soon as you picked them, and limes so tart they’d keep the stray cats away.  There’s really no way to replicate it, but we can always try.  This should make about a pint:

    DSC_0464

    4 large, ripe tomatoes of any color, very small diced  (We used whatever looked good)
    1 cup vidalia onion, minced
    1-2 jalapenos diced (depends on how hot you want it)
    1 clove garlic crush
    juice of 1 lime
    1 tbsp Olive Oil
    2 tbsp chopped cilantro
    1 tbsp chopped oregano

    1.  Easiest thing in the world…Mix everything together, and let it set for 2 hours at room temp, then chill.

    Now this is so simple and basic why even post it?  This isn’t the creative “dude food” you’re used to.  This is something so basic, it truly relies on the freshness and quality of the ingredients, which some chefs just forget about.  Besides,  you can add anything you want to.  You want bacon salsa?  Why the hell not? Add bacon.  You want to use pablano peppers?  SURE!!!!  Use whatever the heck you want. just make sure it’s fresh.

    Happy Eating

    -The Doctor


  • Baked fish with Mushrooms and Leeks

    “Doc, are you on a leek and corn kick?”  Yes…yes I am.  Why?  Well, guess what I got from my co-op this week…leeks and corn (well ramps, but we’ll use leeks today).  This dish is based on the traditional French technique “En Pappillote” or “in paper”.  The protein, vegetables and starch are all cooked together in parchment paper, leaving the food perfectly moist and the flavors beautifully melded.  Now not everyone has parchment paper lying around in the kitchen (although you should), so I decided to make this a little more home kitchen friendly.  This makes enough for two.

    DSC_0474

    1 1/2 lbs leeks

    ¼ lb sliced mushrooms

    ¼ c frozen corn kernels                                                  .

    1/2 cup white wine

    ¼ c. heavy cream

    1 tbsp. Herbs de Provence  (dry..GASP..yes dry, they have their place)

    salt and pepper

    1 tablespoon Dijon mustard

    2 4 oz. fish filets (I used salmon, you can use whatever you want)

    DSC_0465
    All the major players
    1. You know the drill, turn that oven to 400 degrees.  While it’s heating up, lets do some knife work.
    2. Trim about 1/2 –inch from the root ends of the leeks, then trim off and discard all of the tough green leaves.
    3. Cut the rest in half lengthwise and chop; then wash well in a colander, being sure to rinse between all of the layers, just like so.
    4. Mix the vegetables thoroughly with the wine cream mustard salt pepper and Herbs de Provence.
    5. Top the vegetables with the fish and sprinkle with salt and pepper.  Top each piece of fish with a bit of the butter. Cover the pan and pop that bad boy in the oven for 25-35 minutes, or until the fish is a nice medium (or well done if you like saw dust).  A thin-bladed knife should meet little or no resistance when inserted into the thickest part of the fish.
    6. Now, uncover and serve with the leeks and pan juices spooned over the fish.  You can serve this right in the cooking vessel, or make it all fancy and go into bowls.  Whatever you want
    DSC_0471
    Fresh from the oven

     Like I said earlier, you can do this with any fish you like.  Fish that are higher in fat work best though.  I would recommend trout, cod, and seabass.  Just remember to adjust the cooking time based on the size of the fish.

    Happy Eating

    -The Doctor


  • Three Onion Soup

    So, you’re at the store, and there’s a giant scallion staring you in the face.  It looks like it could be something you want to eat, but you don’t  know what to do with it.  Well, this isn’t a giant scallion, it’s a leek…and you can’t treat it like scallion, really, but you can make some awesome stuff with it.  This recipe is derived from a recipe from the fabled Tavern Room at the Greenbrier Hotel in White Sulphur Springs, WV.  While I can’t post the actual recipe, because I have been sworn to secrecy,  I can tell you that “The Cream of Five Onion Soup” was on that menu from the day it opened until the day it closed, and is still on some of the menus at the hotel.  While this recipe is more like a French Onion than a cream soup, it’s still very rich and is a great alternative to a heavy cream soup (which mind you, I love, we all do…admit it)  I will give you fair warning,this is NOT a fast recipe, and it takes some attention, but it is well work the effort.  This recipe will give you about a gallon.

    DSC_0477
    Onions soup and fried onions


    • 1 1/2 lbs. Vidalia Onions, sliced thin
    • 1 1/2 lbs. Red Onions, sliced thin
    • 1 Bunch Leeks, sliced thin, and washed
    • 4 cloves Garlic, sliced thin
    • 3 cups red wine
    • 3 quarts beef or chicken stock
    • 2 tbsp chopped Lemon Thyme (Standard thyme is ok too if you can’t get it)
    • 1 tbsp butter
    DSC_0466
    Cutting the leeks
    DSC_0465
    WASH THE LEEKS.. Trust me, they can be VERY gritty
    1. Start my setting up a heavy pot on a medium high flame.  Get a couple tablespoons of olive Oil hot, them add your butter.  Just let it melt a bit then add some of the onions.  You do want the butter sizzling, and oil smoking just a bit before you add them.  
    2. Stir the onions a good bit initially  until you hear the sizzle die down.  You want these to caramelize, but just like meat, if you add them all at once, you’ll just get a watery mess.  Cook these for about 15 minutes, then add some more onions.   Repeat this until all of the onions and leeks are caramelized and cooked way down.  This is the part that’s going to take the most time.
    3. Now add your wine and thyme.  Let the wine cook down to a syrup.  Stir the pot every minute or so.
    4. Now add your stock and let it reduce by about 1/4 on a low simmer.
    DSC_0475
    Cooking the onions and wine

    I like to serve this with grilled bread and some brie.  You can use anything out of the ordinary though, just because it’s out of the ordinary.  If you like, you can also puree this soup and add some cream to add some serious richness.


    Happy Eating


    -The Doctor


  • Juicy Lucy Meat Cake

    There are times when alcohol induces inspiration.  This recipe is definitely from one of those times, although it came together to a better recipe after I sobered up.  Most people know the Juicy Lucy as a burger stuffed with cheese, so one night I in college (ok, let’s be real here, it was 3 AM) a few of us though it might be a good idea to try and make a big one, with 3 layers of cheese.  Well, this ended up being a bit overly ambitious, but I knew i was on to something.  About $50 and two attempts later, I had this gem of a recipe that ended up being a party favorite.  This recipe will serve 8-10 normal humans, or 1 drunk college student.

    DSC_0025
    If meatloaf, potatoes and ketchup doesn’t look good to you, you need learn…
    • 2 lbs. ground beef
    • 1 lb. loose Italian sausage
    • 12 slices Deli Style american cheese
    • 1/2 c. diced bread, toasted
    • 1/3 c. milk
    • 3 eggs
    • 1/2 c spicy Giardiniere, chopped (Please make sure it’s in oil)
    • 1/2 small white onion, minced
    1.   Preheat you oven to 375 degrees.  While your ovens heating,  combine your milke eggs and breadcrumbs and let the soak for about 20 minutes.
    2.  Take you giardinere and onions, and get them in a saute pan over medium heat.   Make sure to get all of the oil form the giradinere in the pan.  You want to sweat the onions and get them to permeate the oil.  You really only need about five minutes.  just make sure you keep everythign moving so nothing burns.  Let these cool for a minute and combine them with the bread mixture.
    3. In a large mixing bowl, combine the meats and and the breadcrumb mixture.  Season the mixture and taste.  (I’m not crazy, don’t taste it raw, just but a little bit in a pan, cook it, and make sure it tastes good.)
    4. Take a small 2 inch cake pan (I used 8 inches x 8 inches) and fill it a little under half way.  Layer your cheese over the  meat  and be sure leave about 1/2 inch around the edges to seal the meat cake.

      DSC_0020
      Fist layer of cheese awesome
    5. Add the rest of the meat over top and press down around the outside to create a seal  around the cheese.

      DSC_0021
      Second layer of meat awesome
    6. Place in the oven for about 45-55 minutes.  i like to make sure the inside hits 145, then let it come up to 155 after I take it out.  
    7. When it comes out, let it rest 10-15 minutes, then cut.
    DSC_0026
    #Drool


  • Roasted Corn and Garlic Soup with Basil

    One of the major crops that’s grown in my area is corn.  (No I’m not in the Mid-West, but I’ll give you a hint, crabs are THE STAPLE where I am).  Not just and old yellow corn either,  but white Silver Queen corn.  When you go to a traditional crab boil, this is what’s cooking next to the potatoes, sausage, and all of the other goodness in the pot.  The downside is that the only thing most people know how to do with this beautiful corn is cook it on the cob. Is that all there is??? NAY I SAY, I SAY NAY!!!!  This corn is very starchy and milky and makes an excellent soup.    This recipe is one of my own, there’ no huge story behind it. I created it for a friend of the blog who is lucky enough to get this my the bushel almost every week from her co-op.   It’s not a heavy chowder, but still very still very rich and satisfying.  This will recipe will make 3 quarts.

    DSC_0472
    Corn AWESOME!!!!!
    • 4 oz ham (any kind you like) small diced
    • 2 heads garlic, with just the very top cut off
    • 5 ears silver queen corn
    • 1 c. white wine
    • 1.5 qt chicken stock
    • 1/2 small onion, small diced
    • 4 ribs celery, small diced
    • 2 small red bliss or yukon gold potatoes, small diced
    • 3 tbsp , chiffonade (or chopped, doesn’t have to be fancy)
    • 1/4 c. sour cream
    1. Start by turning you oven up to about 475.  While you’re waiting for your oven to heat up, brush your corn and garlic with oil.  When your oven is hot  enough, place them in a foil lined pan and roast for about 15-20 minutes.  The corn and garlic should look like this: DSC_0468
    2. While the corn and garlic are roasting, grab a heavy pot and  set it to medium heat with some oil.  (olive oil, vegetable oil, whatever)  Start sweating you onions and celery.  When they’re nice and translucent, cut the heat until it’s time to add your corn and garlic.
    3. When the garlic and corn are nice and golden brown, take them out of the oven. Let them cool just a bit, then squeeze all of the garlic out of the heads and into the pot.  Take the corn and cut down the cob, removing all of the kernels.  Both the kernels and the cob are going in the soup.  (HUH!?!?!?!, Yes, simmering that corn cob is like simmering a bone, tons of flavor there)
    4. Add your wine and potatoes and bring everything up to a simmer.  Let this go until the wine is almost dry., then add your stock and ham.  Bring everything back up to a simmer for 20-25 minutes, or until the potatoes are tender.
    5. Here’s the fun part.  Reach into the pot with a pair of tongs or something (that’s not you fingers) and remove the cobs.   Take out 1/3 of the soup and drop it until a blender.  Pulse the blender until the soup is smooth, then add the puree back to the soup.
    6. To finish the soup, whisk in the sour cram, and add the basil while everything is still hot.

    There you go, there’s more to do with corn that eat it off the cob, not that there’s anything wrong with it, but we all need variety here and there, right?  As always, feel free to play with this, you can use different types of hams, replace the ham with sausage, or evern crab or lobster if you’re feeling adventurous.  If you want more corn recipes  let me know in the comments.


    Happy Eating

    -The Doctor


  • Taco Cupcakes

    Yes, you heard me, Taco Cupcakes.  This is something I came up with just searching for new ideas for party food.  With the rise in popularity of cupcakes, I thought this would be a smart idea, and I was right.  They’ve been a hit from day one.  Just like with any taco, you can use any filling you want.  I prefer to marinate and grill my meats as well for this.  The marinade in this link, also works well for stirring into any ground meat for extra flavor.  This should make you about a dozen.

    DSC_0025
    Little bites of Mexican goodness

    12 flour tortillas cut in quarters
    1/2 lb of your favorite taco filling (cooked)
    1/2 lb of your favorite shredded cheese

    1. Make sure you keep these tortillas under a moist paper towel while we’re assembling them.  We don’t want them to dry out.
    2. Start by brushing a muffin tin with some oil.  Lay down your first tortilla quarter and press it down into the pan gently.  It’s ok if it tears a bit, or if it doesn’t go all the way down it will all get fixed later. 
    3. Lay down some of your meat and cheese (as much as you want).
    4. Repeat this until you have all four layers ready .  You can make another layer if you want, I just like mine thinner.  (HINT: Don’t be afraid to play with this)
    5. Bake these off for about 12-15 minutes at 350.  Just enough to have the cheese melt inside and out.
    6. EAT!!!!!!!
    DSC_0022
    Pressing the tortilla into the tinDSC_0021
    Two layers

    I like to top these with some sour cream, pico de gallo, and avocados.  This Roasted Corn Guacamole Recipe is also really good on these.  Actually, anything you can put on a taco, you can put on these.  These are great for kids’s parties too (make your own taco cupcake, I know I would have loved that when I was a kid).  You can use this technique with other foods too. For example you can replace the beef with some pork  and the tortilla with wonton skin and have pot-sticker cupcake.  I’ll be doing some variation on these down the road, but definitely test-lab these.


    Happy Eating,


    -The Doctor


  • The Basics…Carne Asada Marinade (yeah, It’s grillin’ time!!!!!!!)

    Who doesn’t like grilled anything?  (Well I know a few people, but they suck at life)  Carne Asada, literally “grilled meat” is generally very thin slices of beef cooked over an open wood flame.  Its eaten on its own, put into tacos and burritos, and is the start of the show in any Tampiquena.  Some of the best I’ve ever had was on the Streets of Valle De Bravo Mexico in the middle of the markets. You’ve probably seen it in Taco Bell commercials, but let me tell you, that crap doesn’t even come close to the real thing.  Every one has a different recipe for it, so there’s really no true definition of it other than the technique, kinda like barbecue.  This recipe comes from a Peruvian cart vendor, who lived in Valle de Bravo.  This was some of the best I ever tasted, and he was the only vendor there that did more than beef.  He used this marinade on lamb, pork, chicken, duck, turkey and fish.  This recipe will do about 3 cups.

    carne
    Carne Asada

    4 cloves garlic, peeled

    1 oz. peeled chopped ginger

    1 bunch cilantro leaves, washed (no big deal if you have some stems, it’s getting pureed anyway)

    2 tbsp. grain mustard

    Juice and zest of 4 limes

    1 tbsp. sugar

    1 c. cider vinegar

    2 c. vegetable or Canola oil (You can use olive oil, but these two are much cleaner flavors)

    1-2 jalapenos (Optional)


    herb
    Finished marnade in the processor


    1. Real easy right?  Yu can use a food processor, blender or immersion blender.  I prefer a blender, because it just gets everything cut so fine. Get all of your solid ingredients into the blender and add just the lime juice.  Pulse everything until the ingredients stop moving. This is going to get everything started and chopped up smaller than if you had added all of that vinegar at first.


    1. Now add half of your vinegar and finish pureeing.  Keep pulsing until everything is smooth.  Add more vinegar if you need to, just to loosen things up.


    1. Add the rest of your vinegar and turn that blender (or whatever you’re using) up high.  Now slowly drizzle in your oil.  Just a light pour.  I like to have this emulsified, just because it makes brushing easier on the grill, but if it break, no big deal.  Just keep mixing it back up.


    1. Marinate whatever you want in it.  The beauty of this is you can brush whatever you’re cooking with it, AND use it as a sauce if you like too.


    When you marinate with this make sure you give it at least 4 hours to work its magic, but no longer than 36.  Just like I said before this marinade is and can be used on absolutely anything, and it’s great to have in your back pocket.


    Happy Eating


    -The doctor