• Category Archives Sides and Relishes
  • Honey-glazed Parnsips and Hazelnuts

    You’ve seen them in the grocery store…that white, carrot looking thing that your mom made you eat, and you hated because it tasted like wallpaper paste.  Admittedly, parsnips can be pretty nasty when they’re not done right.  But when they are cooked correctly and not boiled or burned to death, they are one of the most flavorful vegetables you can eat.  It might be worth saying that they go with just about everything, especially meats you would eat in the fall and winter like venison, lamb and braised meats.  This recipe is a super simple one that has many variations.  It’s been on every fall and winter menu I’ve written in some form or another and they’ve always been a hit ( I wouldn’t put it up here if it wasn’t).  This will serve 4 people.DSC_0470

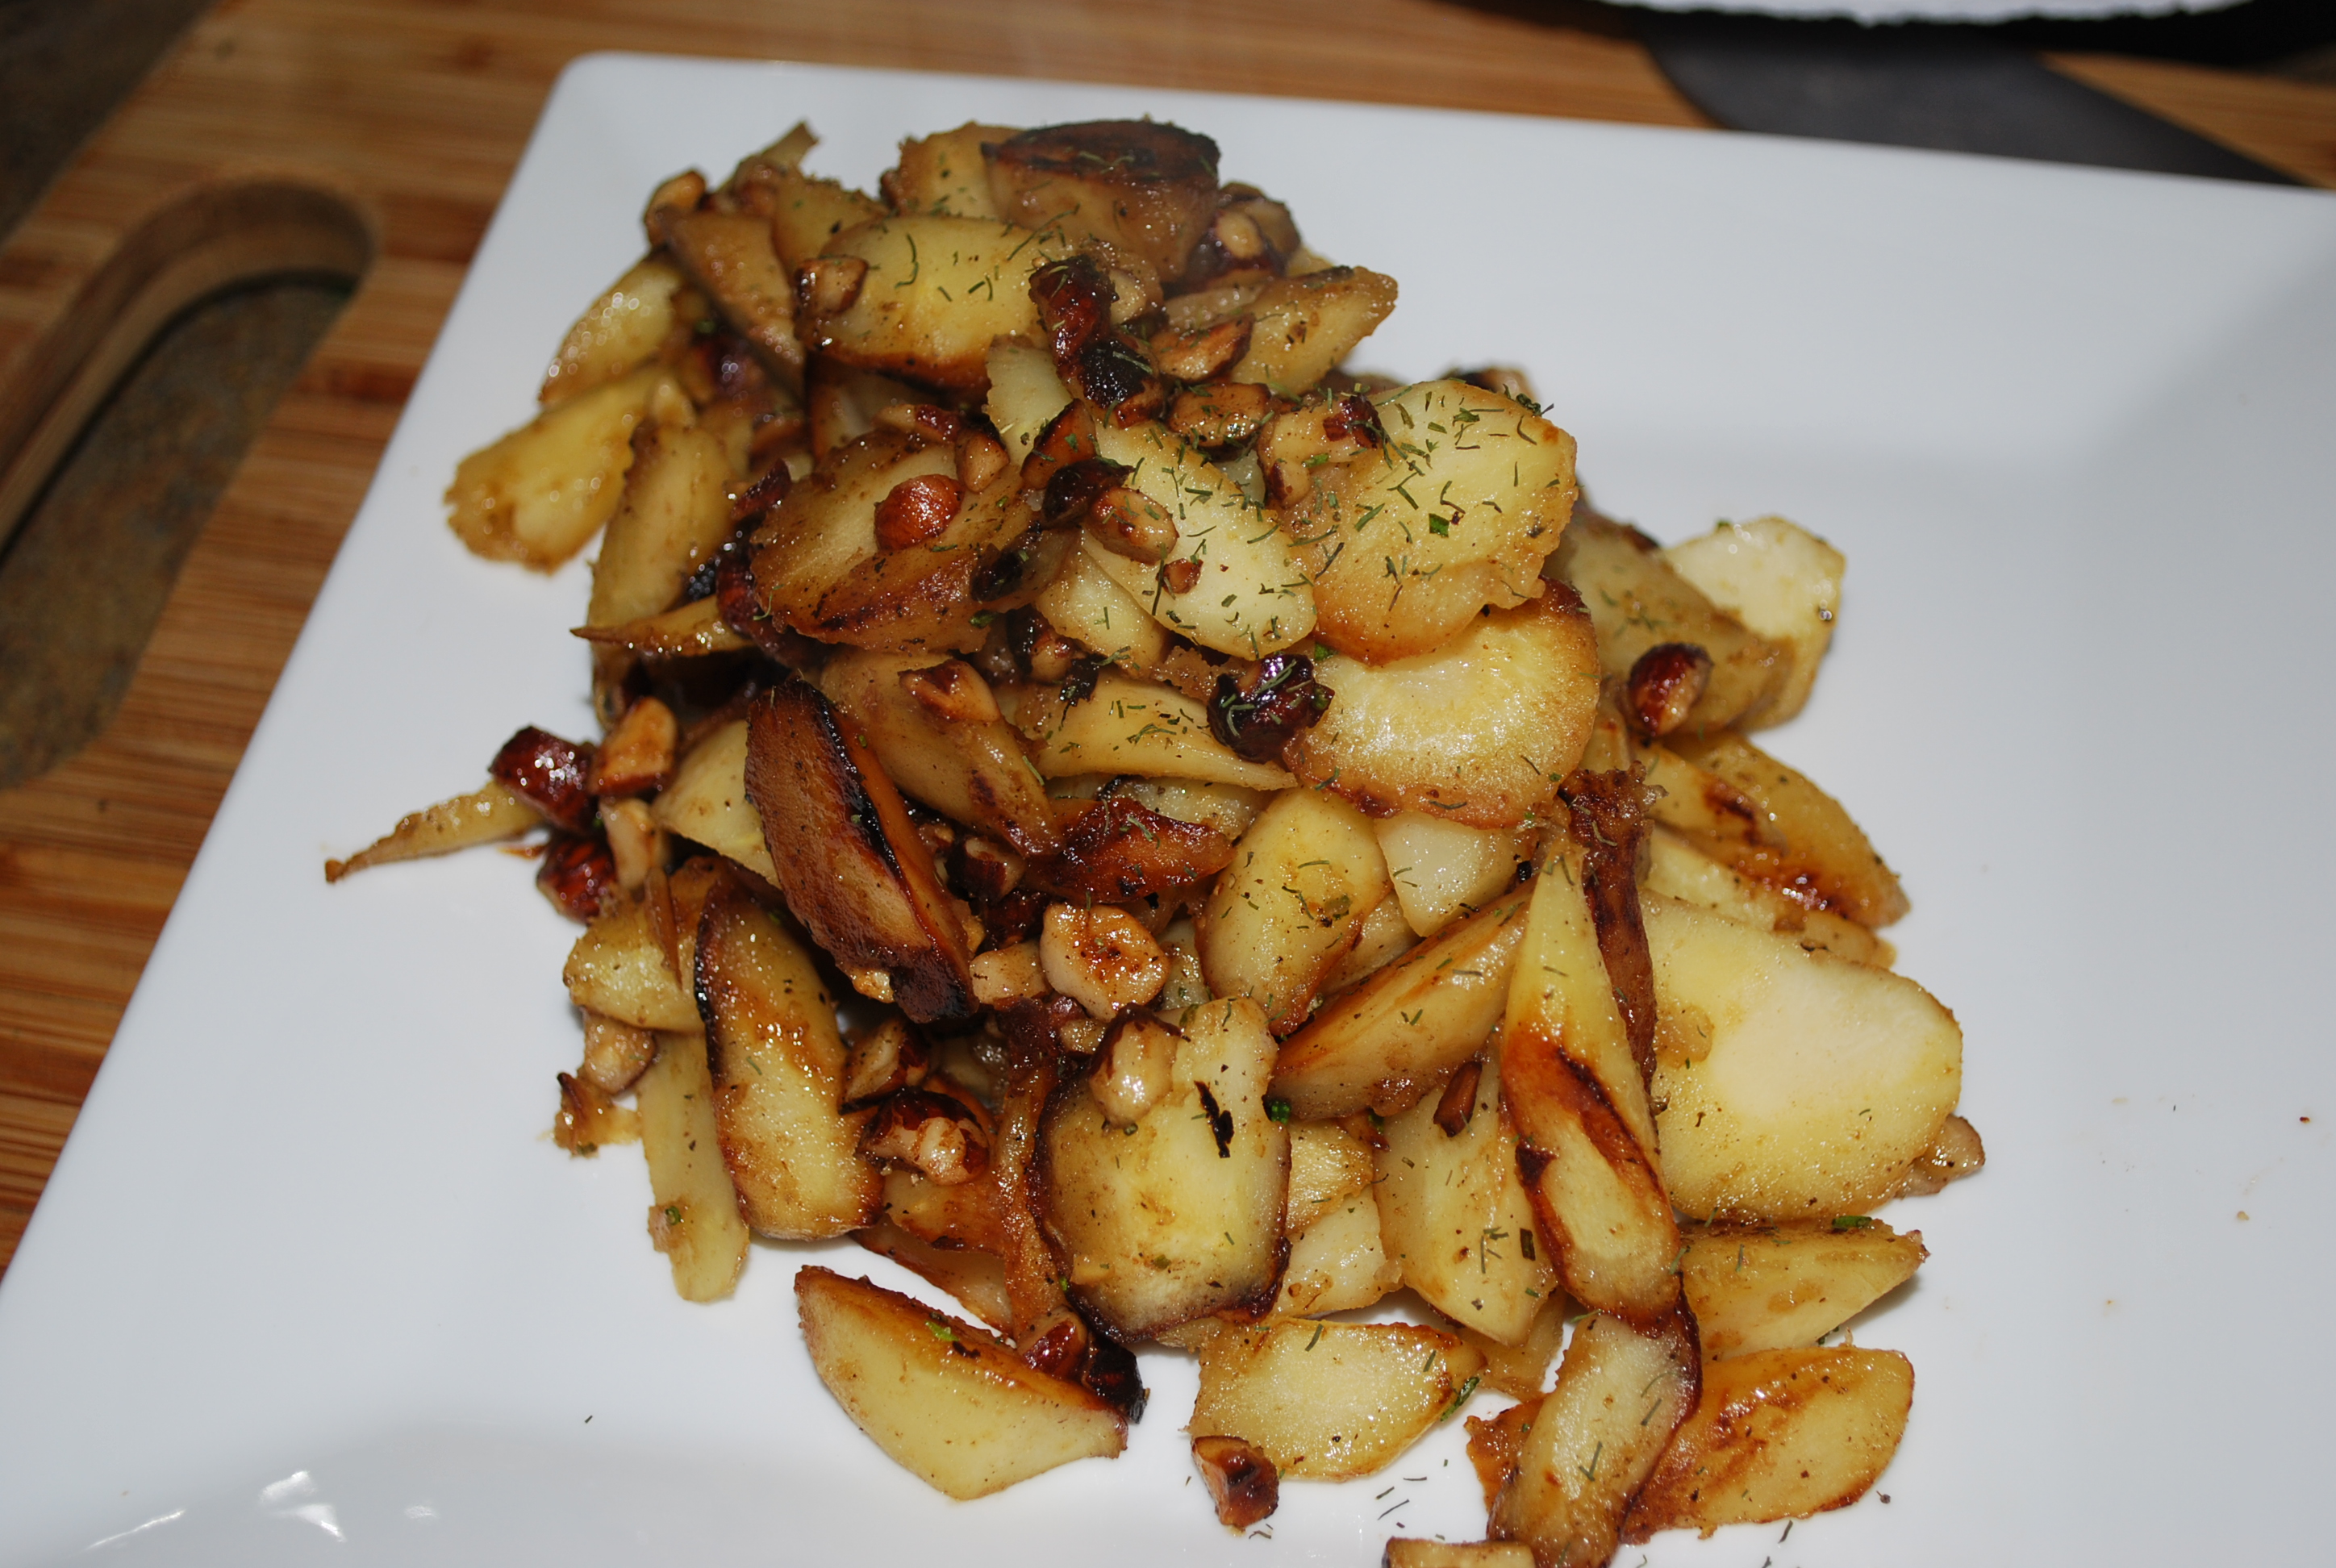
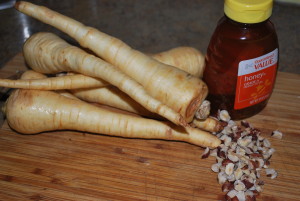
    • 1 lb. parsnips, peeled and roll cut
    • 2 tbsp honey
    • 2 tbsp whole butter
    • 1 tbsp Olive Oil
    • 1 tsp chopped rosemary
    • 1/4 c. chopped hazelnutsDSC_0466
    1. Just like every otherr recipe I put on here (well most of them) start with a heavy bottom pan on medium high heat.
    2. Add the oil and half of the butter and let the butter start to foam.
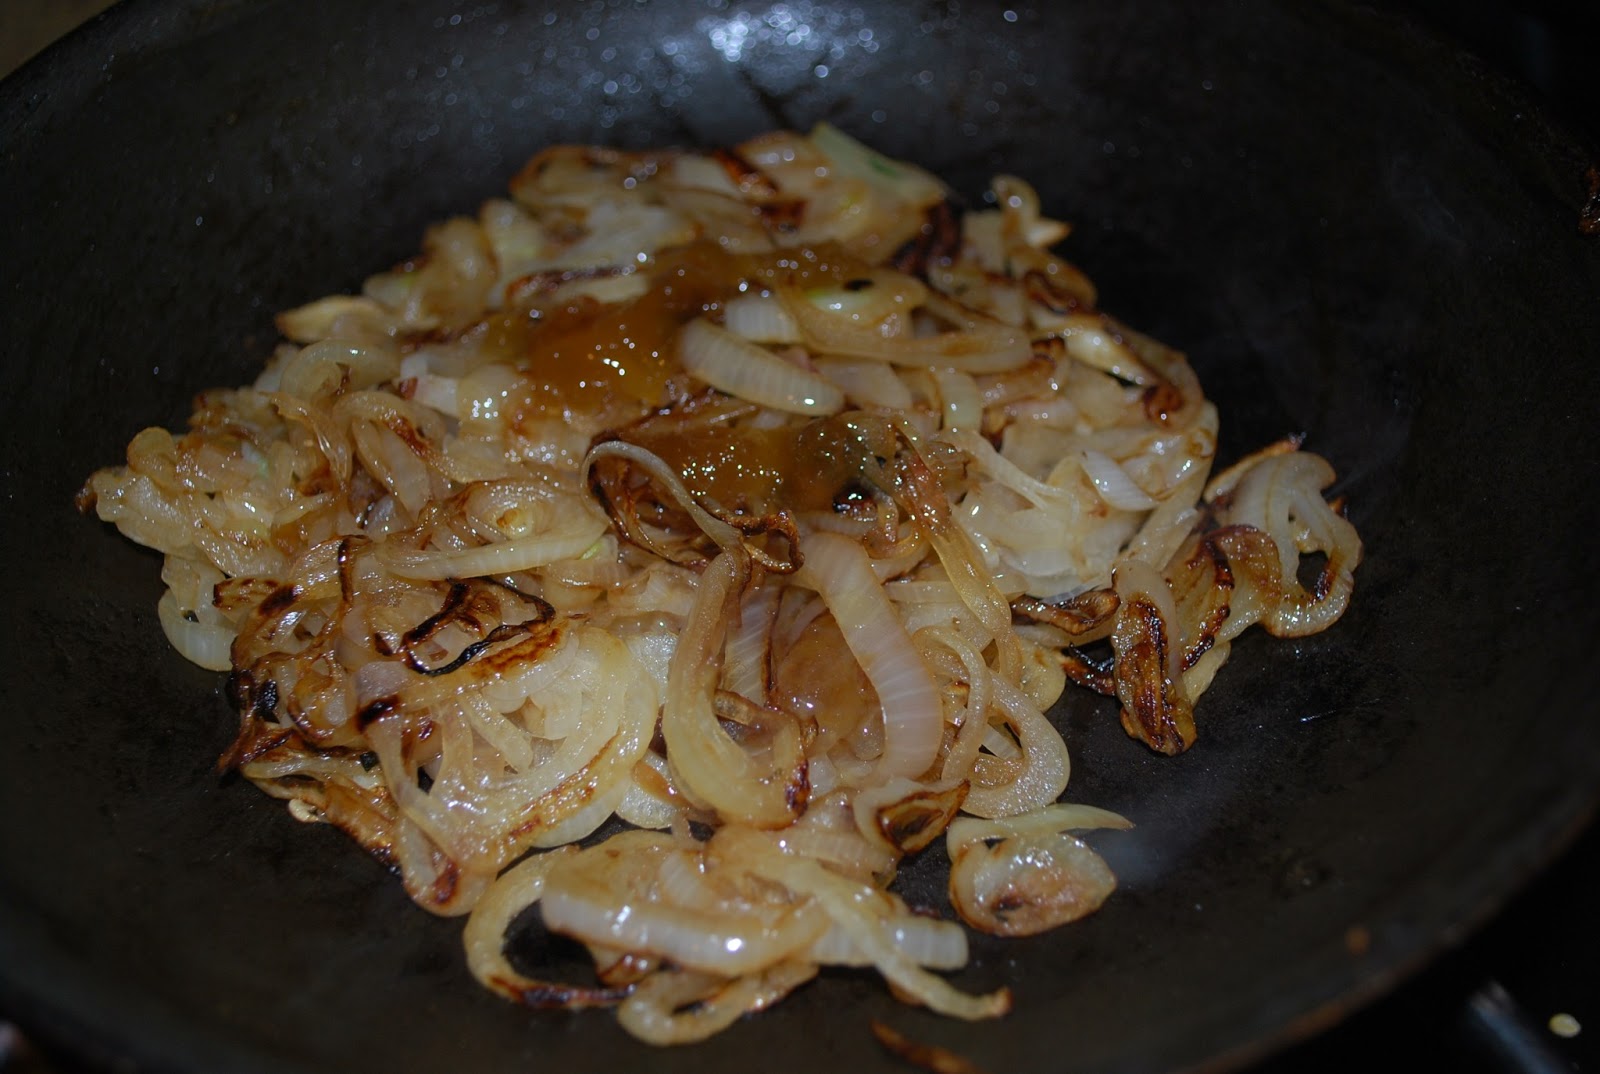
    3. Add the parsnips and shake them just a bit.  Then let them site for about a minute before shaking them again.  Lower the heat to about medium and let them just cook, stirring or tossing about every 3-4 minutes or so.  You want them to get nice and dark, but not burnt.  After about 4 minutes, you’ll want to add yoru hazelnuts so they can toast and add some aroma to this.
    4. Add your honey and rosemary.  Let the honey reduce just a bit, then add the rest of the butter and season with salt and pepper.
    DSC_0468
    Caramelizing the parsnips

    It’s a bit late for Thankskgiving, Christmas and new Year’s,  but give theses a try on you next holiday.   In the mean time, try these alongside some pork chops and roasted apples.  These pair well with roasted poultry too.

    Happy Eating,

    -The Doctor


  • Maple Scented Turnip Puree

    WAIT!!! COME BACK!!!!  This recipe actually kicks butt I promise.  Perfect for Thanksgiving, this recipe made it’s first appearance in my repetoir in my first Washington, DC stint.  I was working in a brew pub at the time and this was one of the sides on our Thanksgiving week special.  Apparently, turnips are popular in DC becasue people kept asking for this side after the holidays.  Anyway, this recipe is super easy, and super tasty.  This makes enough for 4-6.DSC_0475

    • 2 lbs. turnips, peeled, quarterd, then sliced 1/3 inch
    • 1 idaho potato, cut same as the turnip
    • 1 pint half and half
    • 1/4 lb butter
    • 1/2 c maple syrupDSC_0466
    1. This really can’t get any simpler.  Combine your turnips, potato, half and half, and butter in a decent sized pot.  Turn it on medium low heat and cover.  Let this go for about 30-40 minutes, or until eveything is tender.
    2. Pull the utrnips and potao out of the pot, but don’t drain off the liquid.  Add your maple syrup.  At this point you can either mash them with a potato masher, or puree them in a food processor.  ONly add some of the liquid if you seem you need it to get the puree going.  The slow simmering process hsoudl have pulled waterr out of the turnips and transferredin the fat from the half and half.  (If you coudln’t tell, temperature is imprtant here…)


    Seriously, butter and maple syrup? How can you go wrong?  they make everrything taste aweosme, even the humble, uninteresting turnip.  Outside of Thankksgiving and turkey, this side goes well with pork, and and any kind of braised beef.  Go on don’t be scard, embracce the turnip.


    Happy Eating,

    -The Doctor


  • Spicy Garlic Pickles

    A good friend of mine got some cucumbers from a local farmer and decided they were a bit too bitter for her.  So I was the lucky recipient of some free cukes.  When I got them. I got excited, because I’ve had a lot of you ask about canning, which we’re going to learn how to do…WHEN WE MAKE PICKLES!!!!  Seriously , how cool is it to serve your own pickles at a BBQ.  I love the idea of telling Vlasic and Heinz “Nah, I got this covered”.  This recipes is similar to my grandfathers pickled eggplant, with a few changes.  The gist of this is to get you preserving your own food, naturally.  This recipe made 4, 1 pint jars of pickles.

    DSC_0475

    2 lbs. pickling cucumbers
    1 whole head garlic, peeled
    1 tbsp pickling spice
    2 1/2 cup cider vinegar
    2 1/2 cup water
    Pickling salt (Not the chemical stuff. You can find it at hardware stores, if it’s not at your grocer)
    1 bunch dill
    1/2 bunch lemon-thyme
    12 Serrano peppers (Optional)

    Pickles...the beginning...
    Pickles…the beginning…
    1. This step happens the day before.  We need to purge some water form thee cukes,  If we don’t they’ll get real soggy.  Scrub and rinse the cukes well.  While they’re still whole, lay down some salt on a sheet tray and stick the soon to be pickles on it.  Cover them with some more salt.  Rotate them every 6 hour or so.
    2.  The next day, rinse the cucumbers off and dry them very well.  Now slice them about 1/3 inch thick.  (You can cut pears or keep them whole, I just like slices).  Put these off to the side for a bit.
    3. Take your garlic cloves, and give them a light smash with the flat end of your knife.  Drop them in the pot your going to use for heat up your vinegar and water.
    4. Add the vinegar, water, pickling spice, and 2 tbsp of sea salt, kosher salt, or pickling salt to the mix.  Leave this off-heat until your ready to heat it up.
    5. NOW…..it’ time to get the jar ready.  this is a SUPER important step, but it’s easy.  Wash, rune and scrub the jars.  Then drop then in a pot of cold water, and bring that pot to a boil.  Let them boil for 10 minutes.  We’re using the boiling water to sterilize the jars.  If you need to do this in two round, let the water cool a bit, before you do the next set, so they don’t shatter.  Drain and dry the jars.  Oh, I like to do this with the lids too.
    6. Turn on your pot of vinegar and water, and start placing cucumber slices and the herbs in the jar.  Jam them in there if you need to, jut don’t go all the way up.  Add your peppers here too if you want them.  (Really you can use any pepper you want, if you like it spicy).  Be sure to leave the head room (where the jar get very narrow) empty.
    7. When your liquid comes to a boil, cut the heat and let the liquid steep for literally jut a minute.  We don’t want it to cool too much.
    8. Cover the cumbers in the jar with the liquid, and throw the cap on.
    9. Take your jars, and put them back in the pot of water.  Bring the pot to a boil and let that boil for 10-15 minutes.  This will process the pickles and let them last longer.  You can skip this step is you don’t plan on keeping them around very long.
    10. Put your jar right into the fridge.  Don’t stick them in ice water, you’ll break the glass.  (Trust me I’ve seen people do it).  Let these sit for 2-3 days, then they’re ready to eat.
    Just filled, before the canning.
    Just filled, before the canning.

    Do you really need serving suggestions for pickles?  Really???  Fine.  Blue cheese, burgers, BBQ, roasted pork, dogs, and cold salads.  Add a bit of sugar, chop them up and you’ve got a wicked relish.  If you want to change this up a bit, don’t be afraid to change the herbs, or the vinegar.  I also like to do eggplant and zucchini in balsamic vinegar with some grilled onions.  (Yup in the jar).  The end of summer is coming, so don’t be afraid to can your own fresh vegetable, and tell the big canned food companies to shove it.

    Happy Canning,

    -The Doctor


  • Buffalo Chicken Mac & Cheese

    We haven’t done anything good and bad for our arteries in a while, so let’s get cloggin’ shall we?  By the way this is also great for using leftover chicken…and clogging your arteries.  This recipe actually came along at a party, as an accident, just like the old Reese’s peanut butter cup commercials from the 80’s (if you remember those)  I wasn’t looking at what I was putting on my plate and just slapped some of my friend’s buffalo chicken dip on top of some pasta salad.  The next night, a new bar special was born and became a permanent resident. It was a great way to use up left over roasted chickens form the night before without them going to chicken salad.  Pretty soon we were roasting birds just to keep up with the menu item.  If you don’t have time or don’t want to roast your own bird, why not buy one cooked from your grocery store?   Most of them have rotisserie birds now.  Just don’t use that crap in a can.  This makes enough for 4-6.DSC_0482

    • 1/2 lb. and pasta you like ( I used Fusilli for this recipe), cooked
    • 1/2 small block Velveeta
    • 2 tbsp butter
    • 1/2 c. minced onion
    • 1 tbs flour
    • 3/4 c. milk
    • 1/2 c. cheddar cheese ( or another cheese if you want)
    • 1/2 c. blue cheese crumbles
    • 1/4 roasted chicken (I prefer to use the leg and thigh
    • 1/2 Wing Sauce
    1. Start by picking the chicken meat off the bone.  SAVE THE SKIN.  Chop it in to small pieces, it’s going into this recipe.

      Chicken Pickin'
      Chicken Pickin’
    2. Melt your butter over low heat on the stove and add your onions.  Sweat these for about 5-8 minutes.  Then add your flour.
    3. Cook the flour, stirring constantly for about 2 minutes.  Then add your milk.
    4. Stir the milk mixture CONSTANTLY, for about 4 minutes.  Your want this to thicken, but if you don’t keep it moving it’s going to scald.

      Your Bechamel is ready, sir
      Your Bechamel is ready, sir
    5. After the four minutes add you Velveeta and your shredded cheddar (or whatever you’re subbing).  Wait on the Blue cheese, that’s coming later.
    6. Melt these cheese then shut off the heat.  Now stir in the chicken, blue cheese and hot sauce.  Just lightly fold everything together.DSC_0478
    7. If you like you can serve this as is now, or you can top it with more cheese and hot sauce and bake it in the oven (Guess which one i do)


    This is where I tell you to feel free to play with the recipe…and I’m still going to do that.  Don’t’ like blue cheese?  No problem. leave it out.  Don’t like it too hot, don’t’ add as much hot sauce, I don’t care, this is for YOU!!! Leave any questions you got in the comments, I’ll get to ya.DSC_0481


    Happy Eating

    -The doctor


  • Beer Braised Collards

    If there’s any vegetable that says comfort food, it’s the Collard Green.  Anywhere below the Mason Dixon line, this inexpensive and nutrient packed green is all over the place.  During my time in Atlanta, I was hard pressed to find a restaurant that didn’t serve them, so when took over a busy hotel restaurant.  I had to figure something out with them that make them different, but just similar enough to not scare off the natives.  The recipe was so simple, pork fat onions, greens and chicken stock.  How do you mess with it and make it different?  The answer was in my glass at the bar. I’d braise them beer,,but shoot, I just don’t want to use any pork product.  I want to use something out here and unheard of.  The next day in the butcher shop, I was looking through some of the cured meats we had and there it was….Gunaciale.  That Beautiful Italian cured pig cheek.  Congratulations Altanta, you now have my secret you’ve been asking for.  This recipe makes about four portions.   2 bunches Collard Greens, chopped (yes, pick the leaves from the ribs, and wash them) 1 onion, julienne 4 oz. Guanciale 2 bottles NICE Lager Beer (sorry , but the cheap stuff ain’t cuttin’ it here)

    DSC_0468
    Summer Green Awesomeness
    1. Start up a nice heavy pot on low heat.  Add the Gunaciale and let it cooke slowly to render the fat out.  You dont’ want it to crisp up, but you want to cook as much fat out as possible. It shoudl take abotu 10-15 minutes
    2. Add your onions and cook them until there is just a bit of color, like this: DSC_0467
    3. Now add your chopped greens.  Sweat these out and let the wilt for just couple of minutes.  Then add your beer
    4. Cover your greens and let them simmer for about 45 minutes to an hour, or until they’re tender.
    DSC_0465
    All the players

    I can’t stress enough how important it is to wash your greens before you get started, even if they came in a bag.  There’s a lot of dirt and grit that can make the eating experience unpleasant, and who wants unpleasant greens?  that begin said, if you can’t find Gunciale where you are, you can always use pork jowl, or plain old salt pork.  Nothing wrong with that.  Feel free to play with the beers you use too.  For example, if you want something with a nuttier flavor that complements the bitterness for the greens,  heavy IPA will do you just fine.  If you want something heartier, a good strong strout does the job.  let me know what you used in the comments below.   Happy Eating   -The Doctor


  • Italian Style White Bean and Sausage Ragout

    This recipe came straight from a chef from Italy, so you know it’s gotta be good.  During a stint in Alabama (yeah, don’t go there), the hotel I was at formed a partnership with a local University, who happened to have an incredible agriculture program.  They sold pork to a local business who specialized in making Porchetta (which we’ll do a version of eventually), which is also roasted pork saddle flavored simply with herbs, garlic, and Olive Oil.  Every order of Porchetta you got came with some nice crusty bread, and this on the side.  You can serve 4 people with this recipe.

    DSC_0020
    3 oz. loose Hot Italian Sausage
    1/2 c. fennel, sliced thin or shaved
    1/4 c. small diced onion
    1/4 c. small diced carrot
    1 clove garlic, sliced
    1 tsp. chopped sage
    1 tsp. dry oregano (you can use fresh, this is  just what the old man who ran the place swore by)
    1/4 c. white wine
    1.  Start your sausage off in a saute pan on low heat, rendering out the fat.  Break up the sausage as it cooks, we want to ti get all through the ragout.  Don’t be afraid to add a little olive oil to grease up the pan if you need to.
    2.  When your sausage is nice and brown, add your vegetables, garlic, and herbs.  Sweat these out for about 5 minutes, stirring every minute or so.  We want to let the herbs cook just a bit an release some of their natural oils into the olive oil and rendered sausage fat.
    3.  Add the beans and wine and let the wine reduce to almost dry.  Season it up with some salt and pepper and taste.
    4.  Now you can stop here, and server these, or you can take it one more step.  I like to take 1/8 of the beans out, and either mash them with a masher or give them a rough puree with a touch of water or stock, then add them back to the ragout.  This just gives the ragout some body and a slightly nicer mouth feel.  totally optional if your’e not up to it though.
    The beauty of this recipe is you can do just about anything to it.  You can change the Italian sausage out for Andouille and add some Cajun spices for something Louisiana style for example.  You want seafood?  No problem  add some shrimp.  You don’t like fennel?  No problem, use peppers or something else.  Don’t be afraid to mix it up.  I’d love to here what some of you are doing with this.  Why dont’ you tell me in the comments section
    Happy Eating,
    -The Doctor


  • Herb Roasted Baby Potatoes

    So, remember Saint Paddy’s day a few weeks ago where I promised you those roasted potatoes?  Apparently some of you are a shake impatient, and can’t wait so here you go.  Although I don’t eat them much, I do love potatoes.  You can do any most anything with them.  They’re kind of like a blank food canvas you can flavor however you want.  Of course the best things are the simplest.  This is actually a recipe I used to use for banquets I learned form a Frenchman (BLASPHEMY?!?!?!, No)  who cooked very simply and very cleanly.   This recipe will serve 6:

    DSC_0023
    About as simple and delicious as you can get

    3/4 lb, small red potatoes

    3/4 lb small yukon gold or white potatoes (either or)

    1 tsp. chopped sage
    1 tsp. chopped thyme
    2 tbsp. chopped parsley
    3 unpeeled garlic cloves
    1 tbsp soft whole butter
    Salt and pepper for seasoning
    Olive oil for tossing

    1.  Preheat your oven to 400, then quarter up those potatoes.  Leave them them in a bowl of water so they don’t oxidize.

    2.  when you’re ready to cook the potatoes, strain them, then drop them over a towel and pat them dry.  Try to get as much water off of them as you can.

    3.  In another bowl, combine the herbs, garlic cloves, potatoes, and some olive oil, and season with Salt and pepper.  Toss these well.  You want just enough oil to coat the potatoes.

    4.  Lay your potatoes out on a cookie tray or sheet pan, lined with parchment paper or foil.  (You’ll thank me later).  Set you oven timer for 10 minutes, and pop them ‘tater’s in the oven.

    5.  After 10 minutes, toss the potatoes.  I use a heat proof rubber spatula and just rune them gently.  Now these go back in for 15 minutes.

    6.  Turn them again and put back in for another 15 minutes.  After this 15 mintues, they shoudl be done.  If they’re not?  No problem, but them back in. when they are ready, season with a little but more salt and pepper, and toss them whole butter into them.

    Simple right?  This is one of my favorite recipes.  If you don’t have the 45-60 minuets it takes to roast these, you can always cook them half way and the finish them the next day.  My favorite thing to do with this recipe is take those garlic cloves and squeeze them out over the potatoes.  It adds another flavor dimension to the garlickyhint that’s already permeated through the potatoes.

    Happy Eating,

    The Doctor


  • Rosemary Mashed Sweet Potatoes and Caramelized Shallots

    I love sweet potatoes,  but I hate it when people over sweeten them with sugar and coconut and put marshmallows over them.  For the love of all that is culinary, there is so much more you can do with these versatile tubers than just cover them up with sugar.  They’re naturally sweet themselves, and are a nutritional powerhouse.  They have tons of vitamins and minerals, and much less carbohydrates than a regular potato.  If you happen to belong to a co-op, you’re also about to start getting a ton of these because the winter is ending.  This recipe is a nice alternative to what people are used to and still manages to hold some familiar flavors.  This recipe servers 4.

    How ’bout that for a side of sweets, eh?

    2 large sweet potatoes (about 2 lbs)
    2 large shallots, sliced thin
    2 tbsp honey
    2 tbsp butter, room temperature
    Salt and Pepper to taste
    2 tbsp sour cream or heavy cream
    1 tbsp. rosemary, chopped
    Olive oil for cooking
    1 tbsp. sherry vinegar
    1/4 sherry wine.

    1.  First step, Heat that oven up to 350, and throw your sweet potatoes in until they’re done.  How long???? Well, I can’t answer that, because I don’t know how big your sweet potatoes are.  Some take 40 minutes, some take a couple hours.  You want them to be soft is the key.  You can also do these a day ahead and just let them cool over night.  You can just give them a quick nuke when you want to heat th em up, make the puree (I’m getting’ to it) then heat it up in a saute pan.

    2.  When the sweet potatoes are done and cooled enough to handle, just peel the skin off.  This should be pretty easy.  At this point you can either choose to use a masher or a food processor.  If you want this super smooth (and you’re showing off) use the food processor.

    3.  Once you have everything smooth, or fully mashed add your butter, herbs, 1 tbsp. of the honey,  sour cream and salt and pepper.

    NOW…we can leave this as is and serve it, or, we can take this to the next flavor level,  Guess what I’m doing?  Yes, we are doing caramelized shallots to level this up…so…

    1.  Start a pan on medium low heat, add some oil, and add your shallots when you see the is hot.

    2.  Season with some salt to pullout some moisture and stir or toss these every other minute or so until they look like this”

    Caramelized shallots, before the honey, wine, and vinegar

    You can add more oil if the pan gets too dry and they start to burn, they should have a slight sheen on them.

    3.  At this point, add your honey and stir it through thoroughly.  Cook this for about a minute.

    4.  Add your wine and vinegar and let them reduce all the way.  Your shallots are ready when they look like this.

    So this might look a bit complicated to do all at once, but trust me it’s not.  If you’re  a little shy, you can do these at different times and just heat as needed.  You can also prepare these separately.  These go great with (of course) pork, roasted chicken, steaks, or a nice hearty, oily fish like Salmon or Tuna.  If you want any more serving recommendations, just ask.  Don’t forgot to subscribe

    Happy Eating,

    -The Doctor


  • Sprouts & Smoked Almonds

    This one is for all of you out there who have been asking for something a bit lighter. I know, this blog is very meat centric. Well right now at least, but you gotta have something to eat with your meat, right? (Insert Epic Meal Time Hate here)  This was a side I came up with when I was in Atlanta, working at a steakhouse.  I used smoked peanuts originally, because, well, who doesn’t eat peanuts in Georgia; it’s one of their major crops for crying out loud.  Brussels Sprouts are a great winter vegetable. They don’t get a great rap because they can be bitter, but I guarantee you this recipe can make any hater a fan. You can feel free to sub in your own choice of smoked nuts as well.  This recipe feeds 4.

    You got some vegetables, you happy now?!?!?!
    1.5 lbs. fresh Brussels Sprouts, halved

    ¼ c smoked almonds, chopped

    1 tbsp. whole butter

    1 tbsp. olive oil

    Salt and pepper to taste

    1.     Start by bringing a pot of salted water up to a boil and get a nice bowl of ice water.  How much salt itn eh water?  It should be as salty as chicken soup.  If you want a true measurement, use 1 tbsp. per 2 qts of water. 

    2.     We’re gonna blanch these sprouts.  When the water comes up to a boil drop in your sprouts.  Let them go for about a minute.  When they’re tender, pull them out and drop them right in the ice water.  Let them sit until they’re cool, then drain them.  Just a note here, you can do this a day ahead of time if you like.

    2.  When you’re ready to start cooking, get your olive oil and butter into a nice hot skillet. (Let’s say maybe medium high heat). When the butter starts to turn brown, add your sprouts and almonds.  Just warm them though, about 2 minutes total.  Toss them or stir them to keep them from burning.  Season with salt and pepper and you’re done.

    Can’t get easier right?  I told you could substitute the nuts earlier, and you can also substitute green beans, savoy cabbage, and spinach for the sprouts, just to give you some imaginative ideas.  As always, drop a comment and follow the page.

    Happy Eating,

     -The Doctor.


  • Dirty DC Half-Smoke Mac and Cheese

    Yes, this is as awesome as it sounds. When your’e  in Washington D.C., and you go to a place like Ben’s Chili Bowl, or any vendor on the street, you’re not going to order a hotdog, you’re going to get a half-smoke.  Sure, you can get a hot dog, but what’s the point?  It’s just not D.C.  You remember the old saying about “When in Rome…” right?  A half-smoke, for the un-initiated is a half beef, half pork smoked sausage that you can get anywhere in the city, and it’s a specialty of world famous Ben’s Chili Bowl in the city.  I got the idea for this dish from what we used to call “Ghetto ‘Sketti” during my time as a banquet chef.  It was usually left over hot dogs, pasta, and cheese whiz from kid’s menu banquets (Oh like you never stole some from the kids table) – I just simply replaced the hot dog with something much better.  This recipe will make about 1 serving for me, 4-6 for the normal human.

    1/2 lb uncooked weight pasta of your choice (I used Gemelli for this recipe) cooked and cooled

    Yeah…nothing to say here, just look…

    1/4 c. Cheez Whiz (don’t cringe, it’s a Philly classic)
    1/4 c. whole milk
    2 tbsp Cajun seasoning
    1/4 c. minced red onion
    1 whole tomato, large diced, seeds rinsed
    1 tsp. flour
    1 tbsp whole butter
    4 oz. GOOD American cheese (like the deli counter stuff, NOT the singles), cubed
    1/2 sliced half smokes (if you can’t find them use the Hillshire Farms smoked sausages, they’re close enough)
    1/4 c. shredded cheddar cheese

    1. First things first, let’s get the butter in a heavy bottom sauce pot, and preheat our oven to 350.  Let that butter melt a bit on high heat and add your sausages.  Cook these for  a minute of two, then add the Cajun seasoning, onions, and tomatoes.  Cook these down until the onions are translucent; if you need to add more butter, feel free, sometimes the Cajun seasoning can soak it up. We want just a little greasy goodness in the pot.
    2.  When the onions are translucent, scoop out everything that’s in the pot and pour out on a plate . Leave all of the grease/butter in the pot.  Add your flour and cook it, stirring constantly for about a minute.
    3.  Now add your milk.  This is going to need to cook out for just a couple of minutes and get thick.  After about 5 minutes of simmering and stirring, add the American cheese and the Cheez Whiz.  Stir or whisk this until they melt.
    4.  Now it gets good.  Add your sausage and veggies back to the pot, thenyou’re your pasta and mix evenly.  Transfer all of this to an oven safe dish and top with the shredded cheddar.
    5.  Pop the whole thing in the oven until the cheddar melts, then serve.
    There’s not much else to say about this.  It’s simple and delicious.  As always feel free to experiment with other cheeses.  I know for a fact Blue Cheese, Gouda, and Mozzarella will really kick this off too. Dont’ be afraid to try out other sausages and meats too.  Kielbasa, Andouille, and Tasso Ham all will work for this recipe too.
    Happy Eating,
    -The Doctor