• Irish Banger Sliders

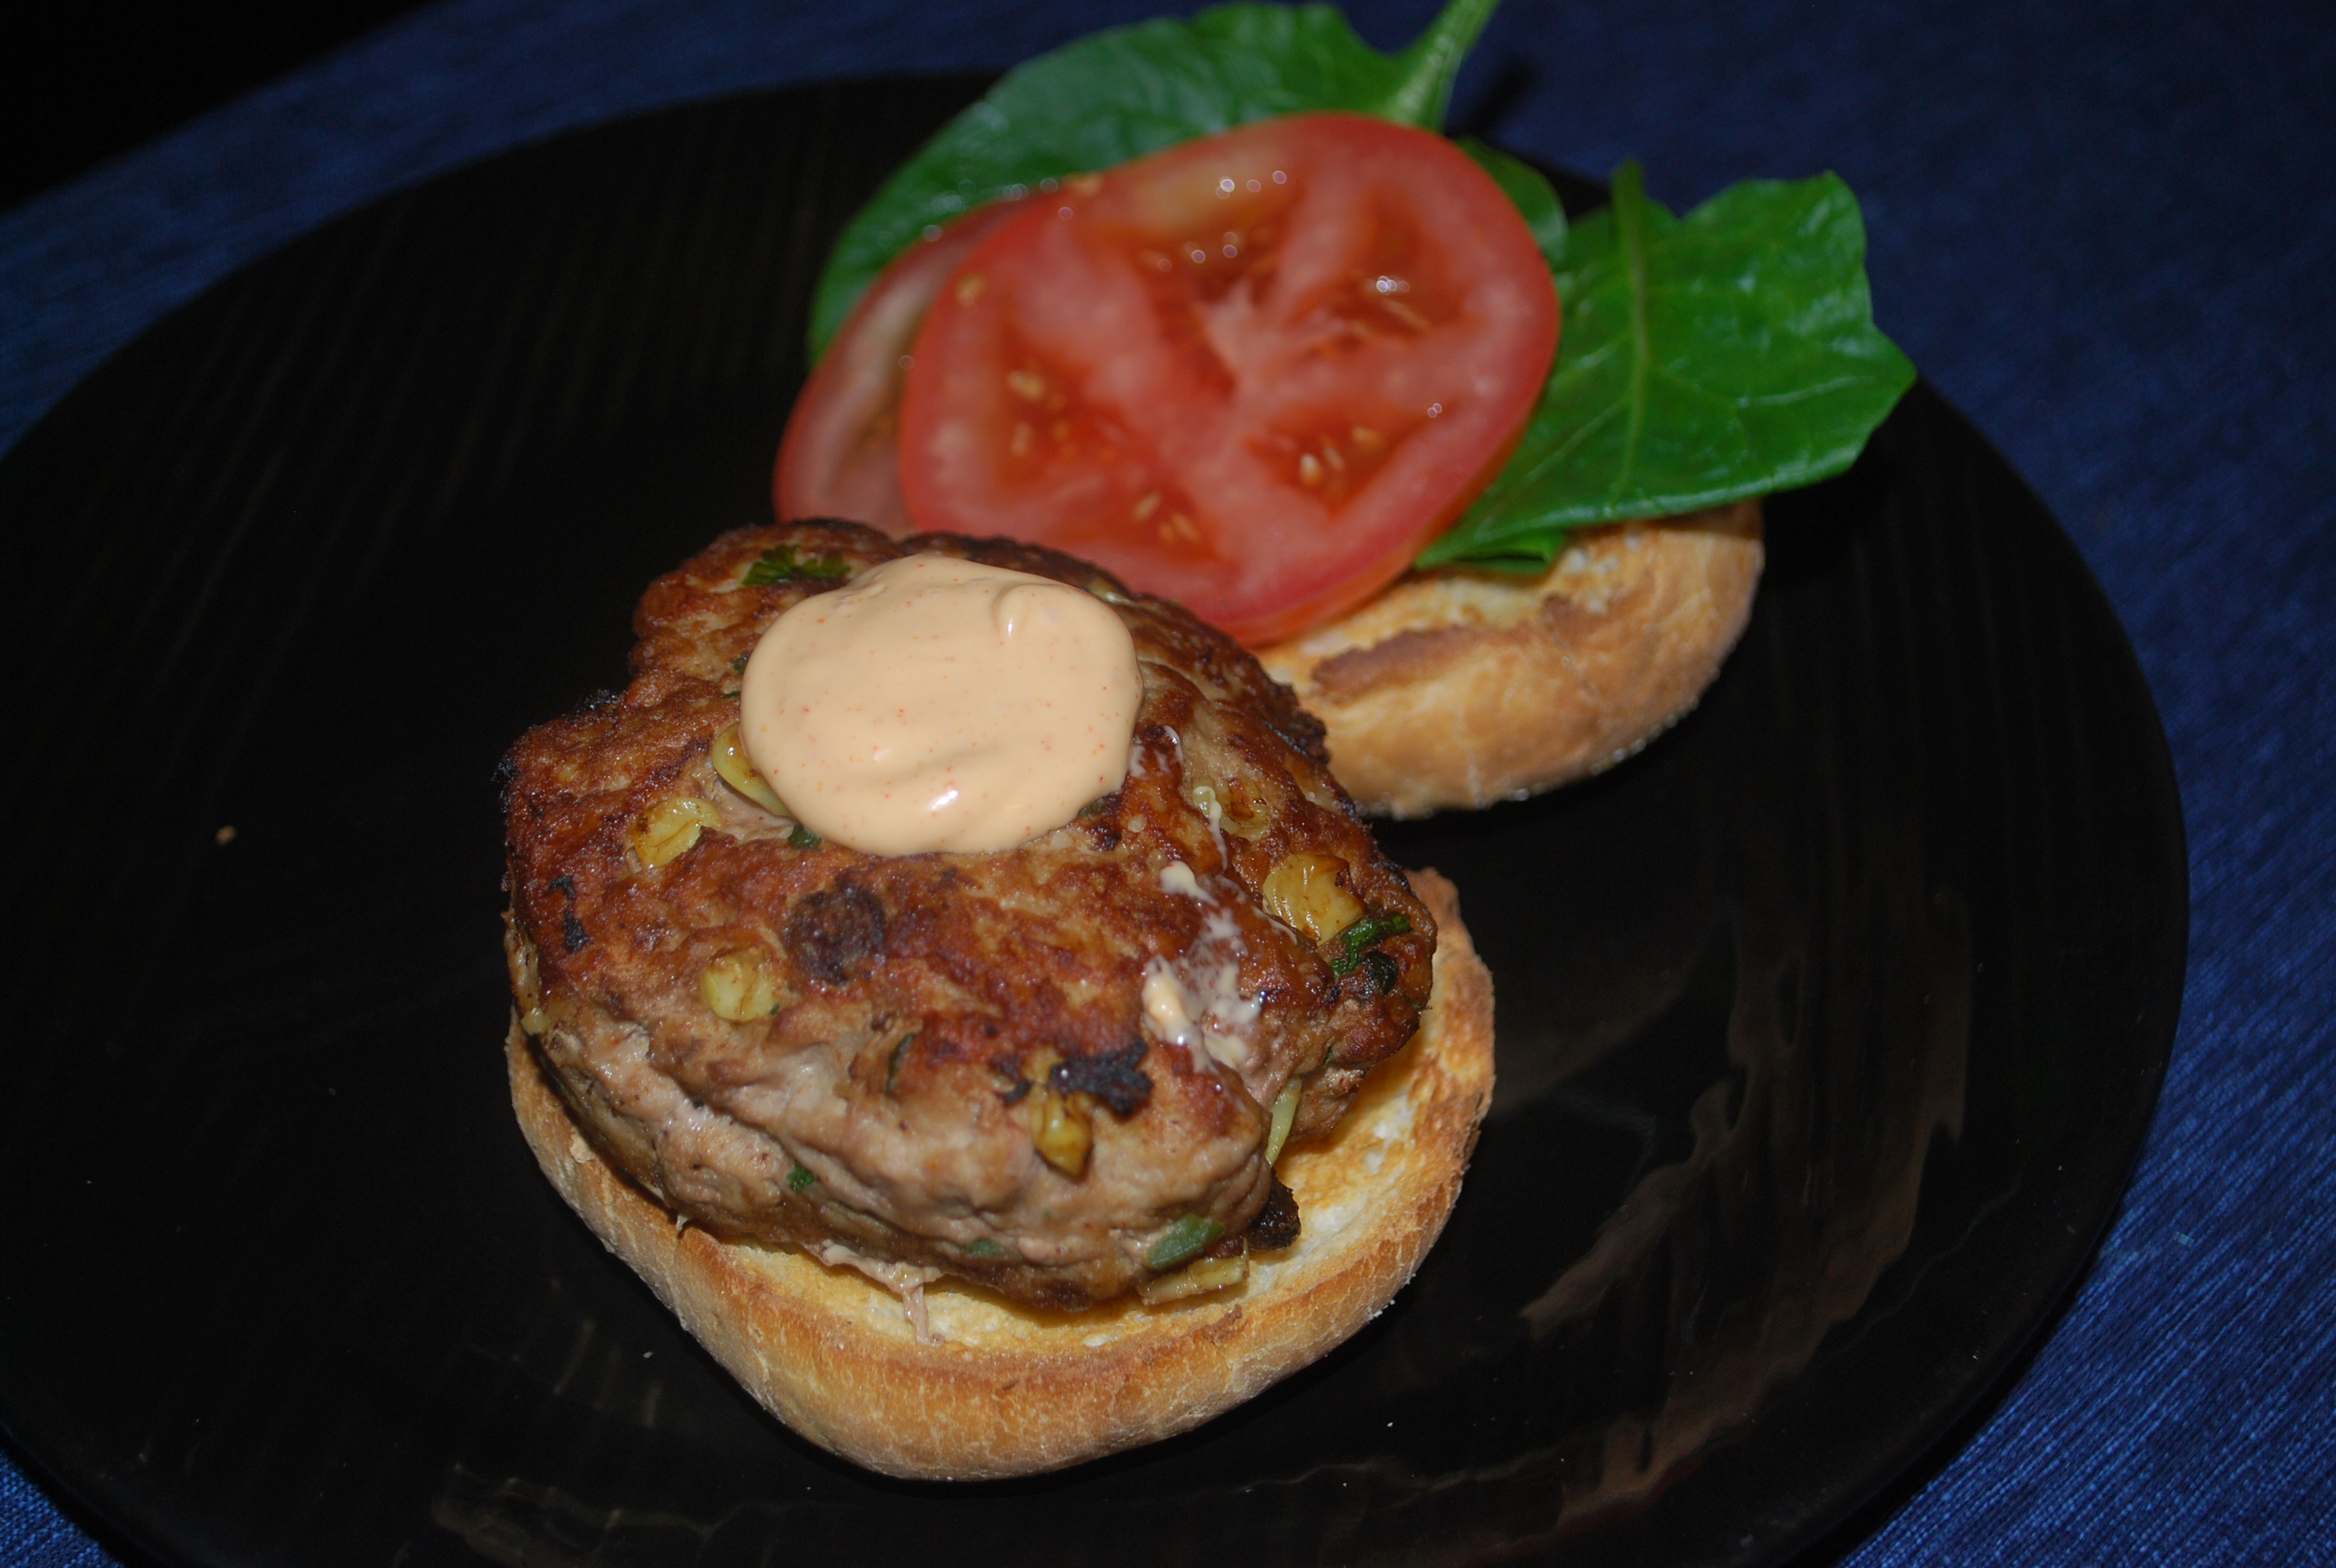
    St. Paddy’s Day Part II!!!!  Who doesn’t love sliders with beer?  (Well, vegans, but they don’t count) These sliders are made with a traditional Irish Banger (pork sausage) recipe.  Bangers are traditionally served with mashed potatoes and onion gravy.  These kind of follow along these lines, but make them a fun finger food for your partying pleasure!!!  This recipe will make 8, enough for one guy on a bender…
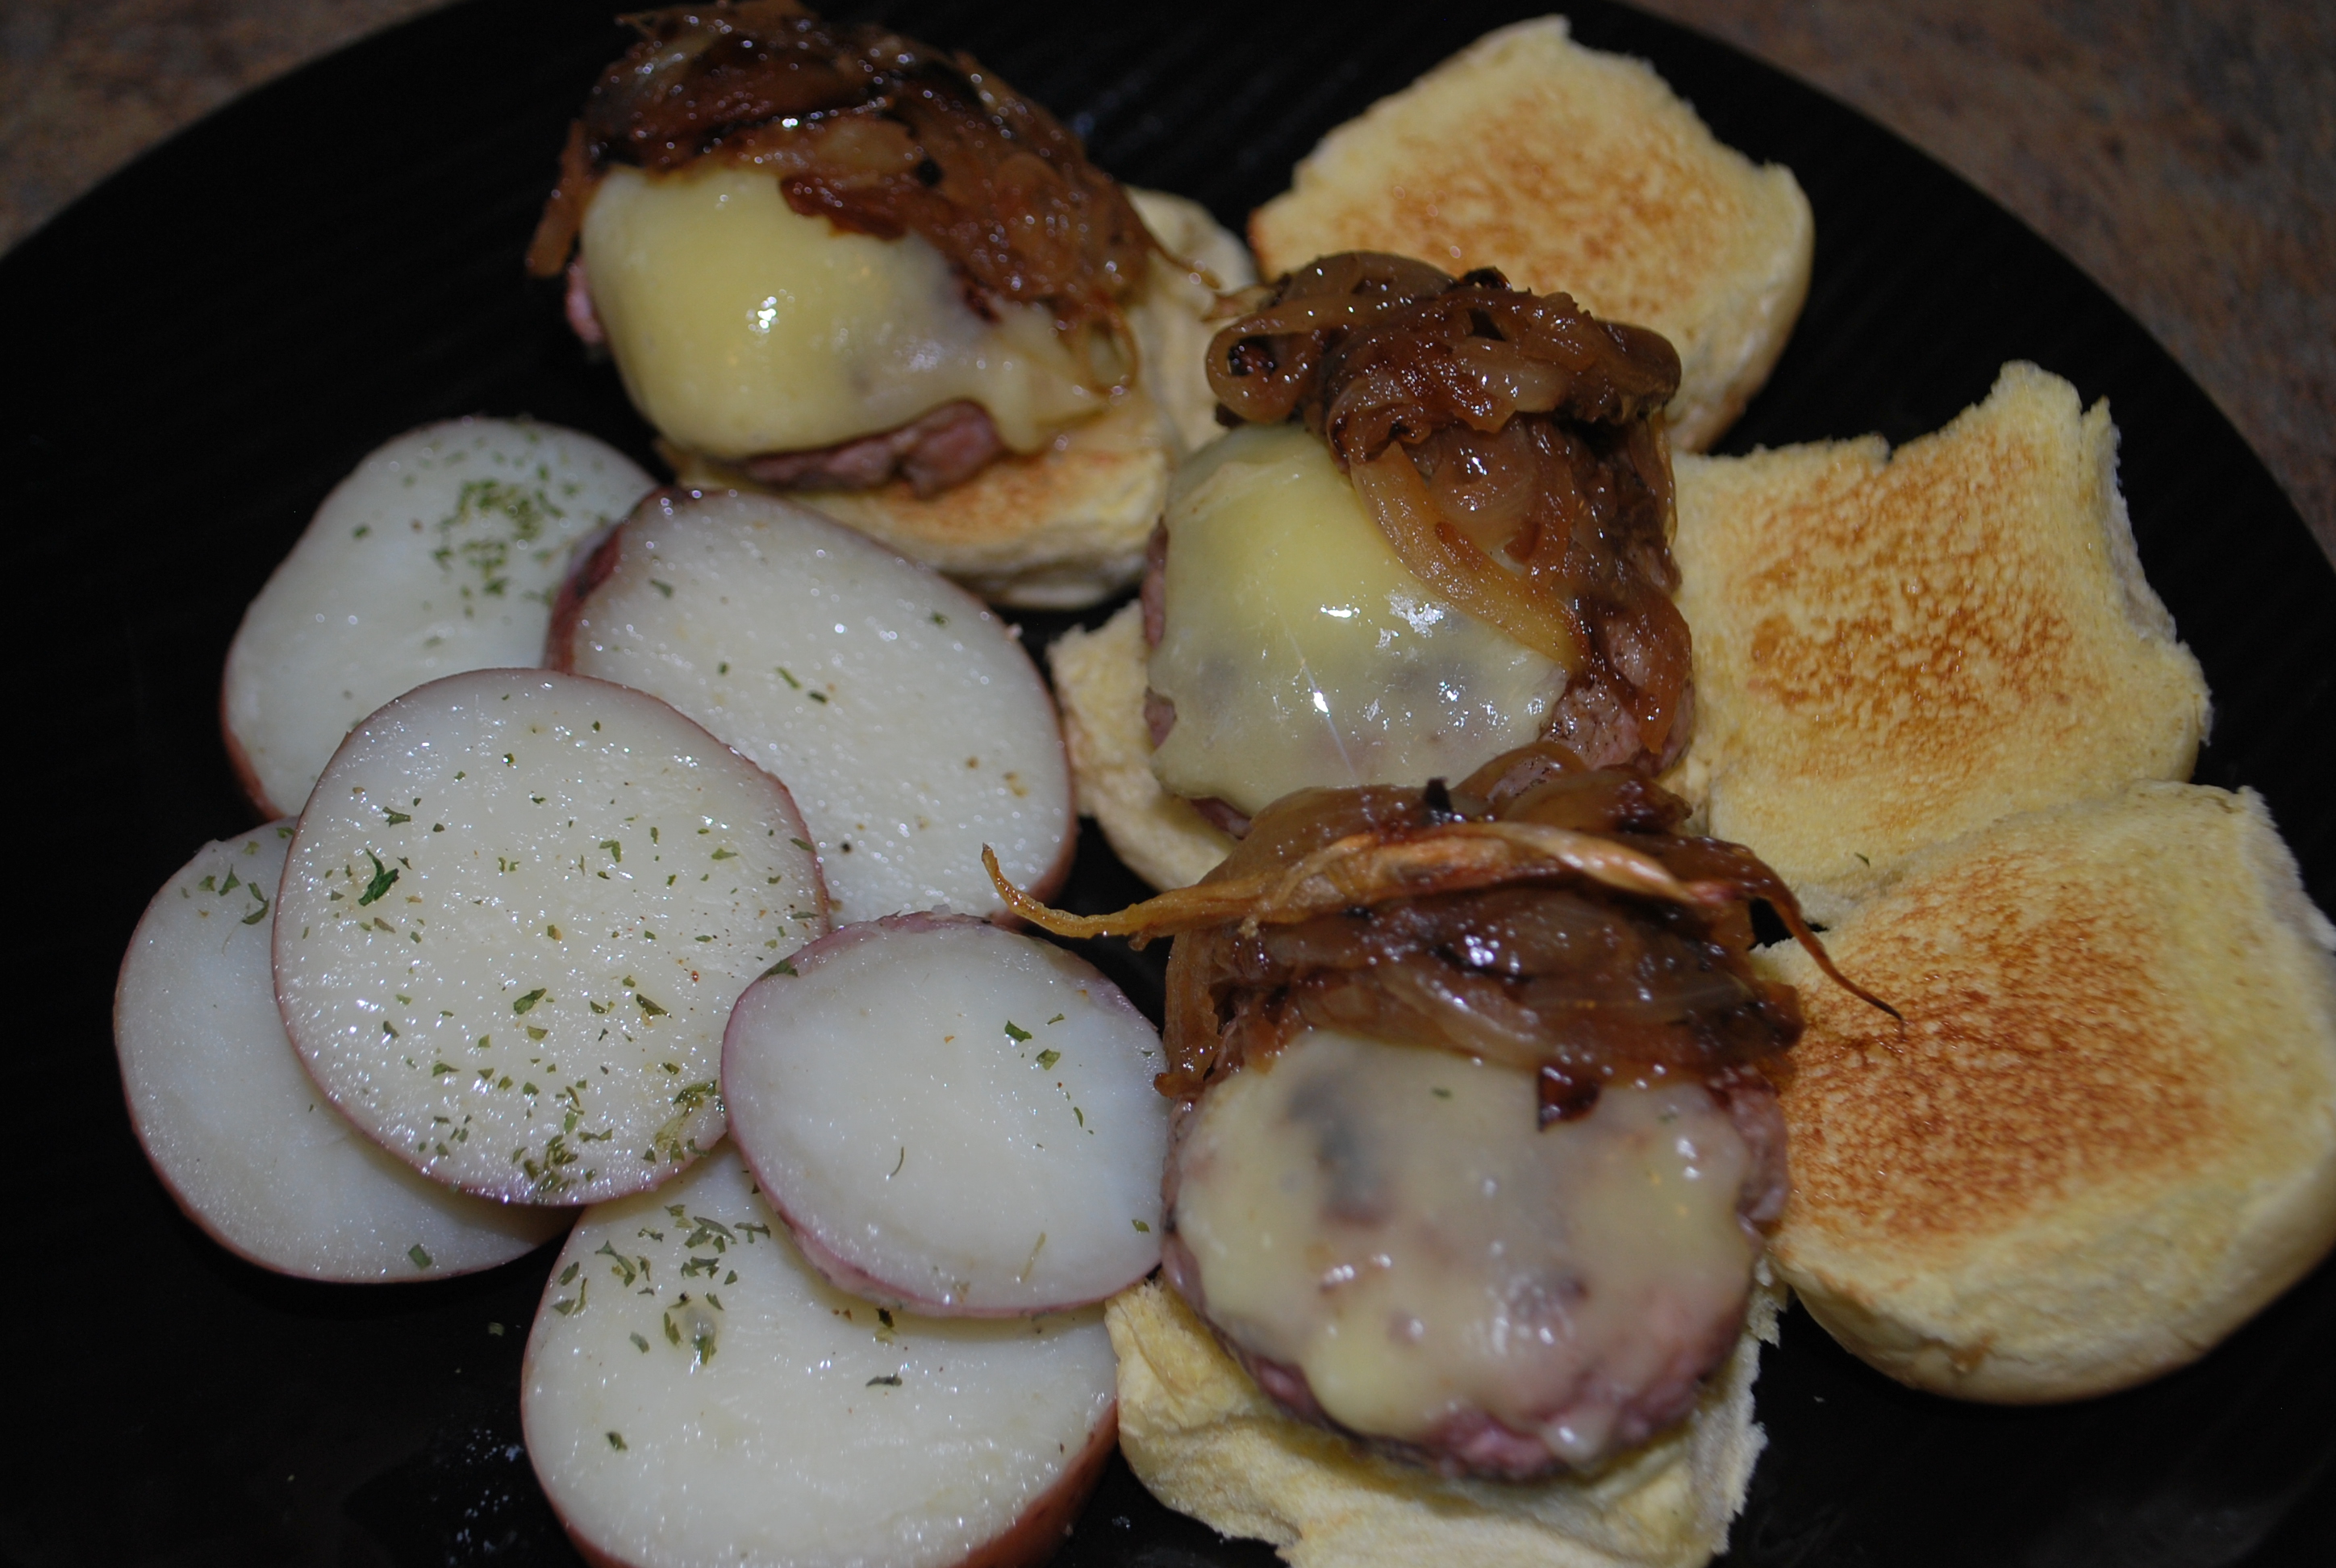
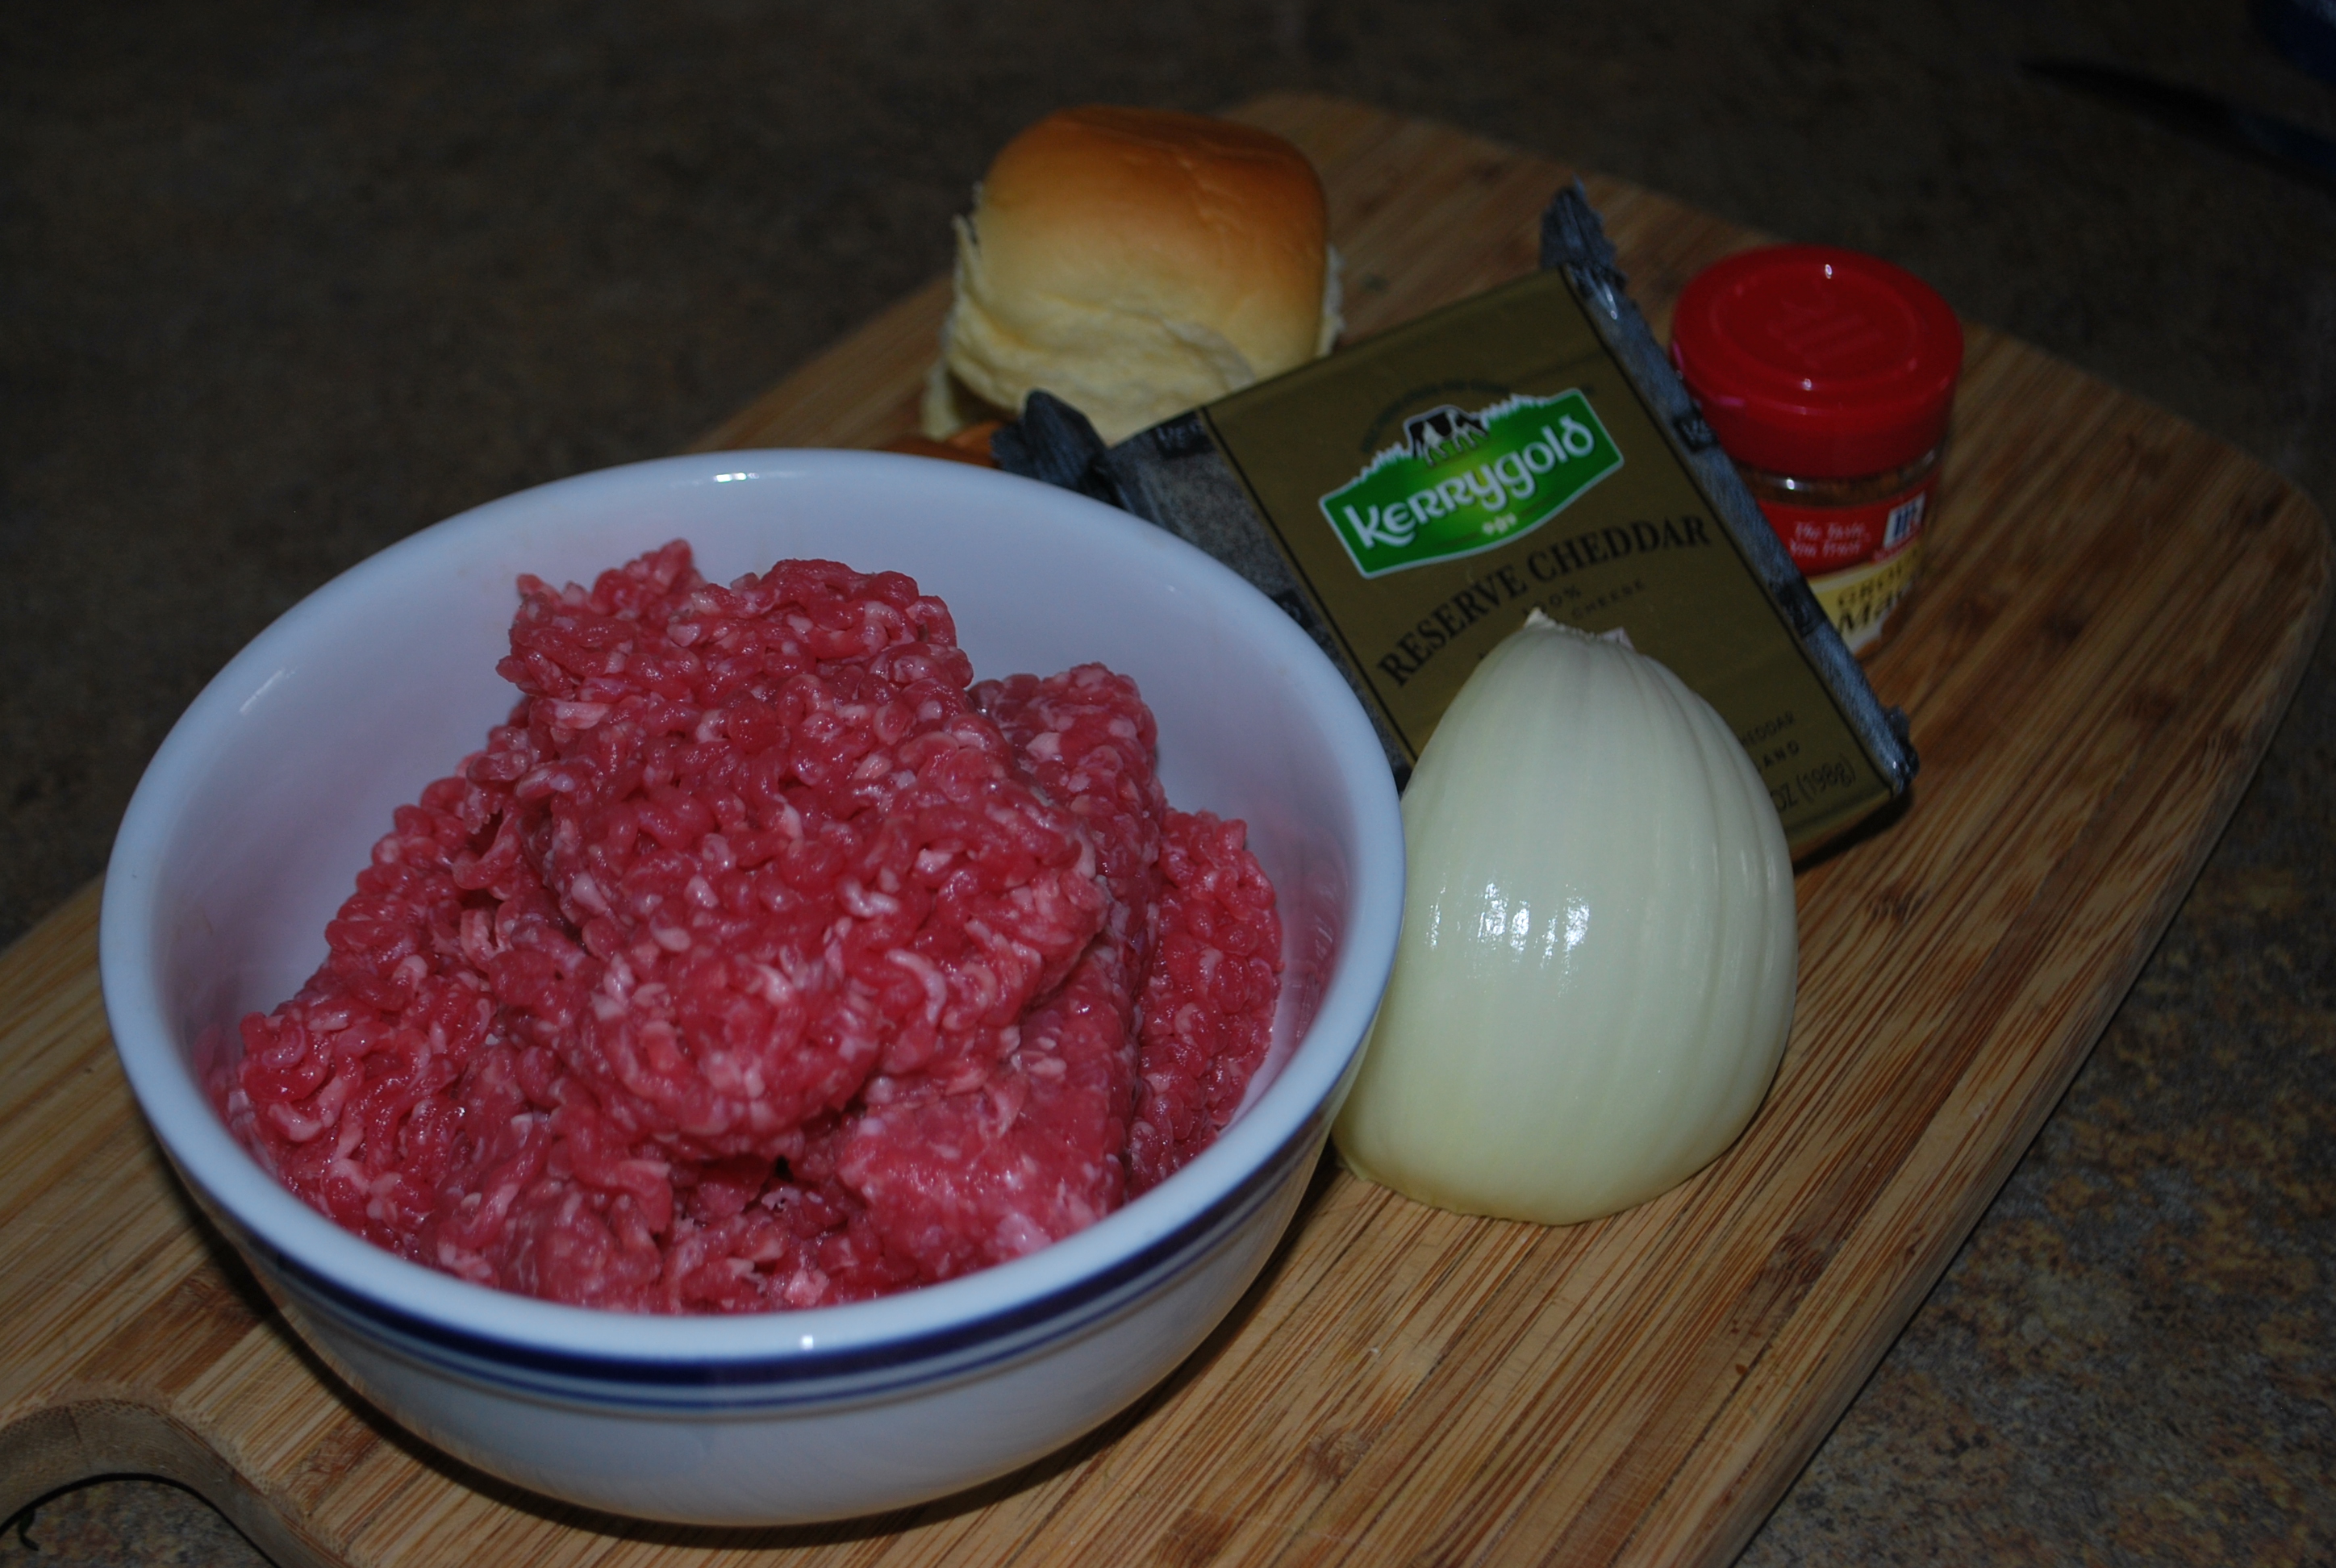
DSC_0501

    • 1 lb. ground pork
    • 1 tbsp. ground mace
    • 1 tbsp. granulated garlic
    • 8 party size potato rolls
    • 1 medium onion, julienne
    • 4 oz. Kerrygold cheddar (the REAL DEAL cheddar)DSC_0490
    1. Start up your broiler and set it to high.  We’re going ot use this to melt your cheese and toast your buns.  You might want to start a skillet on medium heat up too.
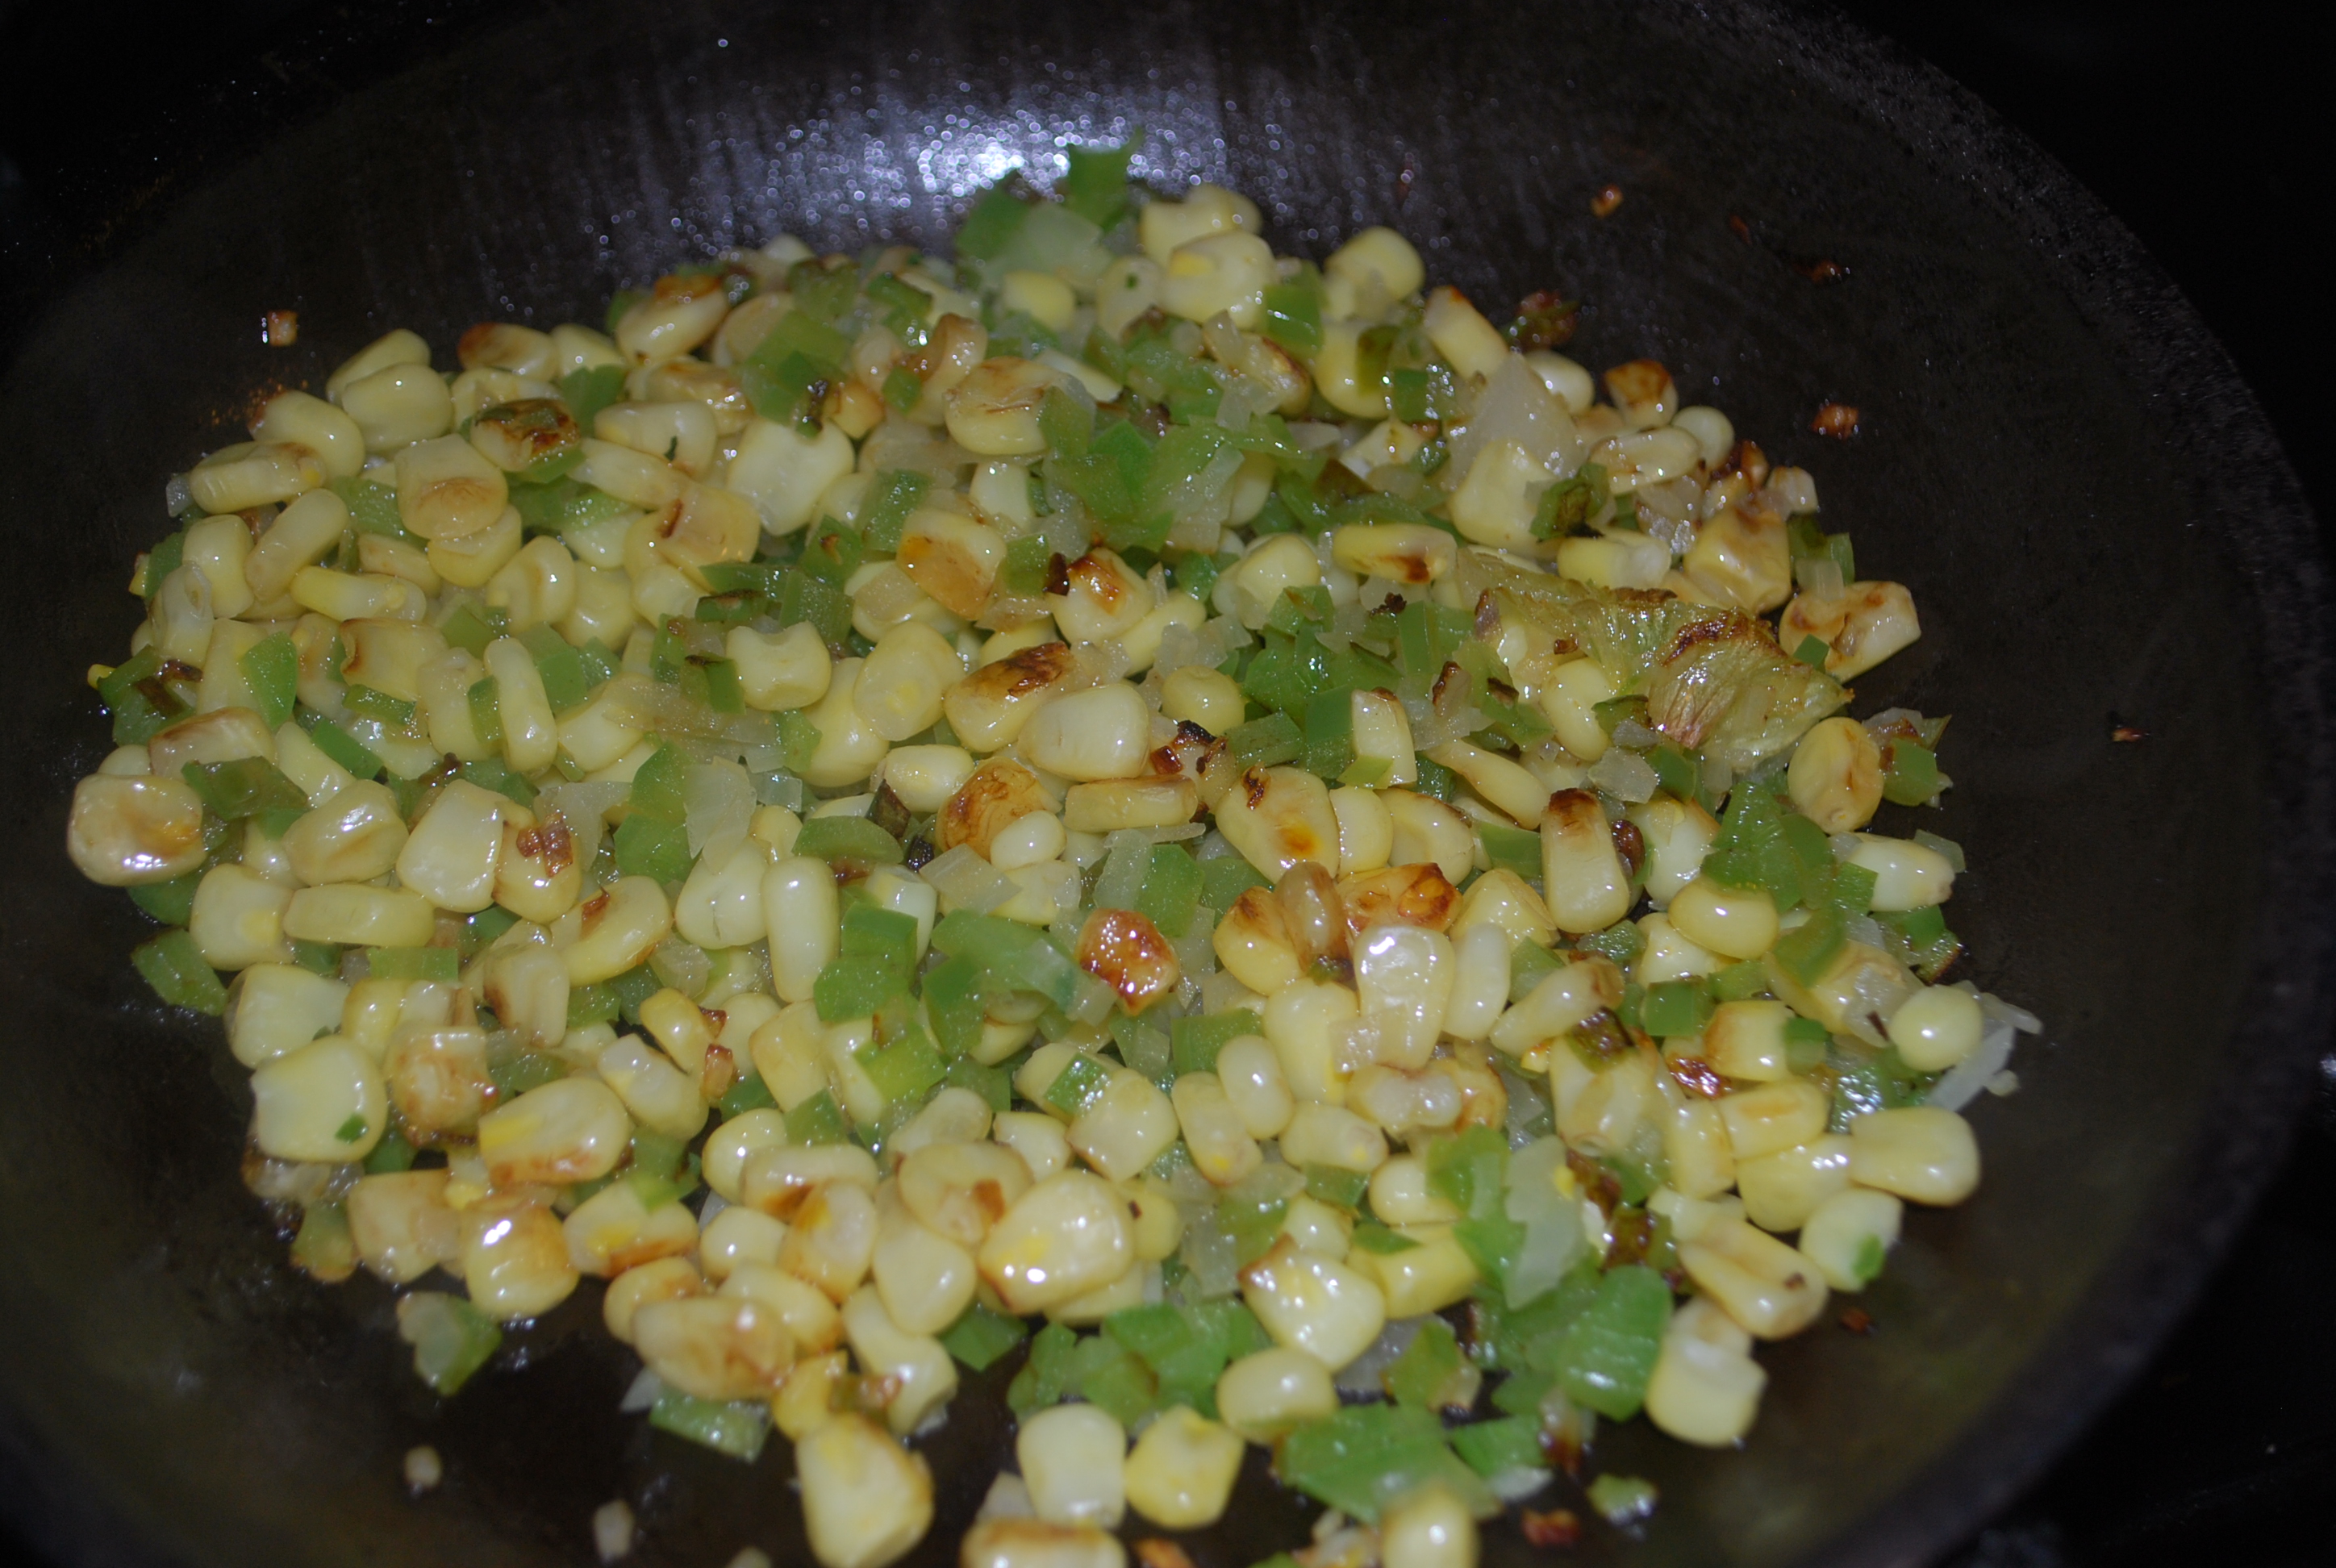
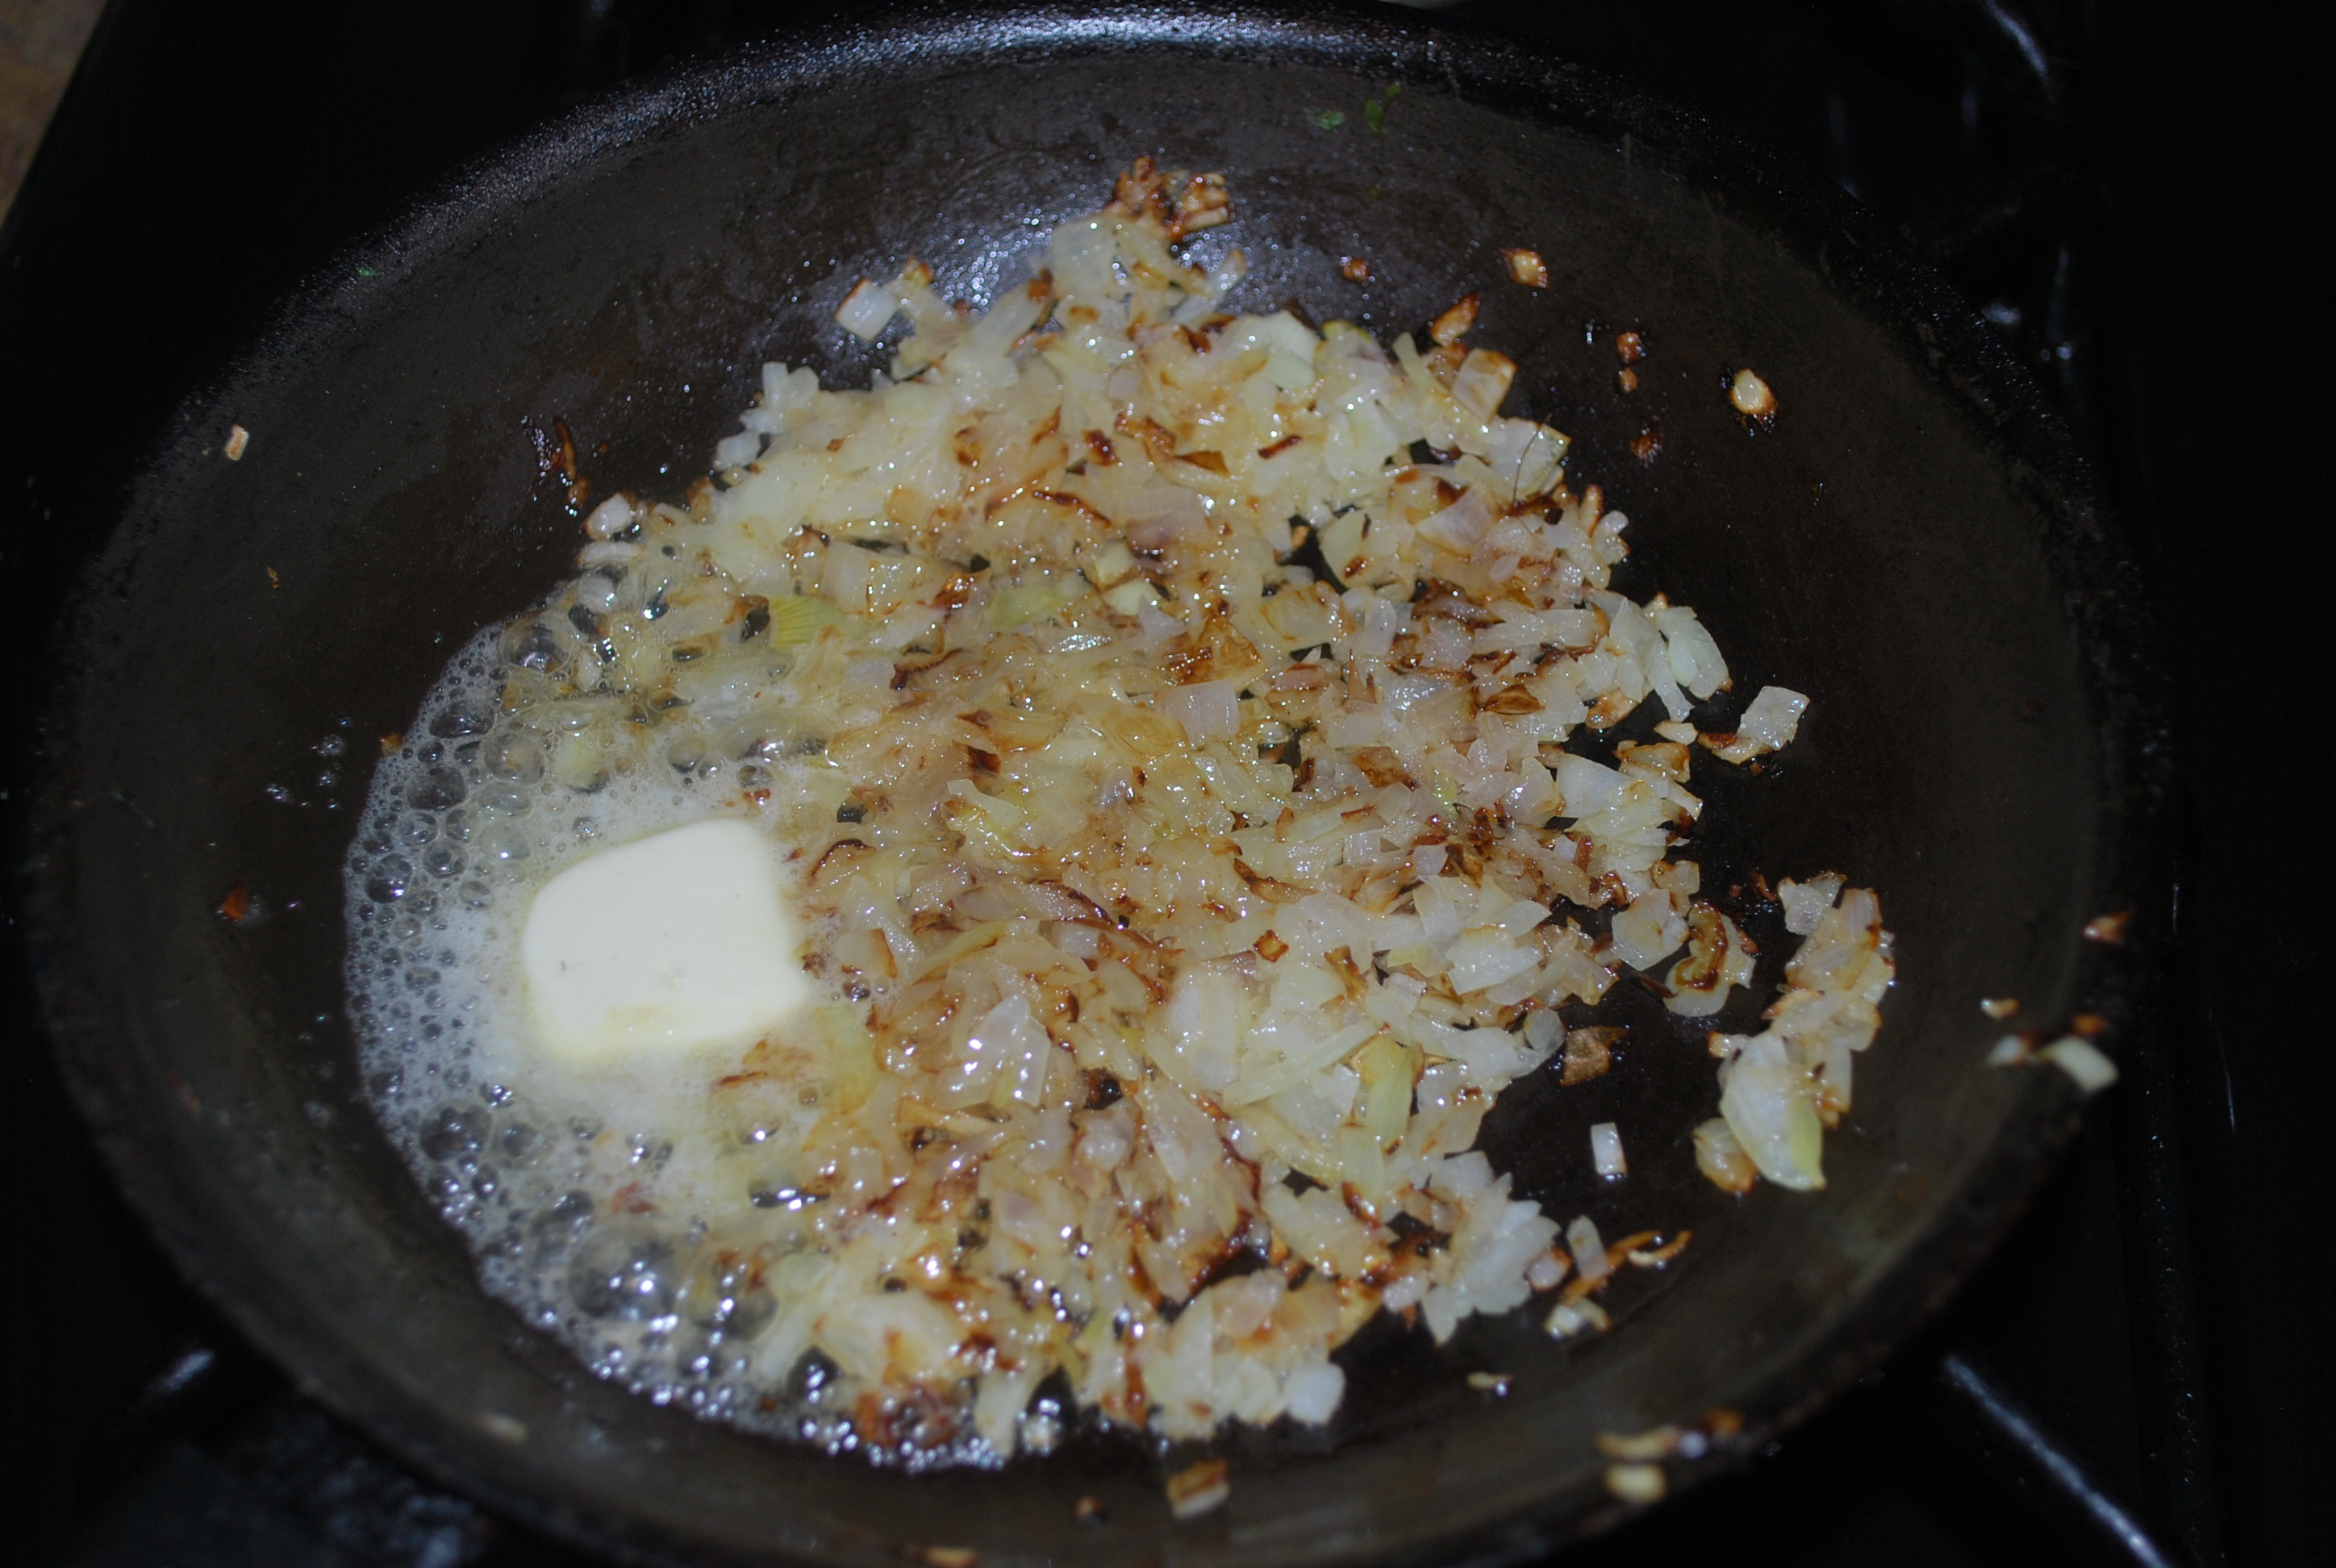
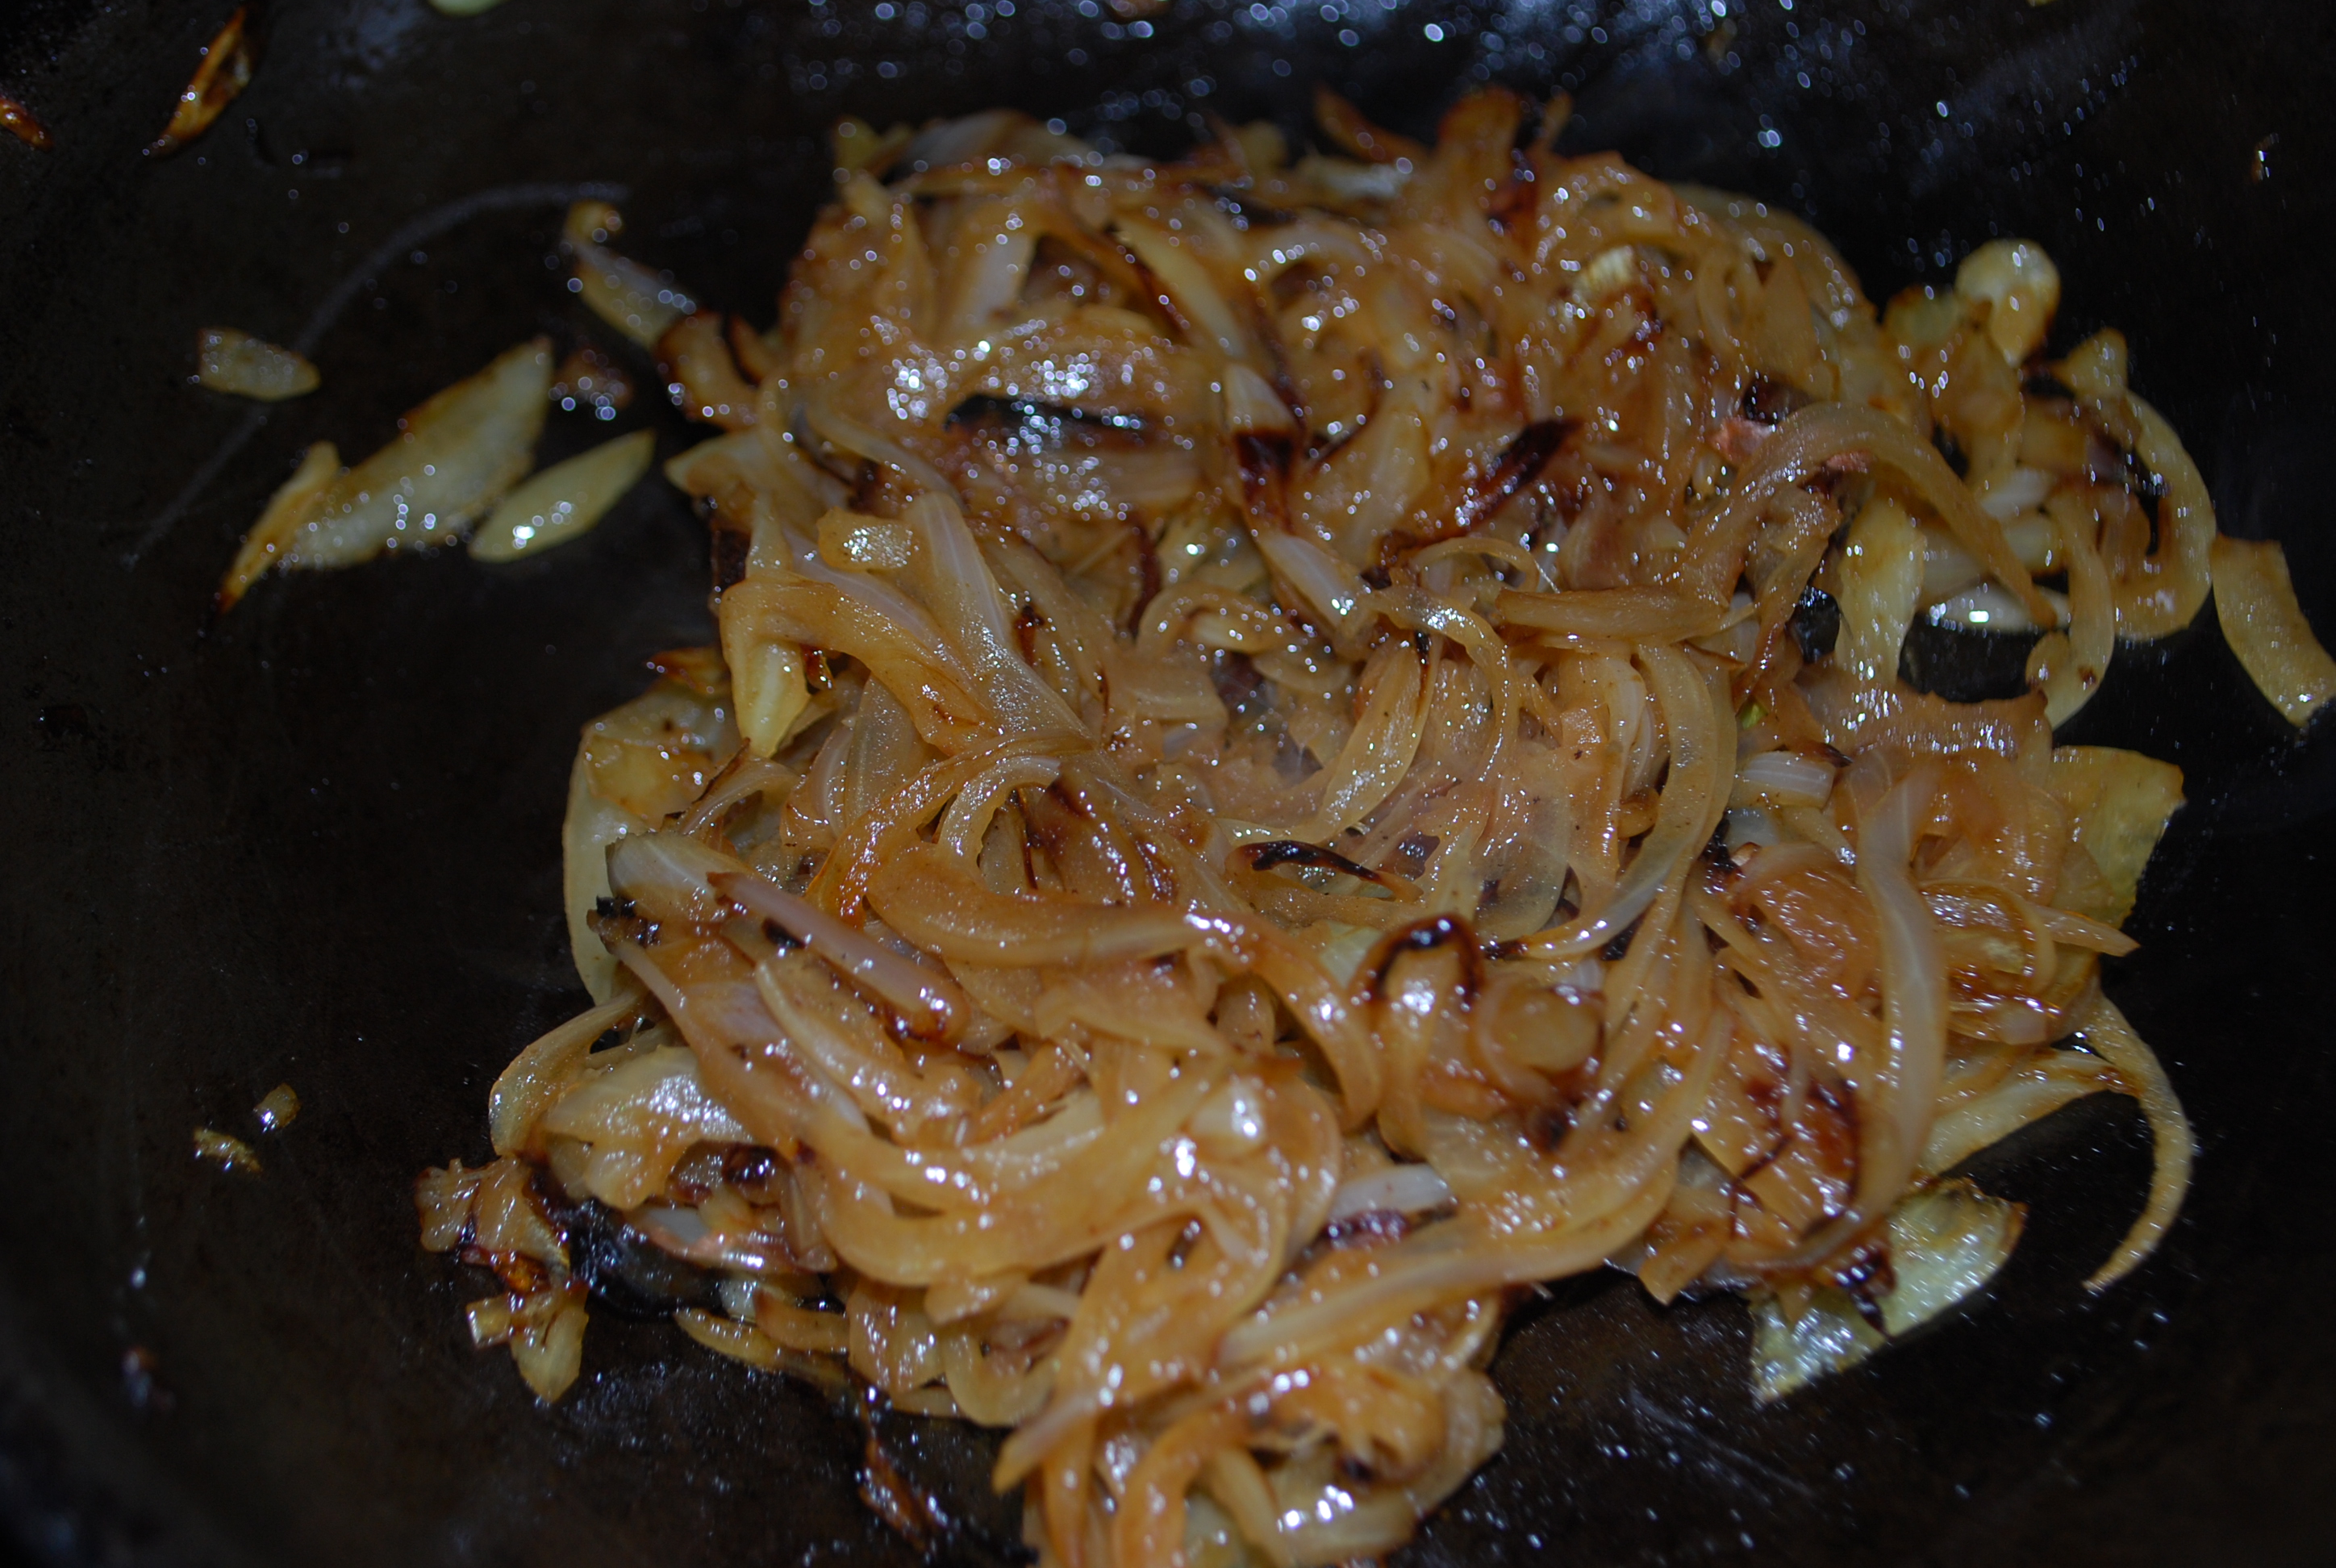
    2. Add some oil and a bit of butter to the skillet.  Let the butt melt and add the onions.  Cook these down slowly, stirring every few minutes.  While these are going, it’s time to start on the meat.
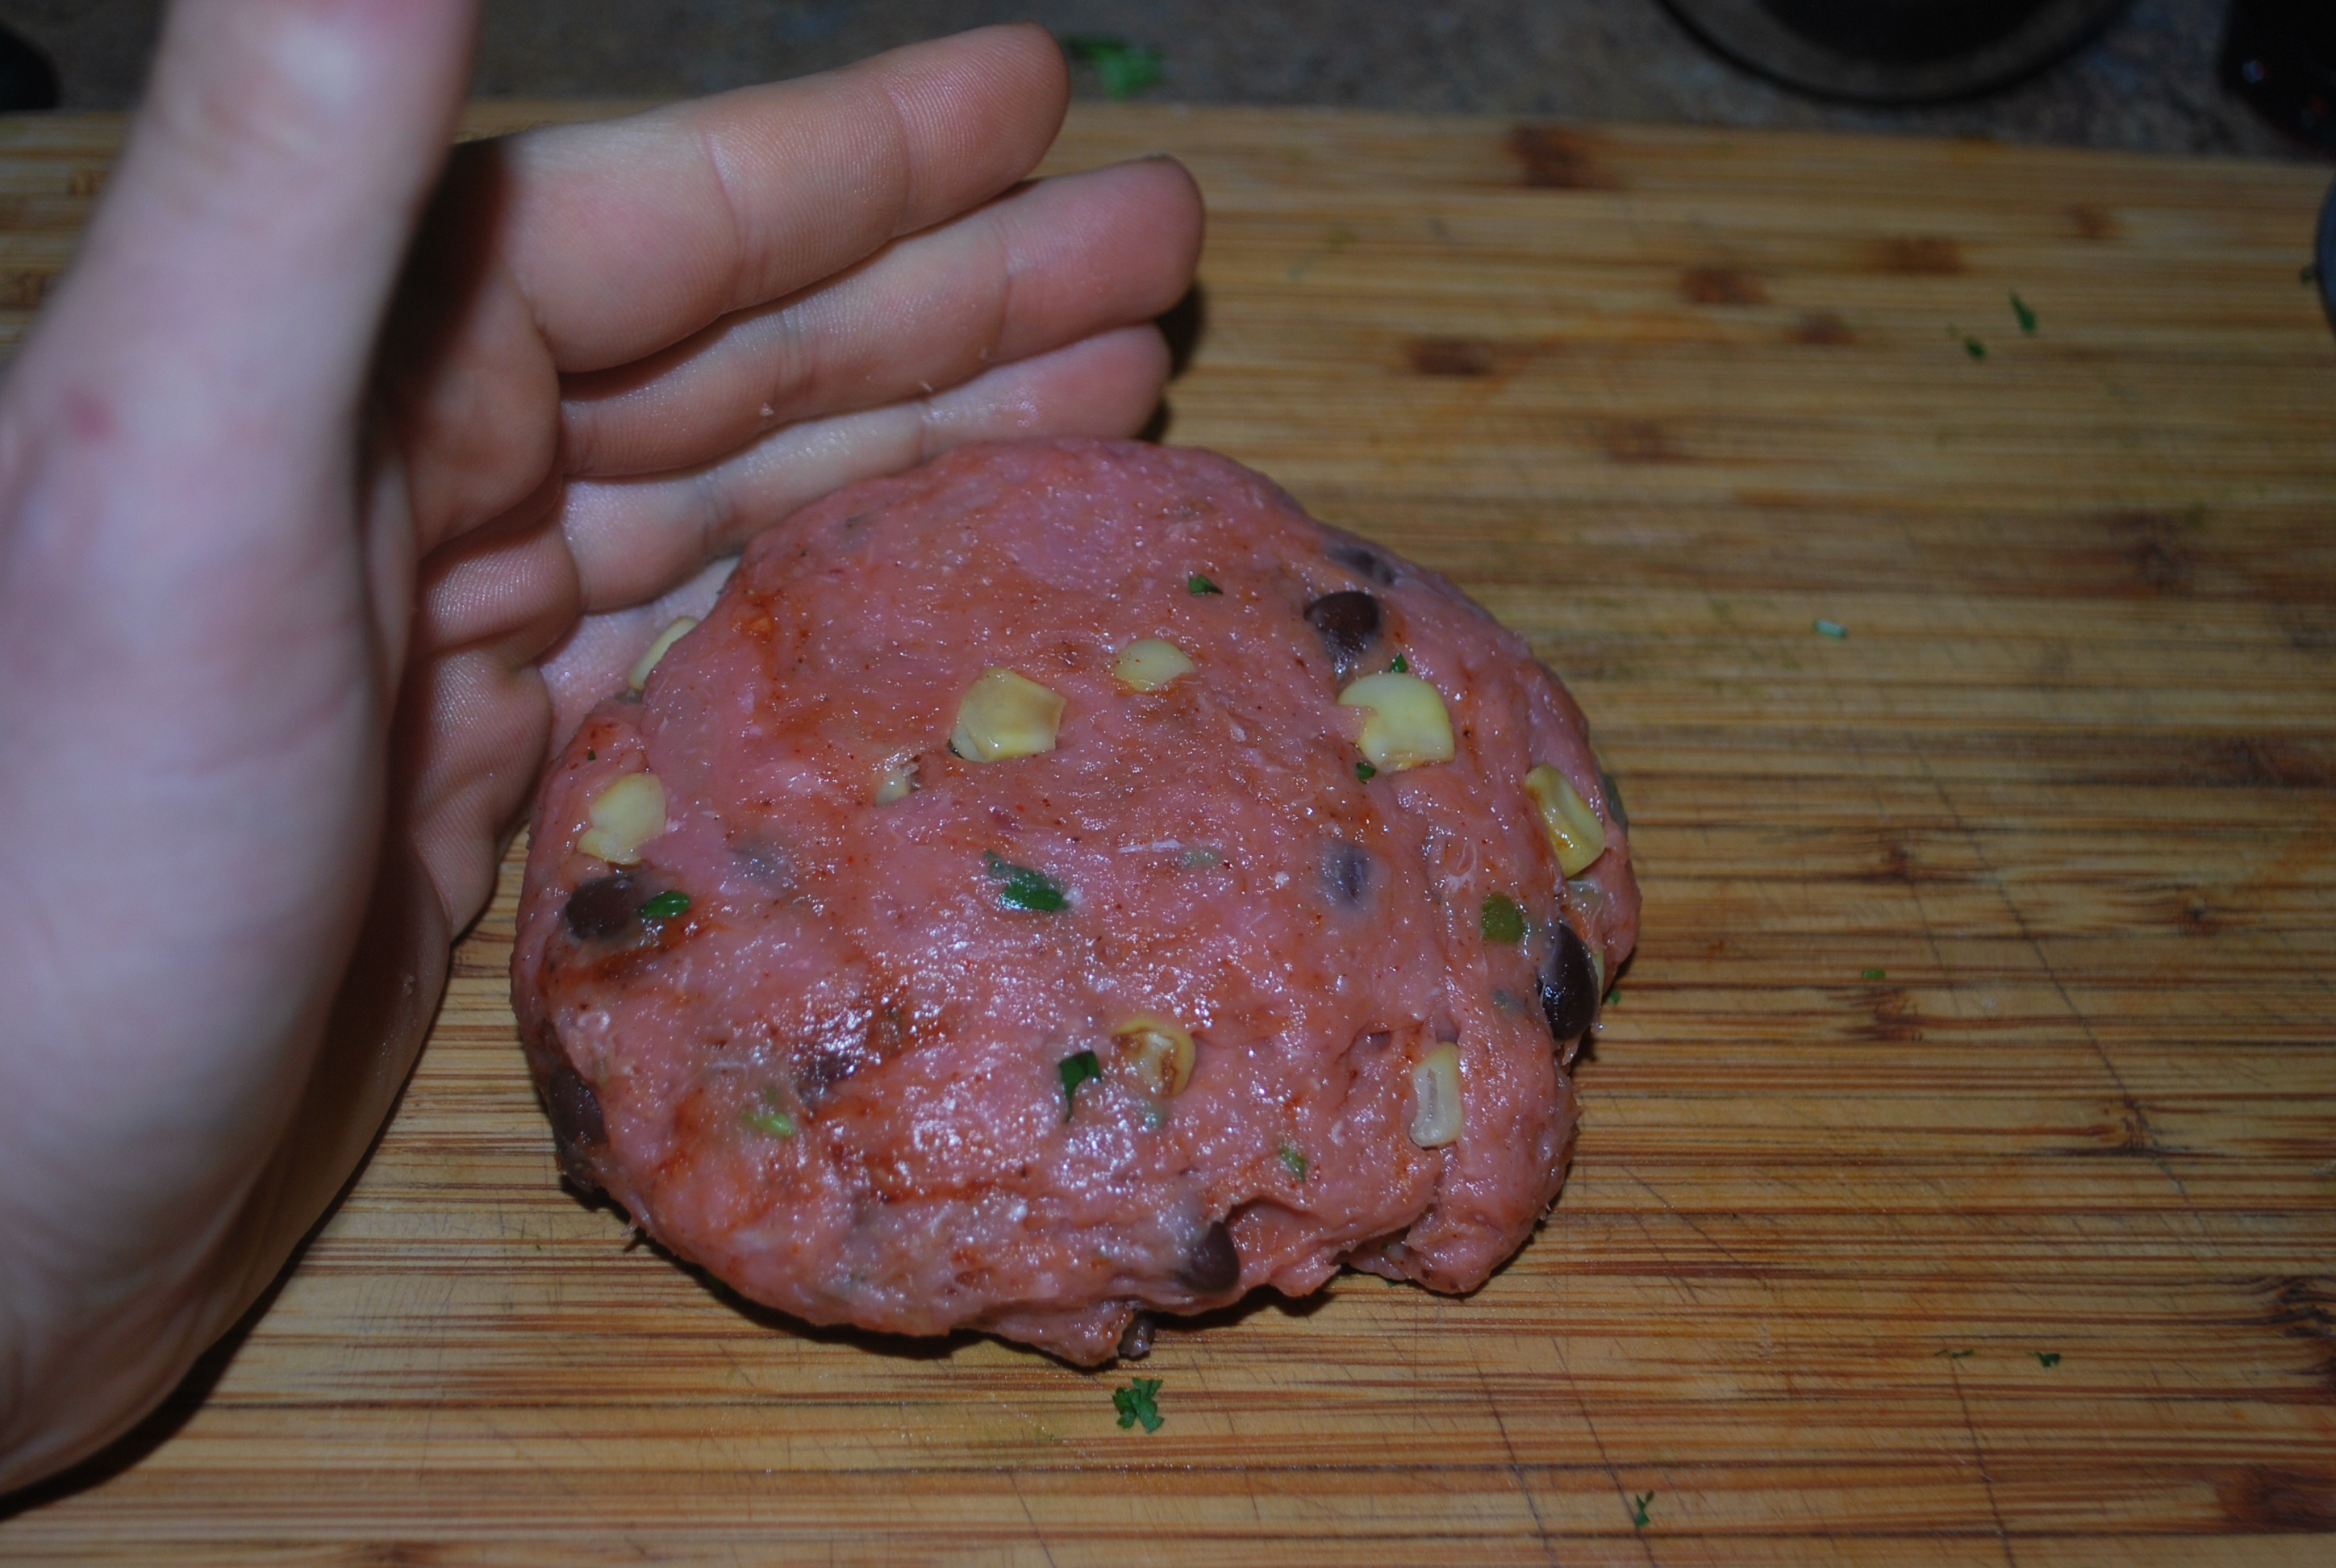
      mmm...onions...
      mmm…onions…
    3. Add the mace and garlic powder to the pork, along with some salt and pepper.  Mix this well and form the meat into 8, 2 oz. patties. Set these in the fridge for a few minutes to set up.
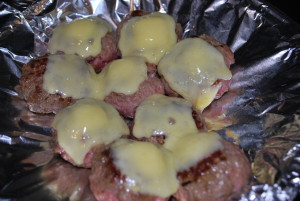
    4. Heat up a cast iron skillet for the bangers and sear them hard for about 2 minutes on each side.  As they finish searing, set them aside on a try and place about 1/2 inch slice of the kerrygold on top.
    5. Place the sliders and the buns under the broiler.  Just be sure to toast the buns, and melt the cheddar.
    6. Assemble you sandwiches!!!!!  Set the bottom down, slider on top, then onions and top of the bun.DSC_0496

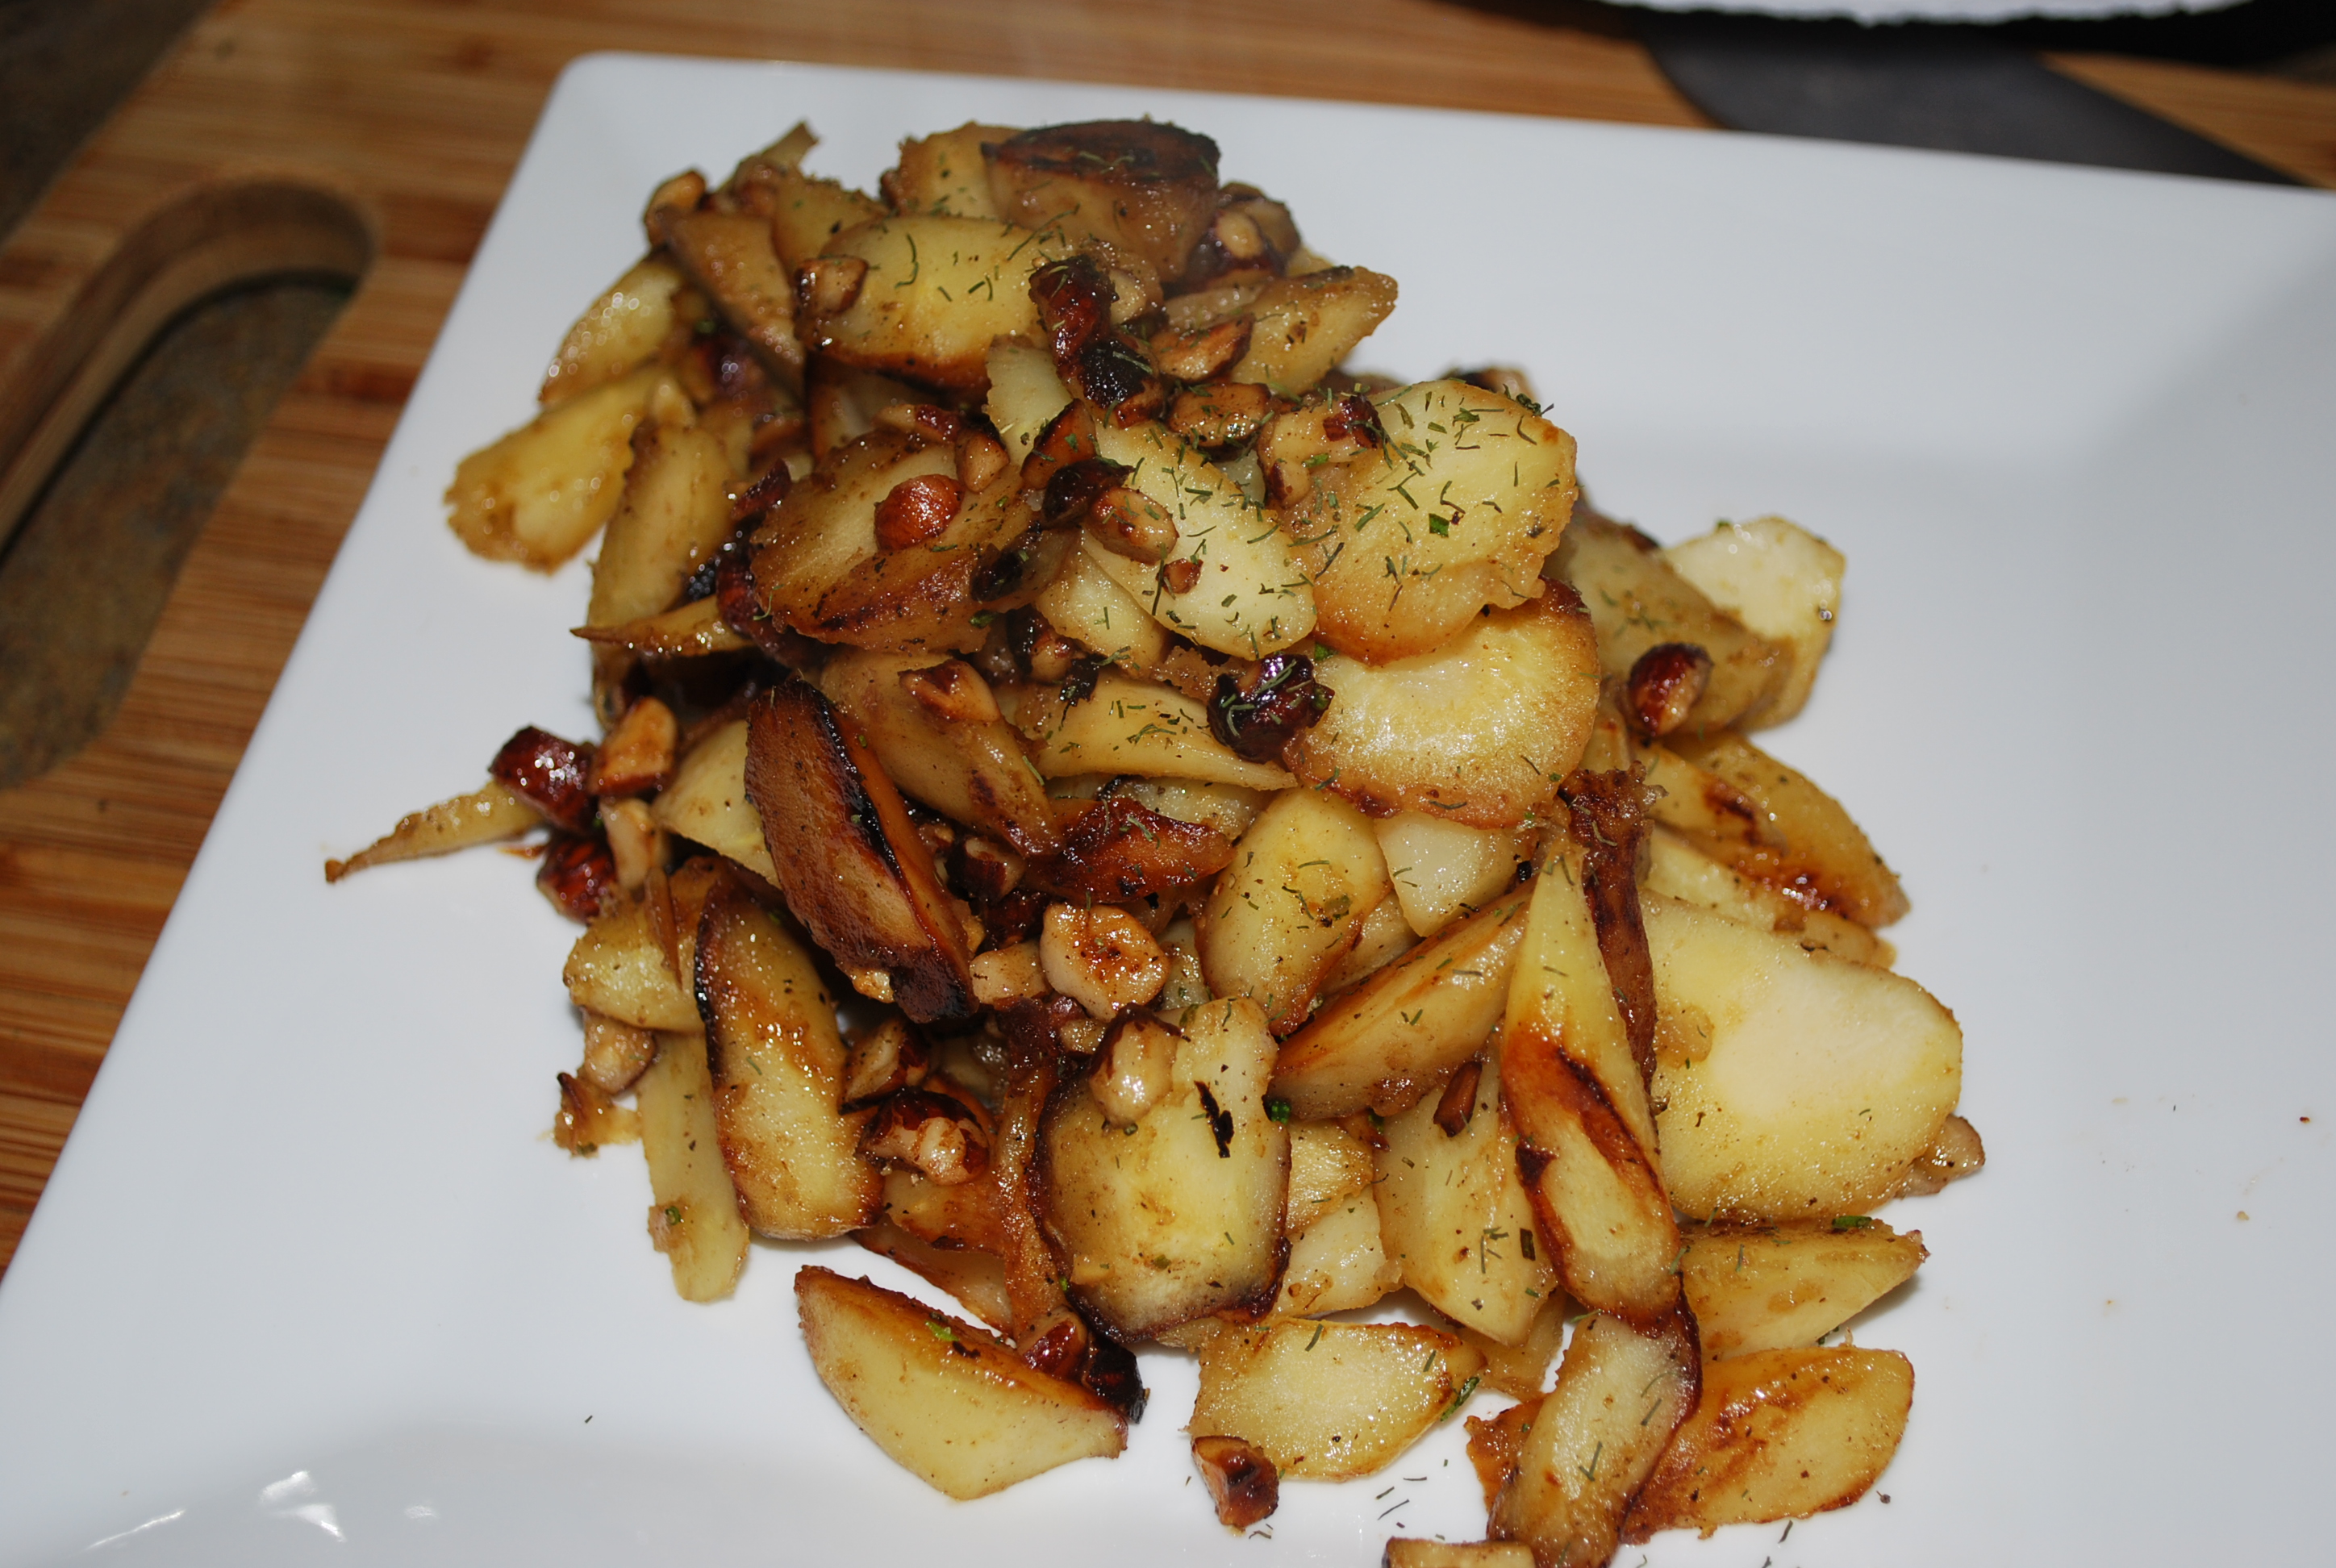
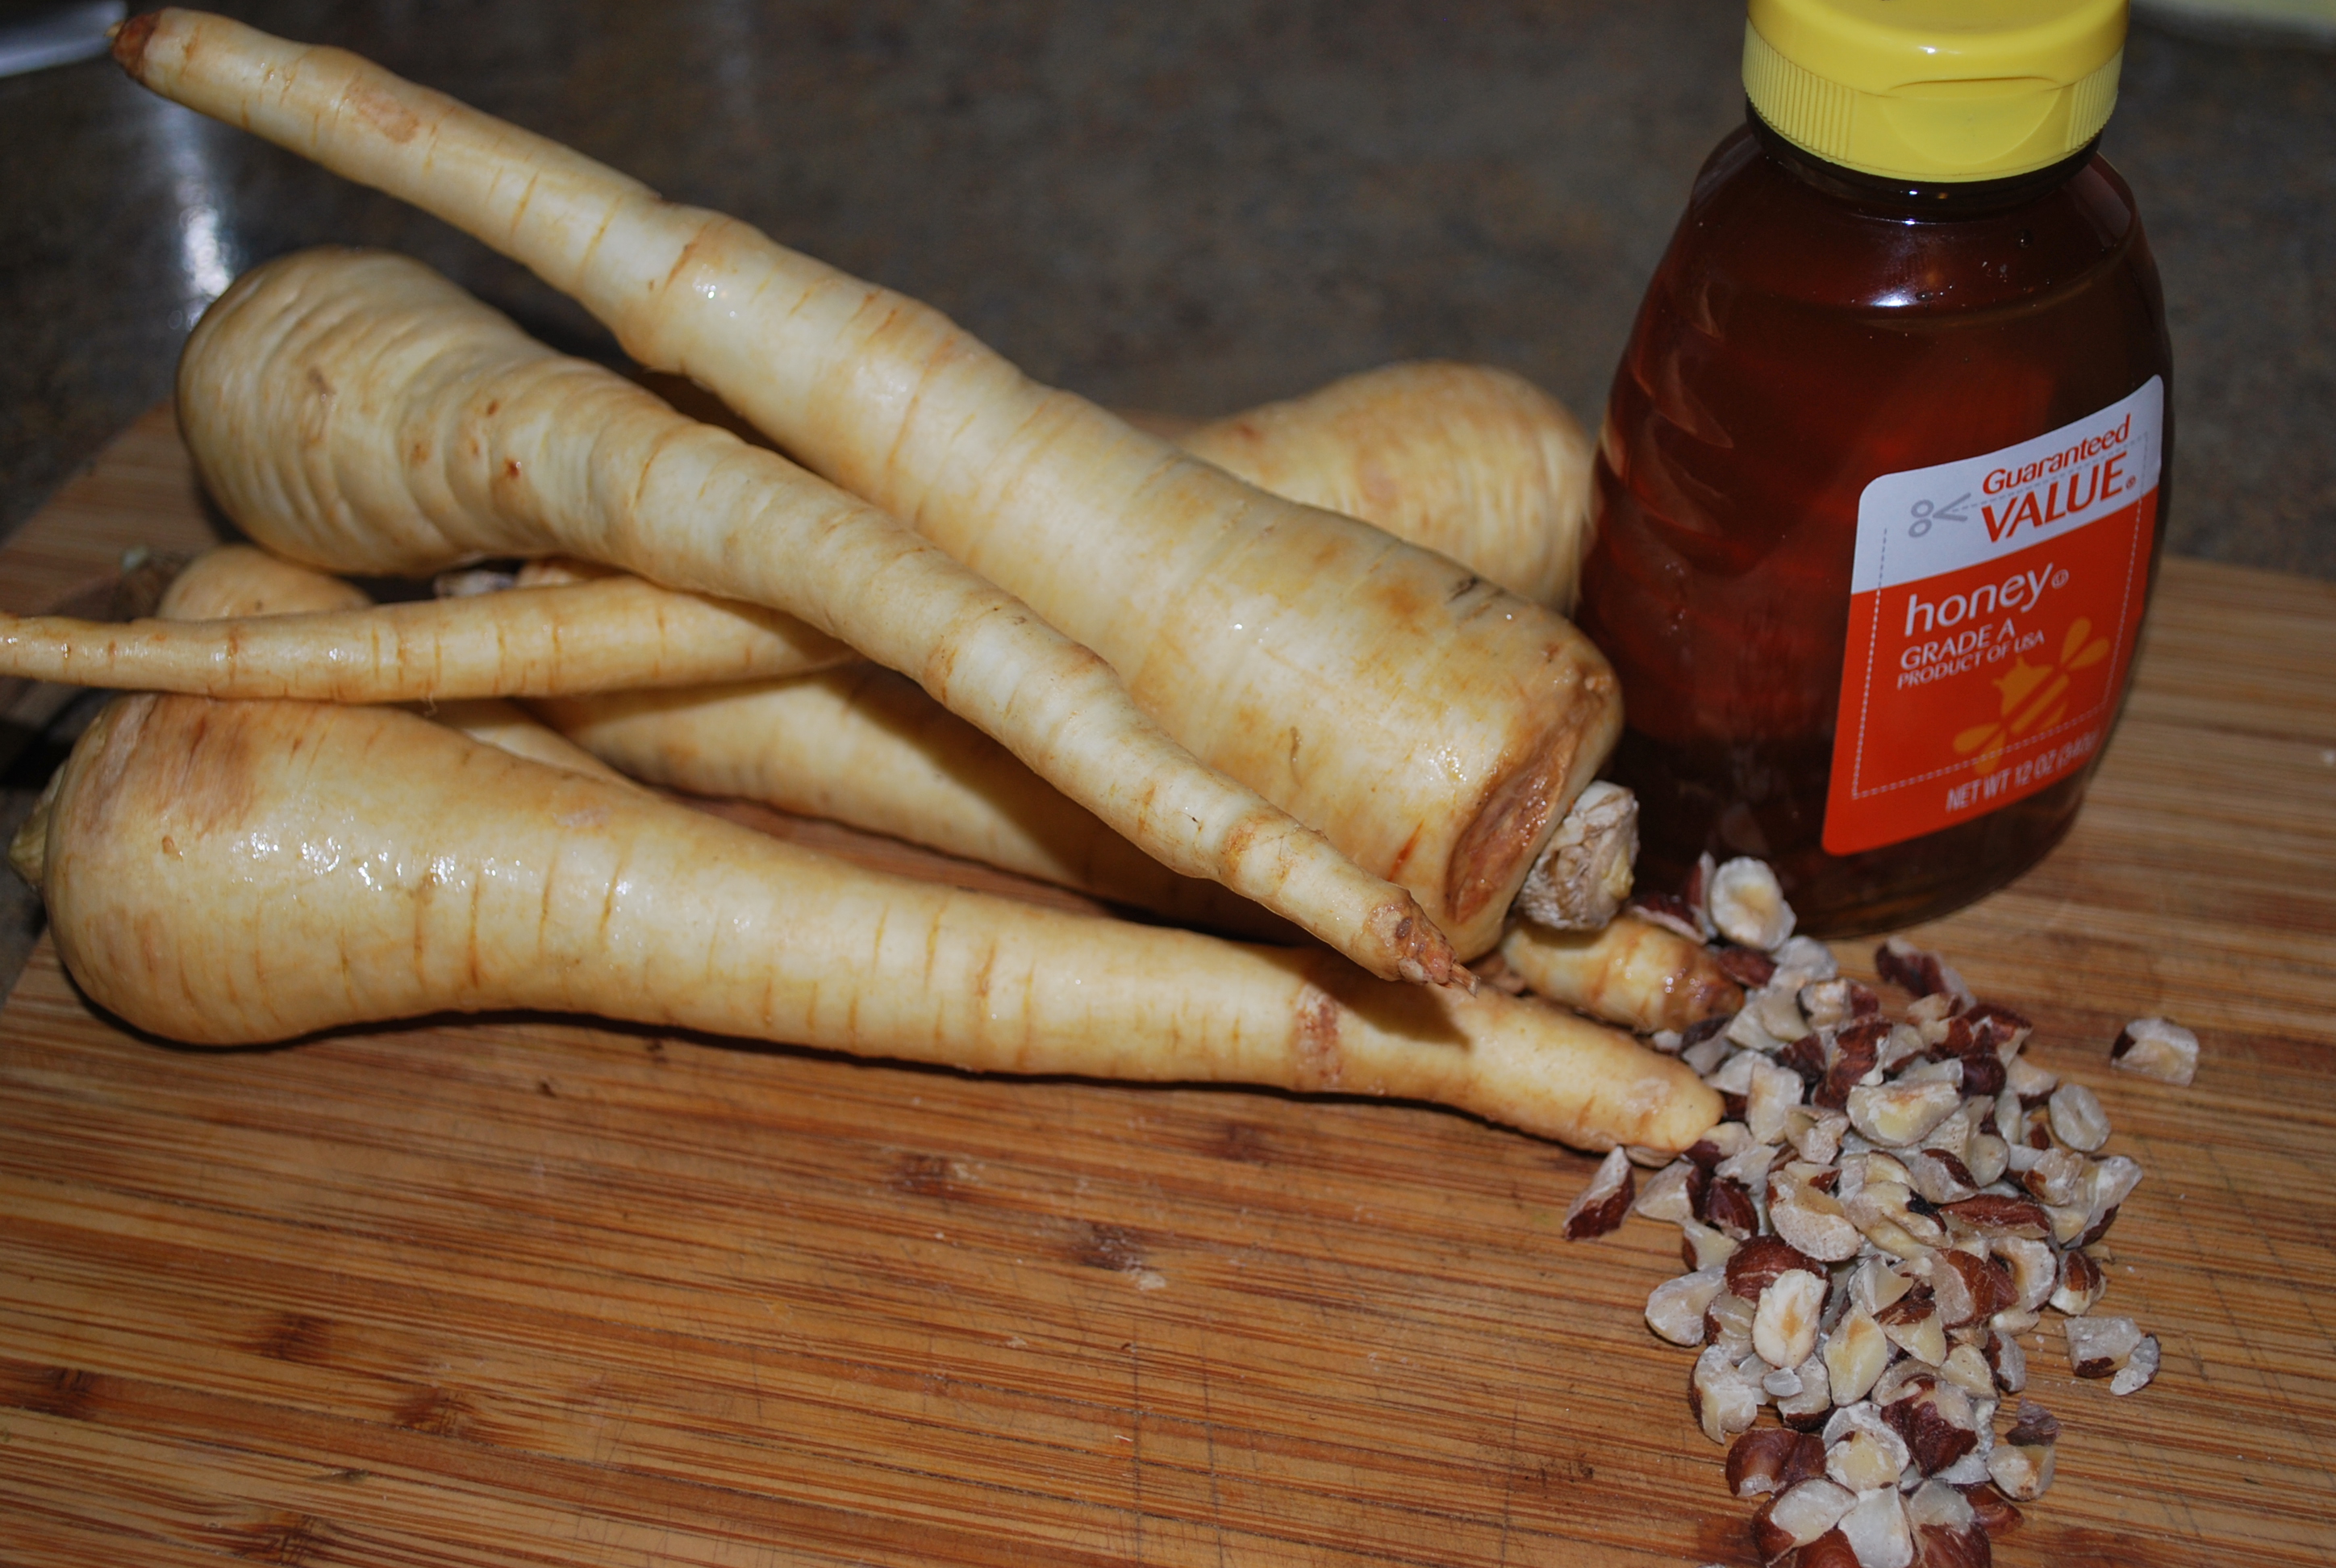
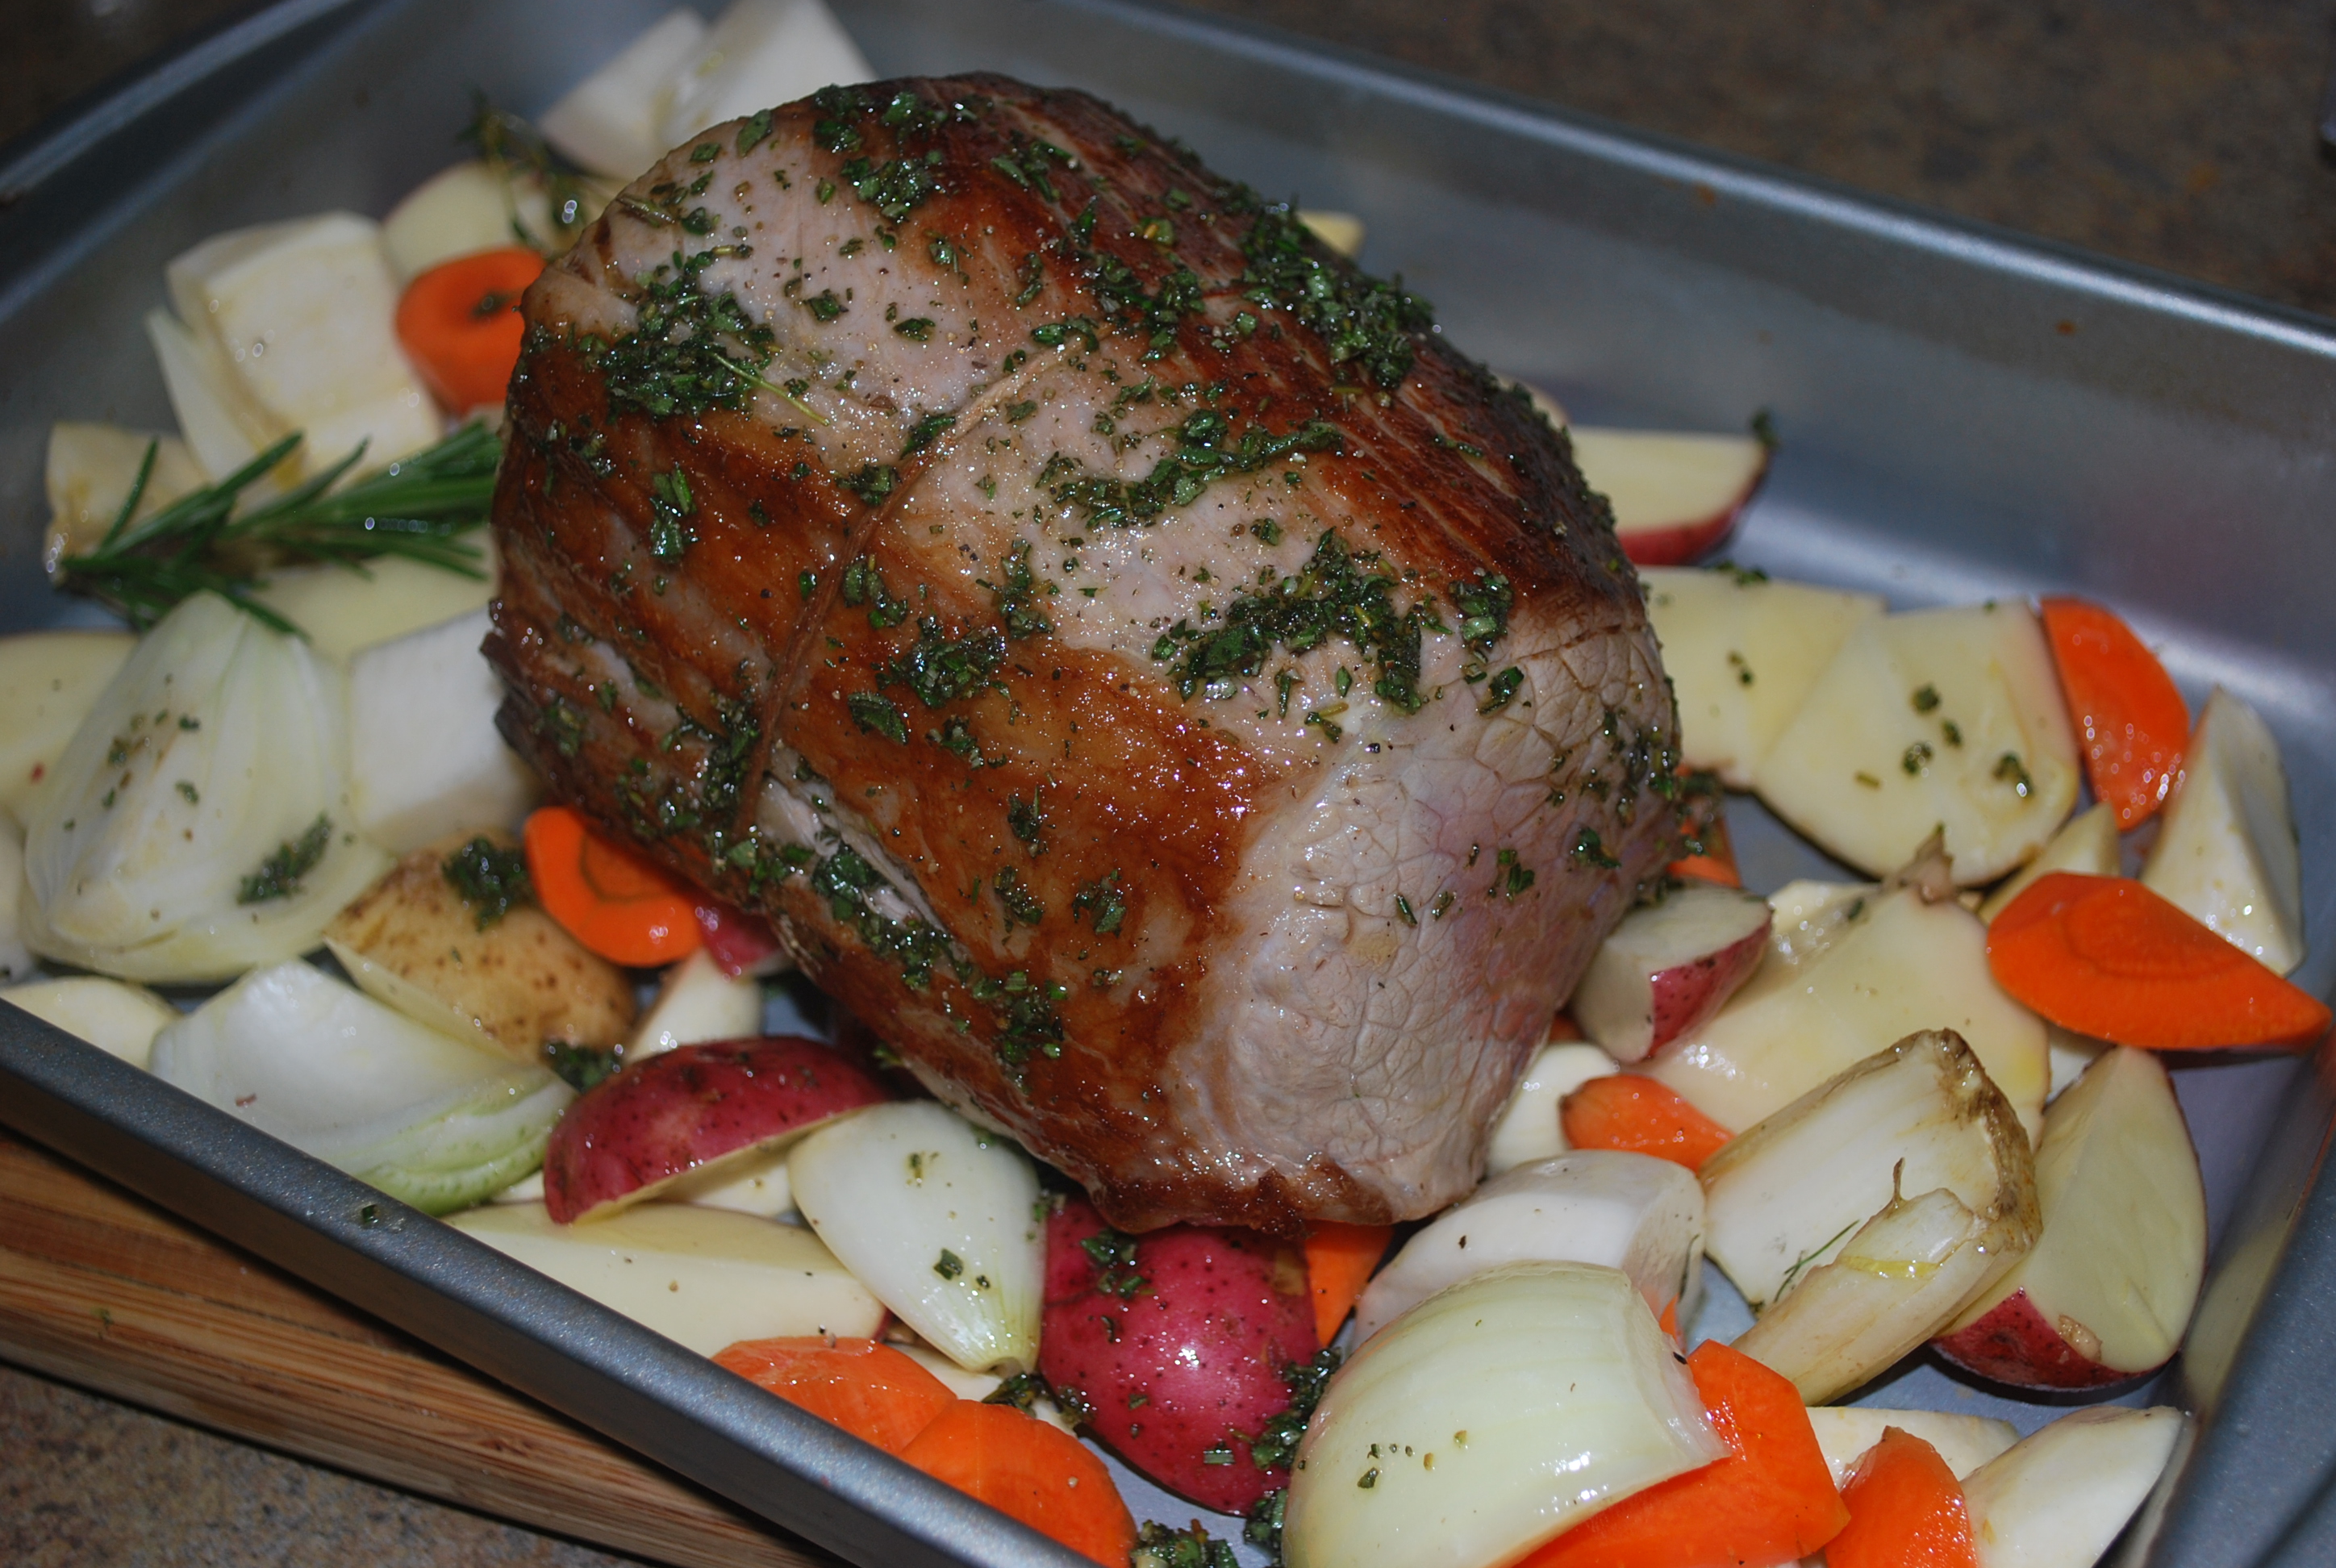
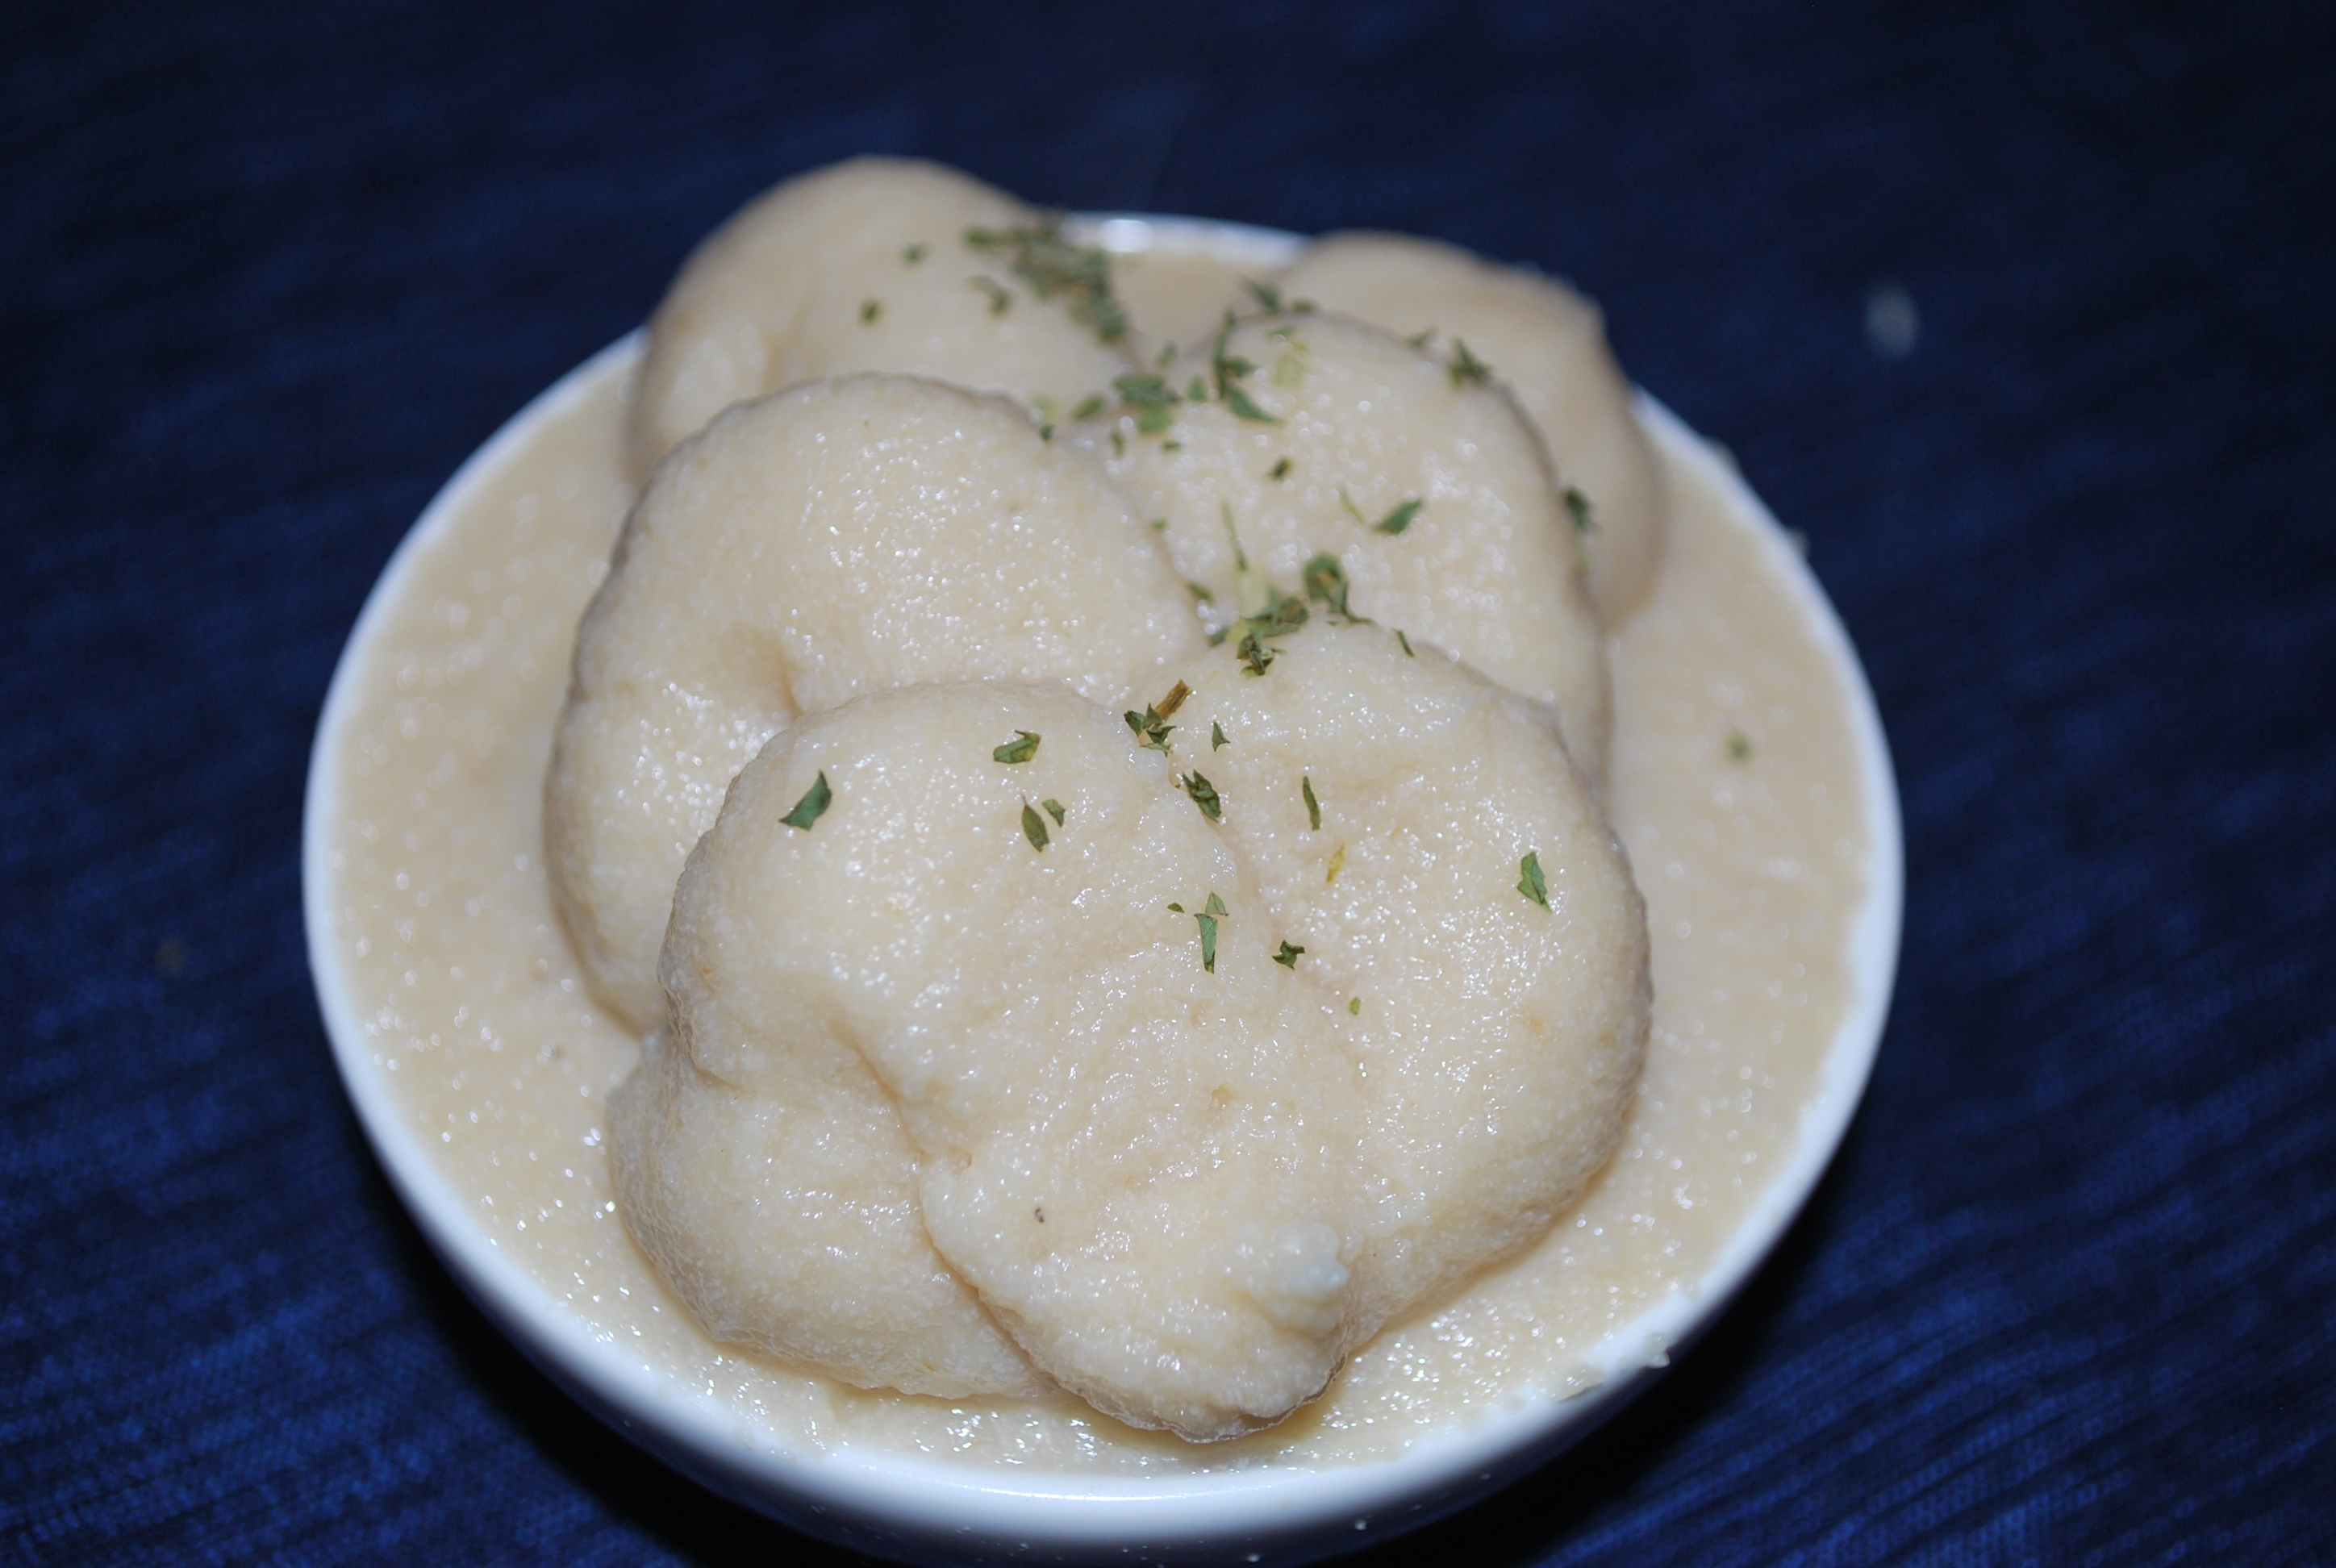
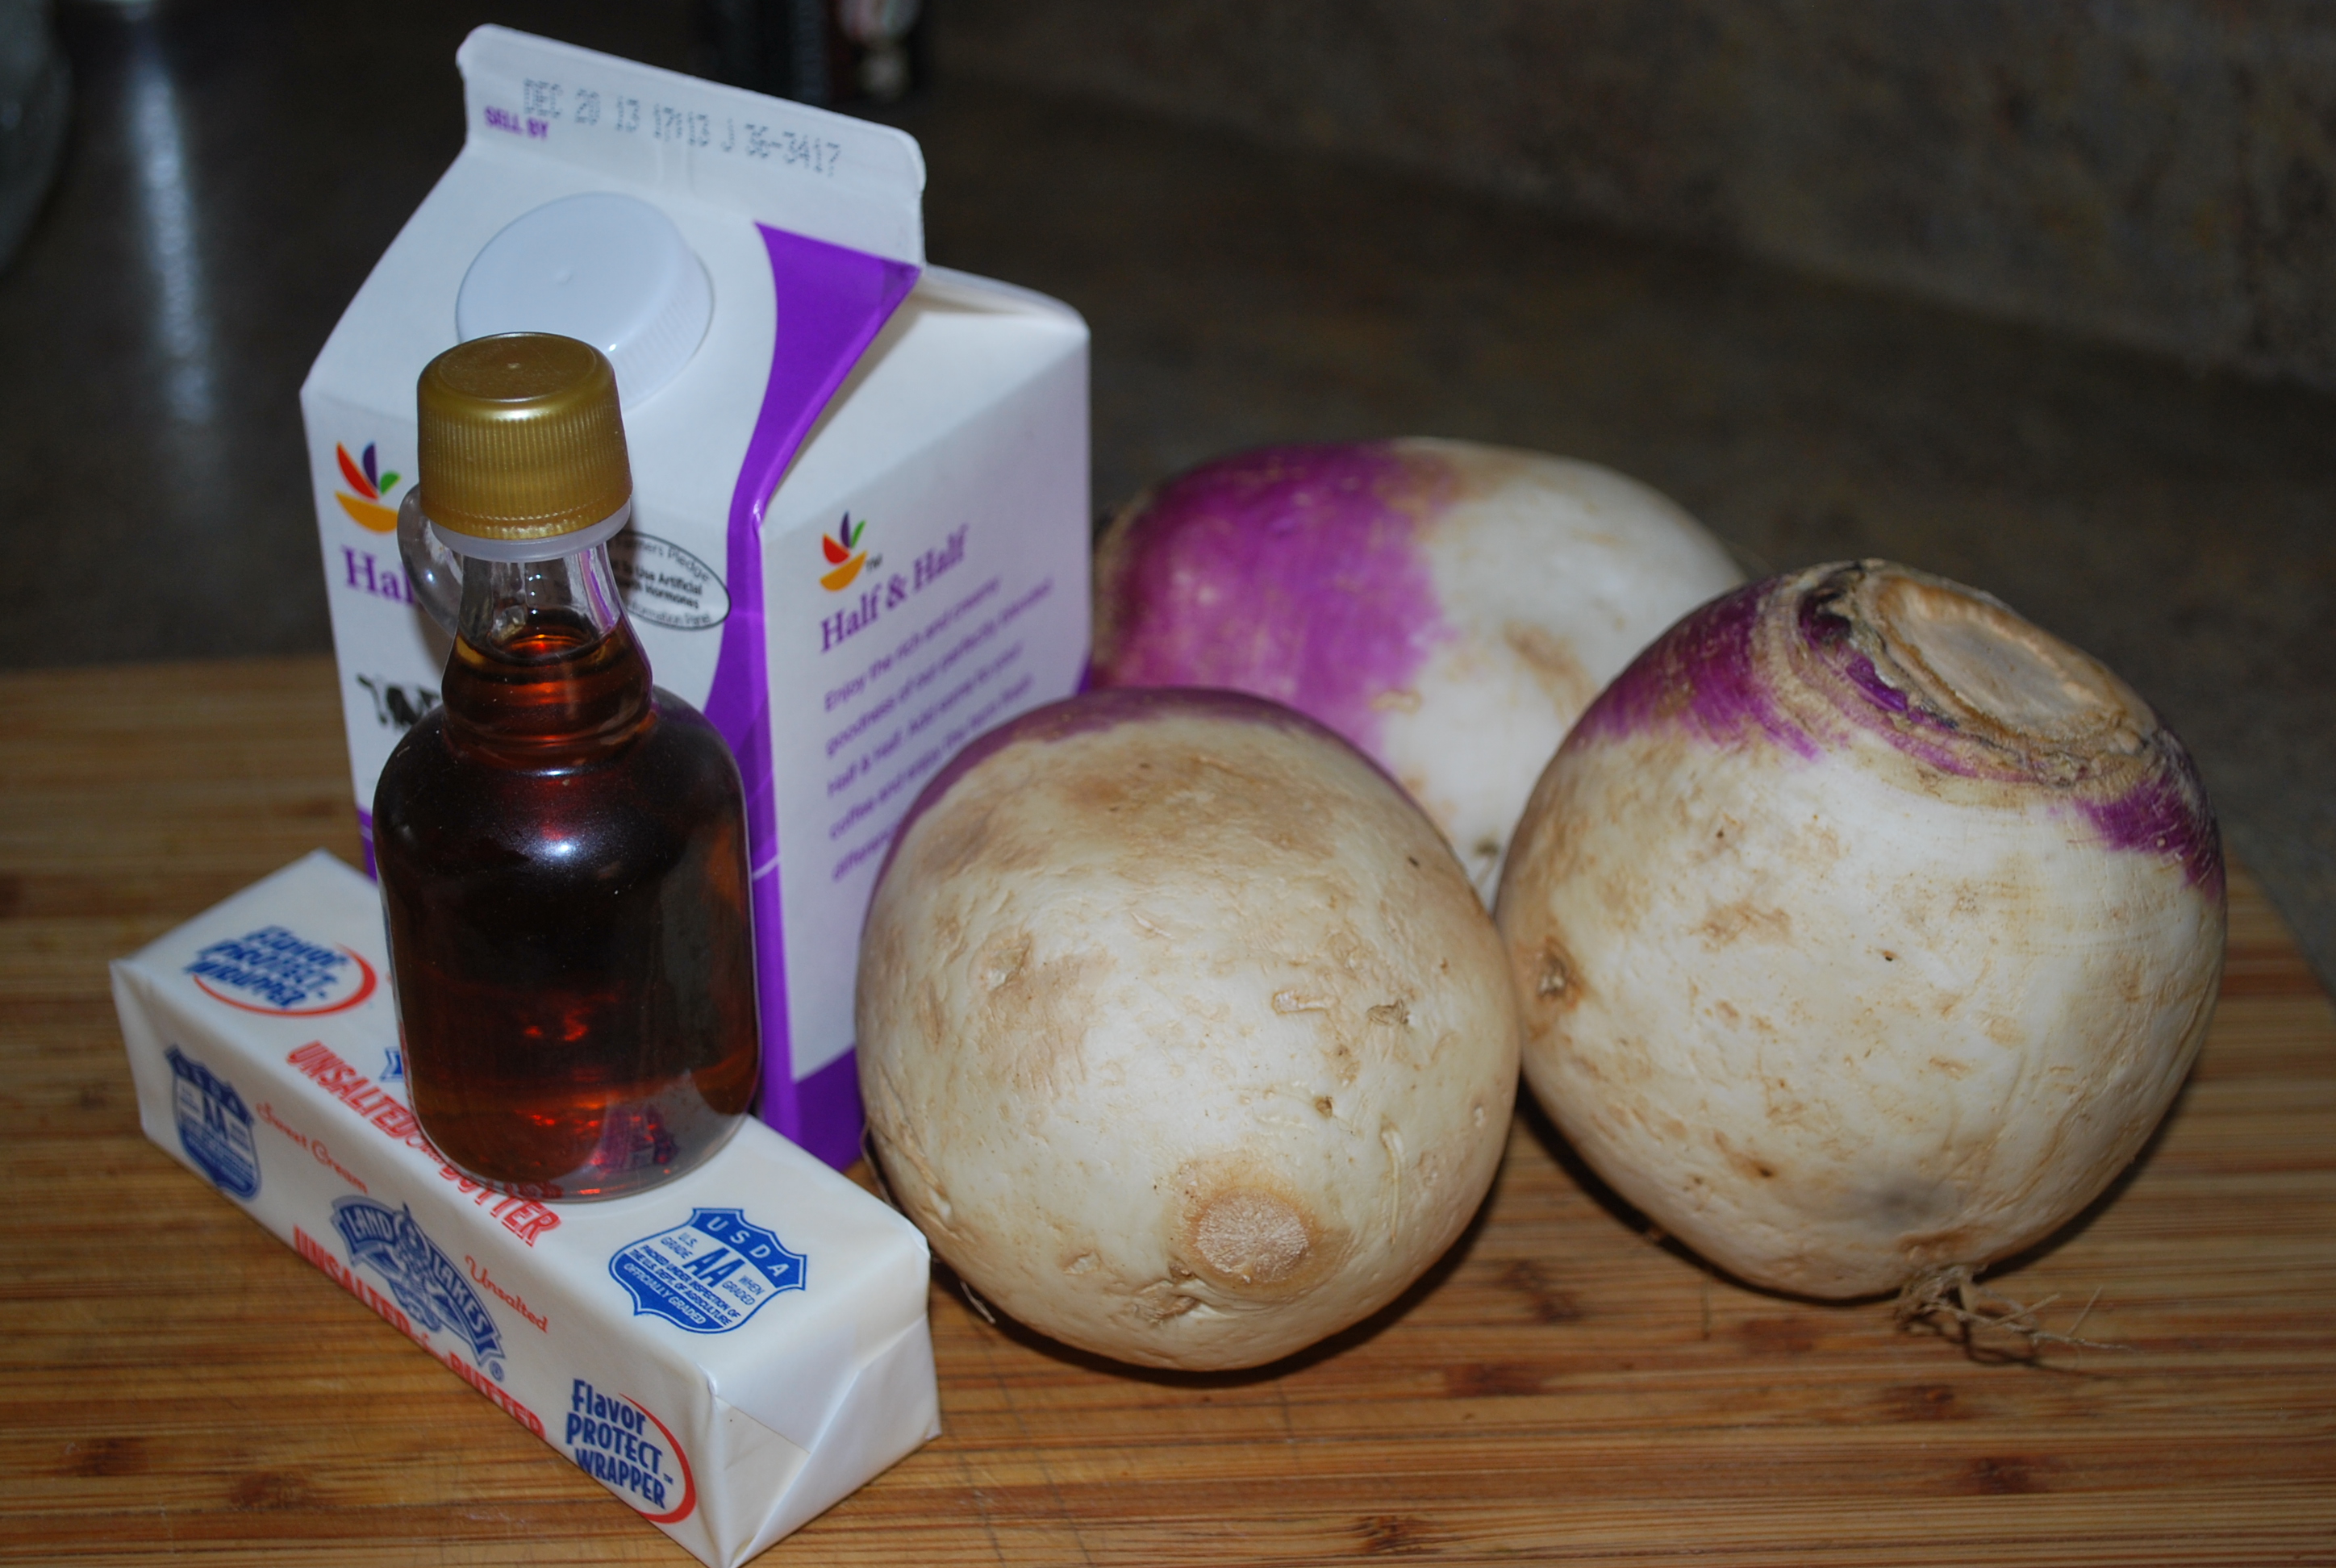
    So what do you serve these with besides beer?  Potatoes, DUH!!!  Boiled potatoes with some butter on them or traditional fries.  Mashed potatoes work well too.   You want to get REAL crazy? Try some roasted parsnips or turnips.  But for this week, I’d keep it simple.


    Happy Eating

    -The Doctor


  • Spicy Porter Braised Shortribs

    Anyone who knows me well knows one of my passions is craft beers and the other is short ribs.  There is nothing better than sitting down on a cold winter day, with a slightly chilled flavorful craft draught.  What makes it even better is this dish.  This dish was developed for a beer tasting dinner I did at a brew pub outside of Washington D.C. many years ago.  Short ribs hadn’t gained popularity yet, so they were still very inexpensive, and they held up well with the strong porter the brew pub offered to it’s guests.  They also wanted add some bar flare, so we used their wing sauce in the recipe.  This will feed four people.

    You drooling yet?
    You drooling yet?
    • 4 pieces short ribs, about 6 oz. each
    • 1 bottle Porter
    • 1/4 c. Frank’s Red Hot sauce
    • 1 medium onion, large dice
    • 1 large carrot, bias cut about 1/2 inch
    • 1 c. chicken or beef stockDSC_0478
    1. Heat up a heavy bottom skillet with some olive oil until it smokes (about 1 tbsp. or so).  You’re also going to want to turn your oven on to about 350.
    2. Sear the short ribs until they’re a deep brown, turn and repeat.  You want to let these sit on each side until they’re completely brown.DSC_0480
    3. When the short ribs are seared, remove them from the pan and add your vegetables.  Let them site for just a minute, then toss.  You want these to get just a little bit of color, not too dark.

      Barely browned veggies
      Barely browned veggies
    4. Add your beer, and let this simmer for about 2 minutes.  Then add your stock and hot sauce.
    5. Transfer this to a roasting pan with the short ribs, cover with foil and throw the in the oven for about 3-4 hours, or until they’re tender.
    6. If you’re serving these right away, let them sit for about 5 minutes so until the ribs don’t fall apart on you.  If you’re like me, you’re doing these the night before and letting them sit in the awesome sauce you just made.  If you’re doing the latter, heat everything up in a saute pan or shallow pot, and let that sauce reduce a bit as they heat up.  You don’t want it to go down too far because the hot sauce will get bitter.

      If you weren't drooling before, you are now...guaranteed
      If you weren’t drooling before, you are now…guaranteed

    So now what do you serve this with?  HAH!! BEER!!!  I like hearty sides.  Roasted potatoes or some bad-ass garlic fries work best for me.  Another favorite is mashed potatoes with rosemary and blue cheese, it hits the heat just perfectly.  Give this a try on your next cold night in.  Let me know how you like it

    Happy Eating,

    -The Doctor


  • Greek MeatLoaf

    Can meat loaf be Greek?  Isn’t it All-Ameican?  Meatloaf is whatever is say it is, when I say it is.  Think about it, almost every culture has some kind of meatloaf, whether it’s wrapped in bacon, chilled and turned into a pate, or smothered in ketchup.  This one in particual, does happen to be American, but with a Greek flare.  During a VERY late night at a Greek diner in NJ (as in I had a few…BL smoothies let’s call them) I stumbled acrosse this item on the menu.  I don’t know if it was the influence of the alcohol or the fact that this item was so good, but I tried to dupicate it for months, and finally did.  This makes enough for 4-6DSC_0481

    • 1 lb ground meat (pork, turkey, whatever)
    • 2 eggs
    • 1 red bell pepper, roasted and diced
    • 1/2 c. GOOD Greek olives, chopped or sliced (like not the crap packed in water)
    • 1/2 c. feta cheese
    • 1/2 c. instant oatmeal
    • 1/2 c. spinach leaves
    • 1 tsp fresh chopped orgeano
    • 1 tsp. dried basilDSC_0476
    1. Turn on your oven and get it up to about 450.
    2. Combine your meat eggs herbs and oatmeal in a large bowl.
    3. Add the olives and feta and just give it a slight mix.
    4. Season with Salt and pepper, then pat you red peppers dry with a paprt towel  You don’t want any excess water there.
    5. Add the peppers and just cook up a little taster piece.  When it’s seasoned how you like it, it’s time to build the loaf.
    6. If you’re doing a full size loaf, take half of the mix and lay it out flat on greased sheet pan lined with foil.  The mix should extend to about just under an inch away from each side o the pan and should be about 3-4 inches wide.
    7. Lay down your spinach.  Then lay down the rest of your meat on top of the spinach.  Make sure there are no holes.  (Seriously treat it like  a sand castle, it’s meatloaf for crying out loud).
      Building layers
      Building layers


    8. Pop this bad boy in the oven for about 30-40 minutes or interrn it hits 155 degrees internal.  The meatloaf will carry up to 165 as its’ resting.  If you cook it up to 165, it will just get dry.

    If your’e looking for soemthing different, try making this in to the mini version in a cupcake pan.  This goes very well with just about anything.  Of coruse Tzatziki and hummus are no brainers for this, but I like to eat this along side a nice salad of bitter greens and a lemon vinagrette.  How do you like to server your meatloaf?  Leave something in the comments.


  • Sweet Potato Biscuits with Shrimp and Chorizo Gravy

    You dont’ have to wake up, you’re not dreaming, you really just read that.  Once in a while you need to take a classic and give it some balls.  In this case, I took a Southern staple, gave it aforementioned balls, and sold it as breakfast in Philadelphia and DC.  Well, if the results weren’t good, it wouldn’t be on this blog so it must be, right?  I learned the Sweet Potato biscuits while in Atlanta form an incredible baker in a hotel I where I was working.  The gravy was my own addition after some brainstorming.   This will make enough for 6-8 biscuit (depending on how thick you like them).DSC_0484

    For the Biscuits:

    • 1 3/4 c. All-Purpose flour
    • 1 tbsp chopped sage
    • 1 1/2 tsp. baking powder
    • 1 tsp. salt
    • 1/2 tsp. baking soda
    • 6 tbsp chilled, small diced, unsalted butter, plus just a bit for brushing
    • 1 medium baked sweet potato peeled and mashed
    • 1/3 c. buttermilk

    For the Gravy

    • 2 links chorizo sausage
    • 1/4 lb cooked shrimp (any size), rough cut
    • 2 tbsp flour
    • 1 tbsp butter
    • 1 pint half and half
    • 2 tbsp. chopped onionDSC_0467
    1. First things first, we’re making the biscuits…because they’re awesome…Heat up your oven to 425.
    2. Combine all of your dry ingredients (flour, salt, baking soda, and baking powder) and whisk them in a bowl to just combine them.
    3. Add your butter and cut it in with a pastry cutter, two knives,or your hands.  If you’re very careful and use the “pulse” feature, you can use a food processor too.  You want the flour mixture to look like meal with a few pea-sized butter balls mixed into it (Seriously, I don’t know a better way to describe it, just look at the picture).

      Properly cut flour
      Properly cut flour
    4. In a separate bowl, mix the sage, buttermilk and sweet potato with a whisk until it’s smooth-ish.
    5. Combine the sweet potato mixture and flour mixture together and mix just so they come together in a loose dough.
    6. Roll your biscuits out to about 1/2-3/4 of an inch and cut them any way you like.

      Rooled biscuit dough
      Rooled biscuit dough
    7. Lay them on a buttered or greased sheet tray and brush them with the melted butter. Bake for 20-25 minutes, or until they’re golden brown.
    8. NOW FOR THE GRAVY!!!!  ‘Cause seriously, that’s the best part…
    9. Melt the butter in a pot on medium-low heat and add the Chorizo and onions.  If you have a potato masher, this would be the time to break it out.  It’s a great tool to crumble the sausage with.  Cook the sausage and onions until the onions are translucent and the fat is rendered from the sausage.
    10. Add you flour and stir.  Cook and stir the flour for about five minutes.
    11. Add your half and half slowly, whisking the mixture the whole way.  Cut the heat just a bit lower and let this simmer and whisk for about 10-15 minutes. Add the shrimp and just let them warm through. 

    Now it’s obvious how you serve  these, you slather as much gravy as you can onto the biscuits and EAT!!!  Another, and preferred, alternative would be to grab a biscuits and just dunk it, but your guesst might not appreciate your hands in the gravy..although it’s awesome.   How do you eat them?  Let me know in the comments

    Happy Eating

    -The Doctor


  • Southwest Style Turkey Burger

    A few of you have been asking for some cool turkey burger recipes, so I am happily obliging.  There’s really not too much behind the story of this recipe, I came up with it on request from some of you. I’ll be posting more “alternative burgers” in the future.  This one, just like most of my recipes, is very versatile.  As a matter of fact, I used the same mix to make a meat loaf and some meat balls, just for giggles; and paired them with some basic Mac & Cheese.  (You can stop drooling now, yes it was AWESOME!!!)  This will make enough for 6 – 5 oz burgers.DSC_0498

    • 1 lb Ground turkey
    • 1 egg
    • 1/2 unseasoned breadcrumbs (or panko if you like as well)
    • 1/2 c. cooked black beans
    • 1/2 c. fresh corn kernels
    • 1/4 c. chopped onion
    • 1/4 c. shopped green pepper
    • 1 chopped Jalapeno (optional)
    • 1/4 c. Chopped cilantro
    • 2 tsp. chile powder
    • 2 tsp. ground cumin
    • 1 tsp. garlic powder
    • 1 tsp. Olive OilDSC_0491
    1. Drop your oil into a skillet on medium heat.  Let the oil heat up for a minute and add you corn, peppers, onions, and jalapeno (optional).  Saute these for about 4 minutes.  You do want to the vegetables to get some color, but not a deep caramelization.  More like a light golden brown.DSC_0493
    2. Add your beans and half of the cumin and chile powder.  Sweat this out for a minute or two, stirring constantly, so the spices don’t burn.  Let this cool for a few minutes, then we”ll get ready to add it to our turkey.
    3. When the mixture is cool, grab a large mixing bowl and combine your turkey, egg and bread crumb.  Mix this until it’s almsot even throughout.
    4. Add the cooked vegetables and the rest of the spices and season with salt and pepper.  Mix evenly and shape in to 5 oz. patties.  These will stay good for 3 days uncooked, but if you’re going to need more time, I suggest wrapping them in sandwich bags or plastic wrap, then putting them into a ziplock bag and freezing them.DSC_0494

    I like to do these in a cast iron skillet, just because I love cast iron skillets; but these do very well on a grill, or even that little George Foreman grill you haven’t used since college.  You can use any kind of cheese you like for these, but my favorites for this are cheddar, jack, and gouda.  I also like to serve this with a nice, spicy chipotlr mayo or ranch instead of the standard ketchup.  Now get out there and get adventurous with your burger.  Tell me how you like yours in the comments below.


    Happy Eating

    -The Doctor

    -The Doctore


  • Honey-glazed Parnsips and Hazelnuts

    You’ve seen them in the grocery store…that white, carrot looking thing that your mom made you eat, and you hated because it tasted like wallpaper paste.  Admittedly, parsnips can be pretty nasty when they’re not done right.  But when they are cooked correctly and not boiled or burned to death, they are one of the most flavorful vegetables you can eat.  It might be worth saying that they go with just about everything, especially meats you would eat in the fall and winter like venison, lamb and braised meats.  This recipe is a super simple one that has many variations.  It’s been on every fall and winter menu I’ve written in some form or another and they’ve always been a hit ( I wouldn’t put it up here if it wasn’t).  This will serve 4 people.DSC_0470

    • 1 lb. parsnips, peeled and roll cut
    • 2 tbsp honey
    • 2 tbsp whole butter
    • 1 tbsp Olive Oil
    • 1 tsp chopped rosemary
    • 1/4 c. chopped hazelnutsDSC_0466
    1. Just like every otherr recipe I put on here (well most of them) start with a heavy bottom pan on medium high heat.
    2. Add the oil and half of the butter and let the butter start to foam.
    3. Add the parsnips and shake them just a bit.  Then let them site for about a minute before shaking them again.  Lower the heat to about medium and let them just cook, stirring or tossing about every 3-4 minutes or so.  You want them to get nice and dark, but not burnt.  After about 4 minutes, you’ll want to add yoru hazelnuts so they can toast and add some aroma to this.
    4. Add your honey and rosemary.  Let the honey reduce just a bit, then add the rest of the butter and season with salt and pepper.
    DSC_0468
    Caramelizing the parsnips

    It’s a bit late for Thankskgiving, Christmas and new Year’s,  but give theses a try on you next holiday.   In the mean time, try these alongside some pork chops and roasted apples.  These pair well with roasted poultry too.

    Happy Eating,

    -The Doctor


  • Breakfast Cornbread

    Say what???  Yes, you heard it, I’m not stuttering, that’s what this is.  This isn’t a light fluffy traditional cornbread.  This cornbread is dense heavy and savory.  It’s a Northern Pennsylvania specialty that I learned about in college on a road trip visiting a few friends at one  of the many fine (but really cold) colleges in that area.  I first had this, where most people have great food, in old school diner in the college  town I was in. It was like 3 AM, and eveyone was, well…well hydrated shall we say…and had this in front of them chowing down.  This recipe will make you and 8×8 pan.DSC_0474

    • 1c. flour
    • 1/4 c. fine ground corn meal
    • 2 oz. country ham (or prosciutto is you can find ham), small diced
    • 1 tsp. chopped sage
    • 1 tsp. chopped thyme
    • 3 tbsp. butter
    • 1/2 c. cheddar cheese
    • 1 egg
    • 1 tbsp baking powder
    • 1c. milk
    • 1/4 c. chopped onion
    • 2 cloves garlic, crushed
    • 1/2 ts salt
    • 1 1/2 tbsp brown sugar
    • 1/2 c. fresh corn kernelsDSC_0466
    1.  Grease up your 8×8 cake pan with some spray or butter and set is aside fora little it.  Turn on your oven and preheat it to 400.
    2. Take one tablespoon of the butter and melt over low heat on a saute pan.  Add your onions and cook them down slow, until they’re nice and caramelized.
    3. Add your ham, garlic, and herbs.  Slowly render  out the fat from the ham.  After about 5 minutes, add thes rest of the butter and cut the heat.  You want the rest of the butter to just melt.

      Butter meltin's and onion cookin's
      Butter meltin’s and onion cookin’s
    4. Time for the wet ingredients.  Take your milk and egg and lightly beat them together.
    5. Now for the dry ingredients.  Take the flour, baking powder, cornmeal, brown sugar and salt, and whisk them together, just to get them combined.
    6. Add your dry ingredients in to you wet ingredeitns slowly, mixing them with a whisk until there are no lumps left
    7. Fold in your ham, onion, and butter mixture, with a spatula or a wooden spoon.  Then fold in the corn and cheese.
    8. Throw this into the oven for about 20 minutes.  To test if it’s done, do the toothpick test.  (Pop the tooth pick all the way down to the bottom, if it comes out dry it’s good).
    9. Let this cool for about 20-30 minutes before you try to cut it.  It’s going to be very fragile before that.DSC_0472

    I like serving this either toasted in the oven or griddled with some butter, with maple syrup and more butter on top, just like a pancake.  I’ve seen people do whipped cream and cream cheese on this as well.  How do you like it? Let me know in the comments.


    Happy Eating,

    -The Doctor


  • Old School Holiday Roast

    Holy Happy Holiday is this an oldie and a goodie!!  This is a time tested and proven recipe that is both easy and ridiculously delicious.  So many people now are trying to do new things for the holdays, and that’s great, but don’t forget the roots.  In my book, nothing meats an awesoem old school roast.  This is a dressed version from my childhood holidays.  Who cares how many this serves, just make it.   There won’t be leftovers.DSC_0492

    • 1 1/2 lb beef eye round
    • 1/4 c. Extra Virgin Olive iol
    • 1 small white parsnip, cut into eights
    • 2 large carrots, roll cut
    • 2 parsnips, roll cut
    • 5 medium red or white potatoes, large dice
    • 1 small onion, cut into 5 wedges (red or white your prefernce)
    • 4 cloves garlic peeled
    • 1/4 c. pasely leaves
    • 1 tbsp. roasemary leaves
    • 1 tbsp. thyme leaves
    • 1 tbsp sea salt or kosher saltDSC_0482
    1. The night before you cook the roast, you’re going to want to marinate it.  To make the marinade, combine your herbs, oil, and salt in a blender.  (Oh, save your herb stems, we’re going to use them)  Crank the blender all the way up and let it go for about 3o seconds.  This should all be smooth, but not liquidy (if that’s a word)
    2. Rub the eye round with the marinade.  I like to pour most of it in a ziplock bag, then drop the eye round into it.  Massage the marindae around a bit, then let it sit over night.  In the morning, rub it again and turn it over.
    3. Add just a touch of oil to what’s left of your marinade to thin it out if it needs it.  We’re going to toss all of the vegetable in this rigth before we roast them. (yes including the garlic cloves)
    4. When you’re ready to cook the roast, toss the vegetablein the marinade, and add some black pepper.  Drop them into a heavy roasting pan with high sides.  At the same time, get a good hard sear in a hot pan on your meat.DSC_0484
    5. Place the herb stems you saved right in the middle of the roasting pan.  Place the roast on top of that and pop it into a 400 dgree oven.  Roast this until the internalhits 125 degrees (it will carry to medium rare).   Ususally this is abotu 30-40 minutes, but the thickness of your roast may vary.
    6. When themeat is ready, the vegetable will still need a bit more time.  Add your wole butter, tosse the vegtable in it and let them go another 10 minutes while the meat rests outside fo the oven.DSC_0487


  • Honey Braised Oxtails with Shallot

    Nothing beats old school peasant food, and the oxtail is exactly that.  I see it in the grocery store a lot being sold as soup bones, but believe you me, this cut is a force of flavor to be reckoned with.  This dish is a take on one from one of my favorite chefs and good friends Rich Rosendale, who just happens to have represented the U.S. in the Bocuse d’Or this year.  (for those of you who don’t know what that is, it’s THE major world hot food competition.  This inspiration for this dish was a take on dismantling one of the first he put on the Tavern Room menu when he came back to the Greenbrier and took it over… it’s always been one of my favorites.   This will make enough for two.DSC_0477

    • 2 x 6 oz oxtails (or 12 oz. of oxtail)
    • 8 large shallots, peeled
    • 2 c. chicken stock
    • 1 c. rose wine (yup, the pink stuff)
    • 2 tbsp honey
    • 1 spring rosemary

    DSC_0471

    1. Set up a have bottom skillet on high heat add add abotu 1-2 tbsp. of Olive Oil.  to the pan.  When it starts to smoke, add the oxtails.
    2. Sear the oxtails until they ae nice and dark brown.  When you turn then, add your shallots and just toss them around lightly with a pair of tongs or some other implemnt of food movement.  Keep moving the shalltos every few minutes of so.DSC_0474
    3. When the shallots are seared.  Drizzle the honey in to the shallots and stir.
    4. Turn down the heat and Deglaze the pan with the red wine.  Scrape down the pan and let the wine cook down half way.DSC_0476
    5. Add the stock, and and the rosemary, then cover the pan.  Turn the heat to low and let this simmer for 2-3 hours, or until the oxtails are tender.
    6. Take the oxtails out and reduce the cooking liquid down by half.  Now your ready to serve them or cool them down and server them the next day (this is what I like to do).

    So now the questions is “what do I serve with this?  I love servign this with any kind of off the wall polenta, or old school maased potatoes.  Mashed sweet potatoes also go well with this.  There’s a lot of flavor here, so you really need a vegetable or starch that’s heavy and can stand up to the oxtail.  Go questions?  Lemme knowin the comments.


  • Maple Scented Turnip Puree

    WAIT!!! COME BACK!!!!  This recipe actually kicks butt I promise.  Perfect for Thanksgiving, this recipe made it’s first appearance in my repetoir in my first Washington, DC stint.  I was working in a brew pub at the time and this was one of the sides on our Thanksgiving week special.  Apparently, turnips are popular in DC becasue people kept asking for this side after the holidays.  Anyway, this recipe is super easy, and super tasty.  This makes enough for 4-6.DSC_0475

    • 2 lbs. turnips, peeled, quarterd, then sliced 1/3 inch
    • 1 idaho potato, cut same as the turnip
    • 1 pint half and half
    • 1/4 lb butter
    • 1/2 c maple syrupDSC_0466
    1. This really can’t get any simpler.  Combine your turnips, potato, half and half, and butter in a decent sized pot.  Turn it on medium low heat and cover.  Let this go for about 30-40 minutes, or until eveything is tender.
    2. Pull the utrnips and potao out of the pot, but don’t drain off the liquid.  Add your maple syrup.  At this point you can either mash them with a potato masher, or puree them in a food processor.  ONly add some of the liquid if you seem you need it to get the puree going.  The slow simmering process hsoudl have pulled waterr out of the turnips and transferredin the fat from the half and half.  (If you coudln’t tell, temperature is imprtant here…)


    Seriously, butter and maple syrup? How can you go wrong?  they make everrything taste aweosme, even the humble, uninteresting turnip.  Outside of Thankksgiving and turkey, this side goes well with pork, and and any kind of braised beef.  Go on don’t be scard, embracce the turnip.


    Happy Eating,

    -The Doctor